Showing posts with label mushroom. Show all posts

Sunday, October 27, 2013

Onion and mushroom stuffed bread


So, it's November already (how ridiculous is that???) - my dog just turned 12 (yes, he's growing old - boohoo) and I recently turned ... well, I'm not telling how old I am although some days, I feel as if I'm 102 (especially everytime my knees crack when I squat to get something from a low shelf!). 

Needless to say, I've been feeling a little dreary. I was in dire need of something to pick my spirits up.

A stiff drink would've worked but I needed something stronger. 

I needed to make bread.

It's been ages since I last made anything other than a five minute (ok, maybe 15 minute) salad. So when Jane of The Wayward Oven brought a super tasty spider bread (a garlic and cheese bread shaped into a giant spider - we were doing a Halloween food shoot in the office), I was motivated to get back to bread baking. 

I liked Jane's bread which she made from a buttermilk and egg-enriched dough. I decided to use her recipe (and her idea of making a stuffed S-shaped loaf) and make my own stuffed bread.

Jane used two fillings: salted fish pickle (paste) and garlic and oven-dried tomatoes. Doesn't that sound super? I didn't try thinking of a vegetarian alternative to salted fish - there really is no equivalent, I think. 

I decided on onions for my first filling and mushrooms for my second. 


I blanched some red onions, chopped them up roughly and pureed them before mixing the paste with some rosemary.

For the second filling, I minced some mushrooms and sauteed them with some garlic and then added some sliced brussel sprouts. The sprouts are optional, really; mushrooms and garlic alone would be great too.

The onion paste was a little wet and I was worried that the moisture from the paste may affect the outcome. I started to panic a little, especially when shaping the stuffed dough into an S-shape on the baking tray: the paste oozed out in places, making the dough a little stodgy. 

"Oh my god," I yelled inwardly. "I'd messed it up!"


So, with the remaining dough (there was enough dough to make two medium-sized loafs) I decided to play safe and make a stuffed round dome - like a boule. 


Well, as it turned out, the onion paste didn't ruin the bread at all. If anything, it added moisture to the crumb and what I ended up with was a moist, tender bread that was deliciously onion-y. 


I was especially thrilled to see the pink of the onions peeking through the insides of the bread, a lovely contrast to the dark mushroom and brussel sprout filling. The two went fabulously well together too! Oh joy!


Onion and Mushroom Stuffed Bread

For the bread (adapted from the wayward oven)
350g bread flour
11/2 tsp active yeast
1 tbsp sugar
2 tsp salt
1 tbsp oil
200ml buttermilk
1 egg

For the onion paste
3 medium red onions
2 sprigs of rosemary

For the mushroom (and brussel sprout) filling
3 cloves garlic, minced
10 button mushrooms
6 brussel sprouts
salt and pepper
2 tbsp olive oil

Whisk together the flour, salt and sugar. Add the yeast and mix it in. Heat the buttermilk until it starts to simmer. Take it off the heat and lightly beat in the egg and oil. When the temperature has cooled slightly (enough for you to stick a finger in for 10 seconds), pour the liquid into the flour mixture gradually and bring together to form a dough. Knead the dough for about 5 minutes until it becomes nice and smooth. Cover and leave for 10 mins. After 10 minutes, knead again about 8-10 times and cover for another 10 minutes. Repeat twice and then cover with a tea towel and leave the dough to rise for about 60 mins.

Drop the peeled onions into a pot of boiling water and blanch it for about 5-7 mins. Drain, roughly chop and puree to a paste. Add the rosemary, stir and let it sit - covered.

Heat a pan of water. When the water boils, add the brussel sprouts and let it cook for about 5 mins. Drain and slice thinly. Mince the mushrooms roughly. Heat the olive oil in a skillet and add the minced garlic. Add the minced mushroom and cook under a low fire until the moisture evaporates. Add the sprouts and mix. Season and take off the heat.

Once the dough has risen, gently punch it down to deflate. Divide the dough in two (or you can make one large loaf).


For the S-loaf, gently roll the dough out into a rectangle with the longer side facing you. Spread the onion onto half the rectangle. Fold the other half (the half without the filling) over the onion paste. Now, spread the mushroom filling on top of it.

Pre-heat the oven to 190C.

Turn the dough around so that the longer side of the rectangle is facing you.
Roll the dough up (from the side nearest you) into a log (as you would a swiss roll). Roll it as tight as you can. Seal the seam as well as you can. Now, shape the log into an 'S'. Let the S-shape dough rest for about 15 minutes.

Bake for 30-35 mins or until the bread browns on top and is cooked through.


For the stuffed boule, simply roll the dough into a round. Spread the paste in the middle of the dough and then spoon in the mushroom filling Fold the edges of the circle around the fillings and seal the dough into a nice round parcel. Smoothen the dough into a nice ball and let it rest, seam side down, for about 15 minutes.

Bake for also around 30 mins.


Friday, April 12, 2013

Galettes, sweet and savoury


Galettes. My latest obsession. Those of you who don't know me well, know that I can be pretty obsessive. If I like something, I go all out. And I do mean ALL out. This applies to food (I've had a cupcake phase, a pasta phase, a pastry phase and then was the time I went elbow deep in making layered cakes ... like my life depended on it), TV (If I'm into a particular series, I spend hours ...no, days watching episode after episode - to hell with actually having a life!) and fashion (it's not uncommon that I buy five pieces of my favourite plain white tee ... I mean what if I never fins a white tee like this ever again, right?).

So, obsessive? Yeah, a little.


At the moment, I am mad about galettes - a flat, round (ish), free-form, rustic, flaky pastry with an either sweet or savoury filling. Essentially, a galette is an unfussy tart that doesn't need a mould to give it a perfect shape with perfect edges.

Despite the fanciful name, galettes are all about simplicity but not at the expense of flavour.


Constructing a galette is simple. Roll the chilled short crust pastry dough into a thin round. Pile the filling of your choice in the centre and then fold the edges up, pleating as necessary. Brush the folded up edges with egg wash and bake.

One important tip when constructing a galette is to roll the pastry thin: thinner than you would when you make a tart. Unlike a tart where the pastry is blind-baked in the mould BEFORE the addition of a filling, with a galette the pastry is baked only once, after the filling is in place. To make sure the pastry is cooked through in 30-35 mins (you can't over bake it as the filling may dry up or burn!), it has to be thin. 


Galettes can be made sweet or savoury. I made an apple galette for dessert last week and a couple of days after, i made a spinach and mushroom one for dinner. Too much pastry in a week? Never! In fact, I have another one I'm dying to try today: mustard, Gruyere cheese and tomatoes. Oh, I'm itching to go make it now and will post the results soon!. Till then, Here's the recipe for both the apple and spinach galette.

For the pastry (enough for 2 galettes)
300g flour (I used 200g plain flour and 150g whole wheat)
1/2 tsp salt (or if you want a sweet dessert crust, 1 tbsp icing sugar)
150g cold butter, cubed
4-6 tbsp ice cold water

Whisk together the salt (or sugar) and flour. Using a food processor, mixer or your fingertip, rub the butter into the flour until the mixture resembles breadcrumbs. Add the ice cold water tbsp at a time and bring the crumbs together to form a dough. Wrap in clingfilm and chill for at least 30 mins. 

Spinach and Mushroom Filling (for one galette)
4 cloves garlic, minced
3 cups chopped spinach
2 dried chilli, chopped/1 tbsp chilli flakes
1/2 lemon
5-6 mushrooms (I used baby portobellos and shitakes), sliced (or if small, halved).
3 tbsp breadcrumbs (optional)

salt and pepper

1/2 cup Cheese (I used cheddar)
1-2 tbsp sunflower seeds

1 egg, lightly beaten (for the egg wash)

Heat some butter in a skillet/pan. Saute half the chopped garlic and add the spinach, chilli, salt and pepper. Toss in the butter and cover for a couple of minutes. Remove the lid, put the heat on high and cook the spinach until it has all wilted. Check seasoning and turn off the heat. and stir the spinach and squeeze a tbsp of lemon juice and mix. Set aside.

Wash the skillet and heat some more butter, about 2 tbsp. Add the garlic and once fragrant, add the mushrooms. Toss in the butter and saute till just brown, about 6-8 mins. Add the breadcrumbs and stir to mix. Cook for a couple of minutes and turn the heat off.


Assembling the galette

Remove the pastry from the fridge. Lightly flour your work surface. Divide the pastry in half, keep one half aside (back in the fridge if you're not using it immediately) roll the other half thin, about 1.5-2 mm. Trim the edges so you get a round, more or less.

Transfer the pastry onto a baking sheet that's been lined with parchment paper. 

Preheat the oven to 180C.

Layer 1: Sprinkle the cheese in the centre of the pastry base, leaving about an inch-wide border all around.


Layer 2: Spoon in the spinach filling on top of the cheese.

Layer 3: Top with mushrooms. 

Layer 4: Sprinkle the sunflower seeds on top.


Fold the edges of the pastry around the filling, pleating as necessary. Brush the folded edges with the egg wash.

Bake for 30 mins or till pastry is cooked.

Apple Galette Filling
Peel and core 5 apples and slice them thin (I left mine unpeeled but I prefer them peeled).
1 lemon
1 tsp cinnamon
1/4 cup coarse sugar
2 tbsp butter

Put the sliced apples, lemon juice and sugar in a saucepan and cook over low heat, covered, until the apples start to soften - about 15 mins.

When assembling the apple galettes, roll the pastry thin (as above). Sprinkle some sugar on the base of the pastry and arrange the apples in the centre. Dot with butter and fold in edges.


Brush the folded edges with egg wash and sprinkle with a little more sugar.

Bake for 30-35 mins. 


Tuesday, December 4, 2012

Rose Levy Beranbaum's Pizza ~ Vege style


I've had my eye on Rose Levy Beranbaum's The Bread Bible for a long time. While there is plenty of resources online for cooks like me who like to bake bread, I wanted to read Beranbaum's definitive guide to bread baking. Last month, I finally bought it and I've spent the best part of the last 28 days reading her gospel of bread. 

Now this is wholly unoriginal but I think I may "do the Julie Powell" and bake my way through (a lot of) Beranbaum's recipes. I certainly want to try most of her techniques out.

I started with her recipe for Pizza. Why? Well I had some scamorza (similar to Mozzarella) cheese in the fridge that I sorely needed to use before it expired. 

I've made pizza before but I've always winged it: I never followed a recipe and kind of made a cross between a flatbread and a focaccia. So this was my first by-the-book attempt at pizza dough. Her recipe is perfect if you like a thin, crispy crust on your pizza. I do. 


Beranbaum's recipe requires no kneading. You can get the full recipe here at culinate.com but I am going to run through the process and how it went for me.

First she says to whisk the flour, yeast and sugar together. Add to this the salt: it is important to add the salt later so that it doesn't come in direct contact with the yeast (in which case the salt may kill some of the yeast!).

The next step is adding the water which should be at room temperature. Mix the flour mixture and water with a wooden spoon until a rough dough comes together. Don't over mix, she cautions.

In a smallish bowl (one that's big enough to hold 2-3 cups of water), add some olive oil. [Beranbaum's recipe is enough for two 6 inch pizza's or one 10-inch one -- thereabouts) Transfer the rough ball (the dough won't be smooth, neither will it be too sticky. Just a little sticky and scraggly) of dough into the oil, rotating the dough so that it gets oiled all over. Leave the dough in the oil and cover. Leave it to rise for at least an hour. According to Beranbaum, the longer the dough rests at this stage, the more flavour it will add to the dough (if you are resting it for the 6-24 hours she suggests, you need to put it in the fridge after the initial first hour). I rested it for two hours at room temperature but I will try this again with at least a six-hour sit.

After the two-hour sit, the dough doubled nicely; the texture wasn't smooth as with most bread dough I've handled before. It looked more like a starter dough actually: bubbly with the oil seeping in through the middle and at the sides. It actually looked good. Photos? Yes! I failed to capture the dough as it was but here's a link to another blogger who did. Thanks, Blazing Hot Wok! Check it out, the process it well documented (yikes! The next time, I will ... try, I promise).


Before working on the dough, heat up the oven: 246C for about an hour. Also, sip in your pizza stone or, if you like me don't have one, your baking sheet. Bah. I need to get a pizza stone!

Now back to the risen dough, If you're making one large pizza (well, regular actually) you can work all the dough at once. If you're making two personal-sized ones, deflate the dough gently and then divide it, keeping one half covered in the same bowl. [In case you're wondering about my pizzas, I made one small round one and another kinda rectangular one: what do they call these? Rustic? Yeah!)

Transfer the dough onto a pizza plate/a round baking tray and gently shape it into a smooth bowl (by tucking in the edges. Place it in the centre of the plate and let it sit for 15 mins (Beranbaum says this helps the dough relax, making it easy to shape). Gently use your fingers to stretch it from the centre to the edges of the plate. The dough may spring back initially; if so, let it rest a few minutes before continuing. Allow the rim to be thicker than the centre (for the crust). It should be pretty thin all around, about 2mms, maybe?

Once this is done, let the dough sit for a further 30 minutes or until the round starts to get a little puffy. Don't expect it to get really puffy: this is, after all, a thin-crust pizza!


Now, slip the tray onto the hot pizza stone/baking sheet that has been heating up. BEWARE! It's really hot so USE A MITT at all times! Yes, I got burnt a little in the transfer.

Bake for 5 minutes until the sides get golden and the centre firms up. Remove and spread the topping: I spread some pesto, piled on my scamorza and then heaped some lightly sauteed garlic mushrooms. I sprinkled some chilli flakes and drizzled some chilli oil over the pie also. Oh yummmm!

Pop the pie back in the over for another 5-7 mins or until the cheese melts.

Remove, slice and eat while hot!

The crust was lovely. You taste the olive oil that has seeped through the dough and it's just rich and wonderful. It's best eaten hot out of the oven though. I had a piece once it had cooled and though still tasty, the crunch of the crust added another dimension that should not be sacrificed. Heating it up in a toaster oven or on a grill pan works fine too.

Though I just let the dough ferment for a couple of hours, the flavour of the dough was good. I would however want to see the difference with a longer ferment. Next time!


Saturday, June 23, 2012

Mad about Tarts


I think tarts are just so elegant, both savoury or sweet. Oh except in Bridget Jones Diary. I must say, that movie kinda messed with my appreciation of tarts as an elegant pastry. You remember the scene, right? The one in which Renee Zellweger shows up at what she thinks is a 'tarts and vicars' costume party in a bunny-girl outfit (you know, like a playboy bunny) not realising of course that the theme had been scrapped. Yeah, so now every time I hear the word tart, I think of her slightly plump person in that costume. Funny scene, funny movie but not a terribly elegant image. 

Ok, I need a minute to get that image out of my head. Today, we're talking about pastry. Tarts. 

I love tarts. I especially love how tart pastry is so buttery and delicate that it literally crumbles once it's safely in your mouth (not before, God forbid). I also love how versatile a tart can be. Add some sugar in the pastry and fill it with fruit or custard or chocolate and it's a perfect dessert. You can also add cocoa into the pastry in which case you get a chocolate-crusted tart. Or coconut, even. Alternatively, for a savoury tart, mix in herbs, spices or cheese for a delicious tart crust that's extra tasty. 

This weekend, I went tart-mad! I made one large batch of pastry and five different savoury fillings to go in them. 


There are two components to making a good tart: the pastry and the filling. 

First: the pastry. Making short crust pastry isn't difficult. Gently rub cold butter into a bowl of flour (generally the ratio of flour to butter is about 2:11/4) until it resembles crumbs; add just enough ice cold water to bind the mixture together to form a ball of dough. Chill. Roll and bake. For sweet tarts, you'd add a little bit of powdered sugar to the flour; for savoury tarts, add some salt: a large pinch will do. 

That's he basic recipe which I learnt to make years ago. Since then, I've come across variations to the recipe, some that have worked amazingly, others that weren't too spectacular. Basic variations include swapping the ice cold water for ice cold milk. Or, you could replace about 1/4 of the flour with ground nuts (walnuts, hazelnuts, almonds or peanuts). Or, replace 1/4 of the plain flour with wholemeal flour or oats. Adding a couple of tablespoons of cocoa to the flour. Add a little more flour and an egg yolk to the dough. These are the variations that I love. 

Today, I added toasted caraway seeds into my pastry and it was fantastic. 

Next: the filling.


I had a few ingredients to play around with: beetroot, ricotta cheese, Gruyere and cheddar cheese, organic mushrooms, peppers, zucchini, parsnip and cauliflower. I mixed and I matched and I came up with five different fillings. Some worked — the Mushroom and Cheddar Tarts, the Zucchini, Ricotta and Parsnip Tart and the Peppers and Cauliflower Tarts and some needed more work (the Beetroot and Ricotta Tarts). 

I'll include the recipe for the Mushroom and Cheddar Tart.

Pastry
(makes 30 mini tarts)
120g plain flour
65g cold butter, cut into cubes
pinch of salt
2 − 3 tbsp ice cold water
11/2 tsp caraway seeds, toasted. 

Mix the flour, salt and caraway together. Using your finger tips, rub the butter into flour mixture, gently lifting the mixture up as you rub. Once the mixture begins to look like breadcrumbs, add the water (a tbsp at a time) and bring the crumbs together to form a ball of dough. Wrap in clingfilm and chill for at least 30 mins. Once it has chilled, roll the dough gently but swiftly and mould it into the tart tin. Using a fork, poke holes on the base of the tart to allow steam to escape (this way your pastry won't shrink when you pre-bake it). Bake it in a preheated oven (170C) for about 15 mins. (You don't need to add pastry weights since you have poked holes all across the base). 

Filling:
1 cup cauliflower florets
1/2 cup milk
1 cup mushrooms (I used oyster), diced
1/2 cup cheese, grated (Gruyere and/or cheddar)
chives, chopped small
olive oil

Toss the cauliflower in some olive oil and bake for about 20 mins (170-180C) or until the florets start to get golden. Remove and place in saucepan with 1/2 cup milk. Cook on low heat until the milk starts to boil and the cauliflower gets soft. Season with salt, pepper and chilli flakes. Remove from heat and puree till smooth. 

Put a tablespoon of olive oil in a skillet and gently saute the mushrooms till they are lightly browned. Season. 

Mix the pureed cauliflower, half the mushrooms and half the cheese together.

Assembling the tart
Spoon the cauliflower puree to fill half of the pre-baked tart case. Top with the remaining mushrooms and then the cheese. 

Bake for 10-15 mins. Remove and garnish with chives.


Sunday, January 23, 2011

Vegetarian lasagna, baby


I've been on the hunt for a recipe for vegetarian lasagna for a very long time. It's not that there aren't any around; it's just that none appealed to me. Looking for a good recipe is like looking for a life partner: lotsa good men around but mostly there's just no chemistry. Know what I mean? 


Then along comes Nigel Slater. I bought Kitchen Diaries about a month ago and have been devouring the pages of his cooking journal almost non-stop. I take it with me to the gym (imagine if you will the hard-cover book propped against the counter of the cross trainer as I sweat it out!), to work (I read it as I wait for and  ride the lifts), to the post office (waiting around has never been so pleasant) and to the coffee shop (forget about having a conversation; I'm with Nigel). I am sure that the little gasps,  the oohs and aaahs that escape me uncontrollably as I read  the book make it seem like I'm reading a great book of fiction A romance novel or perhaps.a captivating mystery. 


The book is fantastic. I've come to one conclusion: this man eats really tasty meals. It isn't often that you want to try every single recipe in a book right away but that's kinda what's happened with me and the Kitchen Diaries.  

I decided to review the book for the column (Don't Call Me Chef in The Star: out tomorrow today) and was really spoilt for choice deciding the recipes to include in the review. Everything looked and sounded delicious. EVERYTHING. The desserts will make you want to throw off your diet with nary a thought. Even his take-out dinners (yes there are times he doesn't feel up to cooking) sound divine.


I settled on Slater's brownie (the best I've tasted)  and his zucchini cakes with feta and dill (see pic below). for the review. Superb.  


But what I really wanted to make was his lasagna. And his lime tart. And the no-tears onion soup. And a whole lot more.


Nigel Slater's Kitchen Diaries isn't a vegetarian cookbook. Hell, no. But it's a very inspiring, easy-to-read, joyful book that charts  Slater's culinary adventures every day in a particular year. There's plenty for vegetarians and plenty more for vegetarians who love to cook. 


So anyway, back to the lasagna. I am not very fond of  lasagna (or pasta, for that matter) that is bathed or tossed in tomato-based sauces. I much prefer white sauces or no sauce at all. Good old olive oil is what I want for my pasta, thank you very much. 


Slater's lasagna is doused with bechamel sauce (milk, flour, butter) and filled with mushrooms-- delicious, plump portabellos and topped with a basil pesto. Are you drooling yet? Are you?


Not a 30-minute meal, this one. There are  three components that make up Slater's lasagna with pesto and mushroom. First you have to make the bechamel sauce. He says store-bought bechamel sauce is fine but I haven't come across any here so I made it myself. Next, the basil pesto. Then you have to cook the mushroom (with onions, garlic, cream and parsley) and of course, you have to cook the lasagna sheets in boiling water .

With a 50-minute baking time, it takes at least an hour-and-a-half to make the lasagna. But it's worth it. Slater combines dried porcini mushrooms with some plump portobellos but I didn't have the former so I used some button whites instead.    


Let's start with the  Bechamel Sauce
500 ml whole milk
2 heaped tablespoons flour
2 bay leaves
5 black peppercorns
45g butter

Heat the milk, bay leaves and peppercorns in a pan until it starts to boil. Take off the heat and let the ingredients sit in the milk for about 30 mins. Strain. Melt the butter and add the flour. Whisk till smooth: low fire, remember. Take off the heat and whisk in the milk. Return to the heat until the sauce begins to thicken. Remove.
For the pesto:
1/2 cup pine nuts
3-4 handfuls of  basil
3-4 tablespoons grated parmesan
olive oil
2 cloves garlic, peeled
I used my mortar and pestle but you can use your food processor/blender. Bash the garlic with some salt. Add the basil and pound till it's a paste. Add the toased pine nuts, cheese and olive oil till it becomes a nice gooey paste.
For the sautéed mushrooms:
A thick slice of butter

1 large onion, chopped

2 cloves garlic, thinly sliced

500g mushrooms, sliced

1 handful chopped parsley

10g porcini mushrooms

1/2 cup cream
2 tablespoons grated parmesan
Sauté the onions and garlic in the butter over a medium heat for around 15  minutes until they get transparent and really soft. Once the onions have softened, add the mushrooms and cook till they change colour and get nice and soft. Add the parsley, cream , and  parmesan. Cook for around 15  minutes, until the sauce has thickened. 
Prepare the lasagna sheets:
Cook the sheets in a pot of salted, boiling water till al dente: about 12 mins.
Heat up  the oven: 180C
Get you baking dish ready. Spoon in a bit of the bechamel to cover the bottom and then place  a layer of lasagna sheets on top of the sauce. Pour out half the mushroom mixture onto the sheets, sprinkle with some parmesan and then follow up with another layer of the bechamel sauce. Now place another  layer of pasta, the rest of the mushrooms and then the pesto. Top it with the rest of the bechamel. Right on top, shave or grate some parmesan and you're good to go.
Bake for 40-50 mins or till the top is nice and golden brown and the sauce is bubbling over.

Friday, October 23, 2009

This is getting to be a challenge

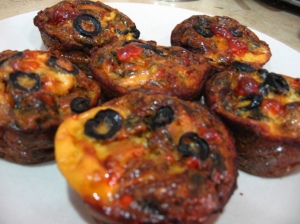
[caption id="attachment_58" align="aligncenter" width="300" caption="Spinach and Mushroom mini quiches"]Pop em in your mouth[/caption]

Am I regretting my decision to give the blood type diet a chance? Yeah.

Am I beginning to question how such a restrictive diet could work in the long run? Uh-huh.

Am I going to give up? Hell, no! Cos my pride is the only thing bigger than my craving for tofu.

Yes I know that sounds ridiculous. Whoever craves tofu, right?

Anyways, back to my progress.  I have decided to stay away from broccoli for a few days -- I''ve been having it so often, them florets are starting to invade my dreams. Me and broccoli -- I think we need some space.

And so, I've decided to turn to spinach (good for me) and eggs (good for me about 3/4 times a week) and cheese (good for me) and mushrooms (neutral -- i.e. they arent beneficial but they ain't gonna do me harm).   Mix all these up -- with salt, pepper, chilli flakes and some milk) and I got myself six pretty little muffin quiches (no pastry, as wheat is the enemy) that are delicious, healthy and type-B friendly.

Muffin Quiches (makes 6) ♣


3 or 4 medium to large button mushrooms (fresh is always better), sliced


2 tbsp leaf spinach (I used canned spinach), chopped


1 green chilli, chopped


1 tbsp crushed tomatoes (I used canned Italian tomatoes)


3 eggs


1 cup milk


leek (about a 3 inch stem), sliced.


chilli flakes


mozerella cheese, cubed small


4 black olives for garnishing, sliced


1 tbsp butter


1. Heat butter in a skillet and add leek. Saute for about 3 mins, then add mushrooms. Cook till brownish (about 4 mins) and add spinach, tomatoes  and green chilli. Cook for a few minutes and add chilli flakes, a pinch of salt and black pepper -- be generous with the pepper. Take off the fire.


2. Heat oven at 180 C


3. Whisk eggs with milk, add salt and then add in the cooked  ingredients.


4. Divide mix and half fill the muffin cups. Add cubed mozerella -- distribute evenly in all six cups. Fill with remaining egg mix.


5. Top with sliced olives and bake for 40 mins.


Sunday, October 18, 2009

New day, new diet. Why do i do it?

I have been on a diet since I was 16 -- I am now ... 37. Yup. Don't roll your eyes because I know I need help.

The latest diet I am trying is pretty controversial. It's not really a diet, more a way of eating "healthier" -- therein lies the controversy. Ever heard of Dr Peter D'Adamo? Sometime in the late 1990s, he write a book titled Eat Right 4 Your Blood Type where he recommends food to suit your blood type. His theory (based on studies he and his father before him had done) is that not all blood types react with food the same way. If you eat food that is not quite suitable or agreeable with your blood type, you suffer the consequences. Not serious consequences, exactly ... but you don't feel the best you could and your metabolic rate could be slow because of it.

Yumm. This could work

Ok. I ain't gonna make this post a summary of his study -- check him out on the web if you want.

I am a type-B (blood that is) and although most people with this  blood type have hardy and flecible digestive systems and can therefore enjoy a wider variety of food, it's not a very friendly blood type for vegetarians as many vegetarian staples like soy and lentils are not type B friendly.

What? Just my luck cos  I am a vegetarian!

Should I stick to it?

I decide to give it a try .. for a month. And am going to chart my meals for this month with food thats beneficial for type Bs.

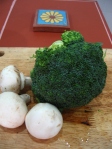
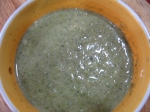
My first meal is a Broccoli and Mushroom soup with cheese (cos dairy is good for me, thank god)

Broccoli and Mushroom Soup ♣


2 cups broccoli, cut small


1 cup white button mushrooms, cut small


leek, 3 inch, sliced


3 - 4 cups vegetable stock


butter


1 cup milk


parmesan cheese


salt and pepper


ground oregano


Melt butter in saucepan. Add leek and saute till soft. Add mushrooms and broccoli and cook for about 5 -7 mins. Add stock and cook till it simmers. Add milk and keep on stove till it simmers. Remove from heat. Blend. Return to heat, add cheese, salt, pepper and a dash of ground oregano.


chewy and creamy too

Related Posts with Thumbnails