Showing posts with label cheese. Show all posts

Monday, June 10, 2013

Tarts, tarts, tarts


For our monthly Don't Call Me Chef column which is published in Star2 today, we decided to derive inspiration from nursery rhymes. My nursery rhyme of choice was The Queen Of Hearts rhyme made popular by Lewis Carroll's Alice in Wonderland. 

The Queen of Tarts she made some tarts
All on a summer day
The Knave of Hearts, he stole those tarts
And took them quite away

I like this rhyme but more than that, I love tarts. It's my go-to party dish at the moment. For dinner, tea or breakfast/brunch, I'm surely gonna make you a tart should you come by my way.

For the column, I made a Dark Chocolate Rum Tart inspired by master baker Dan Lepard's Pecan Crust Bourbon Chocolate Tart which you can view in his post in The Guardian some time back. 


Let me tell you: it was delicious! Decadent! You won't be able to stop at one. You may not want to share it with your guests! 

I made a few minor adjustments: he uses bourbon, I used rum; he uses cane sugar I used palm sugar and I also added some sea salt into the chocolate. I also made a chocolate-walnut crust (adding more cocoa than Lepard uses) instead of a pecan crust. 

You can check out the recipe for the Chocolate tart I made here.

Yesterday I made another tart: a Lemon Mascarpone Tart with a Rosemary crust and sour cream topping. 


Like most lemon tarts/slices, this one is tangy and very lemony. It's also creamy because of the mascarpone. The sour cream topping helps soften the tartness of the lemon filing - especially if you're not a huge fan of lemons. 

The filling is not cooked and thickened to form a curd. Though slightly runny, the cheese helps it set quite quickly. 

The recipe was inspired by one I saw in the food section of The Telegraph's site. I added the rosemary (because at the moment, rosemary and lemon is my favourite couple) and the sour cream.

The tart is best eaten chilled.


Lemon Mascarpone Tart with Rosemary Crust

For the pastry
100g plain flour
50g icing sugar
70g ice cold butter, cubed
1 sprig rosemary, chopped fine
pinch of salt 
4-6 tbsp ice cold water/milk

Filling
2 eggs
2 egg yolks
juice and zest of 2 lemons
125g mascarpone cheese
100g castor sugar
3 tbsp sour cream

First the pastry. Whisk the flour, salt and rosemary together. Add the cold butter and with your fingers or a mixer, rub the butter into the flour until you end up with a mixture that resembles breadcrumbs. Add the cold water a little at a time and work quickly to form a dough. Shape into a disc, wrap in cling film and chill for at least 30 mins.

Once chilled, roll the pastry on a floured surface until about 2mm thick. Lift the pastry carefully and fit into tart tin (I used an 8-inch tin). Prick the bottom and sides of pastry with a fork and blind bake in a 180C oven for about 12-15 mins or until the base has hardened slightly. 

Remove. 

For the filling, beat the eggs and sugar until the mixture gets pale and creamy. Add the mascarpone and the lemon juice and zest and mix to incorporate all ingredients together.

Pour the filling into the half-baked crust and put it back in the oven for about 20 minutes or until the filling is set.

Remove from oven and let cool. Once cool. spread a thin layer of sour cream on top.


Monday, June 3, 2013

Edamame, Radish and Corn Salad


After a weekend ... no make that a week ... of unhealthy dining and irregular meals (if a chocolate tart at 10pm for supper (three days in a row) isn't unhealthy, I don't know what is!), I've decided to eat healthy this week. 

No, that doesn't mean just salads and soups and stuff but it does mean cutting back on the sweets, oily, deep-fried, greasy grub that I've been indulging on for what seems like too long.

I started with this simple Monday salad: edamame, sweet corn, red radish, walnuts and Parmesan cheese. The dressing: olive oil, rice-wine vinegar, lemon, honey, garlic, salt and pepper. Purely improvised (which means it doesn't have a fancy name) but tasty nonetheless.


I've never been a big fan of salads, rally. Raw or barely cooked vegetables with dressing? I'd reach for a plate of steaming curry noodles any day. But all it took is one fantastic salad to change my mind. That one fantastic salad was one I had recently at a friend's home. Just green apples, Feta cheese, spinach and walnuts. There was a choice of dressing: a simple red-wine vinegar dressing or a blue-cheese one. I opted for the latter and was in heaven. Wowza. Salad? Really?

That was a while ago and I have to admit that I am now a salad convert.  It won't be the first thing I gravitate towards at a buffet but it wouldn't be the last thing I'd touch with a ten-feet pole either. 

I don't know if this salad will blow your mind the way the apple salad did mine but it's tasty and has some of my favourite ingredients in it: edamame, walnuts, cheese and radish. Delicious, peppery red radish. 

Just a little but of olive oil and salt and pepper would have been enough to dress this salad, really, but I opted for a little tang from the rice-wine vinegar and lemon and then some sweetness from honey (which really goes well with the Parmesan). 


Edamame, Radish and Corn Salad

1 cup edamame (I used frozen ones in the shell so I dunked them in salted, boiling water for a couple of minutes).
1/4 cup corn, steamed. 
2-3 radishes, sliced thin.
Walnuts, toasted and roughly chopped, a loose handful
Parmesan cheese, shaved
Parsley leaves, a handful

For the dressing
2 tbsp olive oil
1 tsp rice-wine vinegar
1 tsp lemon juice
1 clove garlic, chopped fine
1 -2 tsp honey
salt and pepper

Combine the edamame, corn, radish, parsley, nuts and cheese. 

Whisk the oil, vinegar, lemon juice, honey and garlic until emulsified. Add the sugar, salt and pepper (as much as you need) and whisk till combined. 

Dress salad. Eat. 


Wednesday, May 15, 2013

Ricotta Herb Tart with Olive oil Crust


This wasn't supposed to be a tart, really.

I bought a tub of ricotta cheese to make spinach ricotta gnocchi, based on a dish I sampled in Switzerland recently while I was staying with my friend JY, her hubby, R and their darling black lab, Umbria. R used the fresh Baerlauch (bear's garlic) we picked by the river in Cham, a small municipality in Zug for his gnocchi. It was fabulous. I'd only ever eaten gnocchi made with potato and flour and  not being a fan of potatoes, I find myself staying away from gnocchi altogether.

Since baerlauch is unavailable back home in Malaysia, JY suggested I use Spinach instead. I bought all the necessary ingredients: spinach, ricotta, flour, sage leaves and Gruyere cheese. And then I got side-tracked by another recipe for an olive oil tart crust which caught my eye. I love buttery-rich tart crusts but this one, from Chocolate & Zucchini seemed to get a lot of positive reviews. I had to try it. I just had to.

The gnocchi would have to wait till another day. Soon. Just not today.

The olive oil crust is a little simpler to put together than the classic butter shortcrust pastry crust. Because cold butter is not a pre-requisite, the dough doesn't have to be made with speed (before the fat melts as in the case of shortcrust). Also, the olive oil dough is much sturdier and as a result there is no fear that a soggy filling will in turn create a soggy tart base. There is also no need to rest the dough before rolling. If kneaded enough (just a couple of minutes should do) the dough should be pliable enough to be rolled as soon as it is mixed.

The filling is creamy and delicious, richly flavoured with the herbs. The smell from the herbs is practically intoxicating too!. The egg in the filling is optional, but it does help bind the creamy cheese together and give it a little form. An eggless filling will be a little softer (some thickened cream could thicken it a little). The nuts in the pastry and the Parmesan garnish adds texture and the garnish of red radish adds a little spiciness to the tart.


Olive Oil and Herb Crust
(Based on a recipe in Chocolate & Zucchini)

150g whole wheat flour
100g plain flour
1 tsp salt
1/4 cup olive oil
1 tbsp chopped chives 
handful of walnuts, chopped fine
1/2 cup + 2 tbsp ice cold water

Mix the flours, chives and salt together. Add the oil and the nuts and mix into the flour: it should start to clump together in bits. Add the water, gradually, until the dough comes together in a neat ball. Knead for a couple of minutes. 

The dough is now ready for rolling. 

Lightly flour your work surface and rolling pin and gently roll the dough till its 1/4 cm thin and gently lift it to fit the tart pan. Trim the edges, puncture the base with a fork and blind bake (180C) for about 15 mins or till it firms up. 


Creamy Ricotta-Herb Filling
250g ricotta
2-3 tbsp chopped mixed herbs (I used chopped thyme, rosemary and parsley) - a little more to garnish, if you like.
1 tbsp lemon juice
1 egg (optional)
salt and pepper to season

Mix all the ingredients together well. Spread it into the tart case and bake for about 25-30 min or till the cheese is set and slightly golden.

Garnish
Red radish, sliced thin
1/4 cup grated Parmesan (spread the grated Parmesan thinly on a sheet of parchment-lined baking tray and bake for about 12 mins or till golden. Coll and then break it up).


Tuesday, May 7, 2013

Sauerkraut and Cheese Pie


IT's hard to believe that a week ago, I was freezing my a*** off in Switzerland, where I was lucky enough to be for about 10 days. Although it was unusually cold for this time of the year (late April/May), the main reason I was freezing my a*** off was because I didn't pack my warm clothing. I thought the weather would be manageable - after all, I always adjusted to the cold much better than the heat. Also, I kept packing to the very last minute and I wasn't thinking too straight.  So what I ended up with was a few sleeveless (say, what?) dresses for work and for play, some barely warm t-shirts, jeans and a long sweater coat (like that was going to do much good).

So, freezing? Well, it serves me right. (Thank goodness for really nice colleagues with additional scarves and sweaters!).


Switzerland was amazing. Sure, it was chilly but there were a few nice sunny days that interspersed the gloomy, rainy days (and a hailstorm too, I must say!). Sunny days that allowed me and my friend JY (who lives there with her husband R and her black Lab, Umbria) to go for walks and, literally, forage for food - more on this later.


What did I love? The crisp air and the beautiful spring flowers.

Oh! the flowers. I just couldn't stop talking photographs (with my phone, of course. I couldn't find it in me to lug my camera and it's accompanying lenses along!).

What else did I love? The Cheese! Oh boy, did I overload. Cheese for breakfast, lunch and dinner. And champagne (for you must have cheese with champagne). 

Oh, and the other thing I loved? Hanging out with Jy.


We didn't do much really - which was fantastic. Just chilling (no pun intended), grocery shopping, eating, walking Umbria two or sometimes three times a day, cooking and more chilling. 

She did feed me well though. Oh, my. I wasn't allowed to just eat cheese. But I wasn't complaining. Which leads me back to us foraging for food. 


JY's husband made some baerlauch gnocchi one night that was just scrumptious. Baerlauch, otherwise known as bear's garlic, grows freely in the wild in Springtime in Cham where JY resides (just an hour away from Zurich). 

A relative of the chive, the baerlauch  apparently got it's name because of the brown bear's taste for the bulbs. There were no bears in Cham but we were freely picking the leaves which emitted a rather strong smell of garlic. Luckily, I love garlic.

Yeah, that picture above, that's me foraging. If you're wondering about the exposed hand and flip flops, this was one of the rare sunny days in Cham, hallelujah!


And this picture above is the gnocchi, served with butter-fried sage leaves and cheese (I only remembered to photograph it AFTER I started eating... it was just too good). Oh! My! I loved the baerlauch so much that JY and I picked more the following day to make pesto (baerlauch  + basil + cheese + olive oil + pine nuts + salt).

JY made a sauerkraut and cheese pie the next day which didn't require any plant-stealing. Having never tried sauerkraut (fermented cabbage) before (I know ... quite incredible), I was eager to try it. Also because the pie had cheese in it ... and you already know how much I love cheese. 

By the way, if you want to make your own Sauerkraut, check THIS article in saveur.com. 

The pie was delicious ... again I ate it up before remembering to photograph it. Oops, my bad. The pickled cabbage mixed so well with the cheese and with just minimal seasoning (salt, pepper and a little sugar) and a short, tasty pastry, it was a pie to die for. 

I went to the supermarket the next day and bought myself a kilogram of Sauerkraut to bring home. I was definitely making pie for myself back home. 


And guess what? I did. I made it the day after I returned home. Yes, it was that yummy.

I followed JY's recipe (there were no quantities exchanged but I kinda eyeballed her as she made it), adding just a couple more ingredients: chopped, toasted hazelnuts for some crunch and some parsley to garnish because, well, I love parsley. I also omitted the cream that she added to her egg custard that was needed to bind the pie - I just used milk instead. 


I made quite a large pie and, thankfully, all at home loved it else I'd have (gladly) finished it off on my own. And, the good thing is that the pie, like most pies, tastes even better a day later - straight out of the fridge (reheating is optional).

Sauerkraut and Cheese Pie
For the filling
250g sauerkraut, well drained (I bought mine but here's another link to tell you hot to make your own)
2 cups cheese (I used gruyere and cheddar)
1 leek, sliced fine 
Handful of hazelnuts, toasted and chopped
2 eggs
1/2 cup milk (or 1/4 milk, 1/4 cream)
1 tbsp sugar
salt, pepper

Chopped parsley to garnish

Shortcrust pastry
350g plain flour
175g butter, cubed (cold)
pinch of salt
4-6 tbsp ice cold water

To make the pastry, whisk the flour and salt together. Rub the butter into the flour mixture until it begins to resemble coarse breadcrumbs. Add the iced water bit by bit until the pastry comes together smoothly. Wrap in cling film and chill in the fridge for at least 30 mins.


Saute the leeks in butter till soft. Add the leeks (once cooled) to the sauerkraut. Add in the cheese, nuts, pepper and a teensy pinch of salt, and sugar. Stir to mix.


Beat the egg and milk together.

Once the pastry is chilled, roll it out and press onto a pie dish or a round baking dish.


Prick the base with a fork and blind bake for 15 mins (180C).

Once base is slightly cooked (the pastry should be a little firm but not brown), add the sauerkraut filling into the shell. Pour in the egg custard. If you wish, sprinkle some more cheese on the top. 

Bake at 180C for about 45 mins or till filling is firm.


Garnish with chopped parsley.

Friday, April 12, 2013

Galettes, sweet and savoury


Galettes. My latest obsession. Those of you who don't know me well, know that I can be pretty obsessive. If I like something, I go all out. And I do mean ALL out. This applies to food (I've had a cupcake phase, a pasta phase, a pastry phase and then was the time I went elbow deep in making layered cakes ... like my life depended on it), TV (If I'm into a particular series, I spend hours ...no, days watching episode after episode - to hell with actually having a life!) and fashion (it's not uncommon that I buy five pieces of my favourite plain white tee ... I mean what if I never fins a white tee like this ever again, right?).

So, obsessive? Yeah, a little.


At the moment, I am mad about galettes - a flat, round (ish), free-form, rustic, flaky pastry with an either sweet or savoury filling. Essentially, a galette is an unfussy tart that doesn't need a mould to give it a perfect shape with perfect edges.

Despite the fanciful name, galettes are all about simplicity but not at the expense of flavour.


Constructing a galette is simple. Roll the chilled short crust pastry dough into a thin round. Pile the filling of your choice in the centre and then fold the edges up, pleating as necessary. Brush the folded up edges with egg wash and bake.

One important tip when constructing a galette is to roll the pastry thin: thinner than you would when you make a tart. Unlike a tart where the pastry is blind-baked in the mould BEFORE the addition of a filling, with a galette the pastry is baked only once, after the filling is in place. To make sure the pastry is cooked through in 30-35 mins (you can't over bake it as the filling may dry up or burn!), it has to be thin. 


Galettes can be made sweet or savoury. I made an apple galette for dessert last week and a couple of days after, i made a spinach and mushroom one for dinner. Too much pastry in a week? Never! In fact, I have another one I'm dying to try today: mustard, Gruyere cheese and tomatoes. Oh, I'm itching to go make it now and will post the results soon!. Till then, Here's the recipe for both the apple and spinach galette.

For the pastry (enough for 2 galettes)
300g flour (I used 200g plain flour and 150g whole wheat)
1/2 tsp salt (or if you want a sweet dessert crust, 1 tbsp icing sugar)
150g cold butter, cubed
4-6 tbsp ice cold water

Whisk together the salt (or sugar) and flour. Using a food processor, mixer or your fingertip, rub the butter into the flour until the mixture resembles breadcrumbs. Add the ice cold water tbsp at a time and bring the crumbs together to form a dough. Wrap in clingfilm and chill for at least 30 mins. 

Spinach and Mushroom Filling (for one galette)
4 cloves garlic, minced
3 cups chopped spinach
2 dried chilli, chopped/1 tbsp chilli flakes
1/2 lemon
5-6 mushrooms (I used baby portobellos and shitakes), sliced (or if small, halved).
3 tbsp breadcrumbs (optional)

salt and pepper

1/2 cup Cheese (I used cheddar)
1-2 tbsp sunflower seeds

1 egg, lightly beaten (for the egg wash)

Heat some butter in a skillet/pan. Saute half the chopped garlic and add the spinach, chilli, salt and pepper. Toss in the butter and cover for a couple of minutes. Remove the lid, put the heat on high and cook the spinach until it has all wilted. Check seasoning and turn off the heat. and stir the spinach and squeeze a tbsp of lemon juice and mix. Set aside.

Wash the skillet and heat some more butter, about 2 tbsp. Add the garlic and once fragrant, add the mushrooms. Toss in the butter and saute till just brown, about 6-8 mins. Add the breadcrumbs and stir to mix. Cook for a couple of minutes and turn the heat off.


Assembling the galette

Remove the pastry from the fridge. Lightly flour your work surface. Divide the pastry in half, keep one half aside (back in the fridge if you're not using it immediately) roll the other half thin, about 1.5-2 mm. Trim the edges so you get a round, more or less.

Transfer the pastry onto a baking sheet that's been lined with parchment paper. 

Preheat the oven to 180C.

Layer 1: Sprinkle the cheese in the centre of the pastry base, leaving about an inch-wide border all around.


Layer 2: Spoon in the spinach filling on top of the cheese.

Layer 3: Top with mushrooms. 

Layer 4: Sprinkle the sunflower seeds on top.


Fold the edges of the pastry around the filling, pleating as necessary. Brush the folded edges with the egg wash.

Bake for 30 mins or till pastry is cooked.

Apple Galette Filling
Peel and core 5 apples and slice them thin (I left mine unpeeled but I prefer them peeled).
1 lemon
1 tsp cinnamon
1/4 cup coarse sugar
2 tbsp butter

Put the sliced apples, lemon juice and sugar in a saucepan and cook over low heat, covered, until the apples start to soften - about 15 mins.

When assembling the apple galettes, roll the pastry thin (as above). Sprinkle some sugar on the base of the pastry and arrange the apples in the centre. Dot with butter and fold in edges.


Brush the folded edges with egg wash and sprinkle with a little more sugar.

Bake for 30-35 mins. 


Thursday, July 8, 2010

Mushroom magic


I learnt my lesson the hard way. About six years ago, I was lunching with  some buds in a deli-styled eatery in KL and I ordered a mushroom burger thinking it would be a vegetarian burger made of mushrooms. The menu didn't offer a description of the burger so I assumed...

Imagine my embarrassment when the burger arrived: a huge chunk of beef patty with a generous mushroom topping and some white sauce, some variation of mayonnaise I assume. I protested, but to no avail of course. The waiter thought I was being ridiculous: who would order a burger made of mushrooms (he didn't say it but his expression shouted it!).

I pushed my plate aside, dejected, an sipped on my smoothie. Oh bother, these all-meat eateries.

Mushroom burgers are not something I conjured up, in case you are wondering. Portobello mushroom burgers are quite popular, perhaps not in our cafes. I've had them (they serve them at The Daily Grind in Bangsar Village) and I love them. You can't go wrong with mushrooms, really. Especially not the Portobello, surely a royal mushroom.

At home, I make mushroom burgers/sandwiches all the time. I either incorporate them in vege burger patties or, like the one above, I make sandwiches with a variety of mushroom fillings. The one above is made from sautéed mushrooms in a creamy cheese sauce, served with roasted tomatoes on sprouts. I usually use lettuce or salad but I had some sprouts at home and used them instead.

Cheesy Mushroom chompers

1 cups mushrooms (swiss brown, button white and fresh shiitake), separate the stems from the caps.

1/4 cup cheddar

1/4 cup parmesan (you can add blue cheese too if you feel extravagant)

4 tbsp butter

1/4 cup chopped walnuts

2 sprigs thyme

1 med onion, chopped

2 garlic cloves, minced

Chop the mushroom stems; quarter the caps.

Heat 2 tbsp butter and saute the caps with thyme, season with salt and pepper, remove and set aside.

Heat  butter. Add onions and then garlic and saute till soft. Add chopped stems and cook till soft, about 5 mins. Stir in cheese and nuts. Cook for a couple of mins.

Lay sautéed caps on baking sheet and pour half the cheesy sauce over. Bake in 180C oven for about 15 mins. Remove. Pour remaining sauce over.

Assemble the chomper: Layers of sprouts, mustard, cheesy mushrooms and roasted tomato in between sesame burger buns.

Sunday, June 6, 2010

Homemade cheese, louise!


My mother used to make butter and ghee and though she never said it, I could tell that it gave her great satisfaction. It wasn't a matter of economics; rather it was a desire to consumme less preservatives (yes, butter has preservatives which allows us to keep it for a long time, albeit refrigerated). At the time, I admired her for it although I don't think I fully realised the satisfaction she got from it.

Yesterday, I made my own ricotta cheese and all at once I understood.  For me, it was partly  economics that prompted me to try it (it is much cheaper to make ricotta than buy it). I also was curious. If I could make cheese at home (my next project is mascaporne), I wouldn't have to pay those exorbitant prices  for imported cheese at supermarkets. Well, at least I'd save a little.

For a RM15 block of store bought ricotta, it cost me just about RM8 to make it at home. I needed two litres of full cream milk, a cup of whipping cream, lemon juice and salt.


Homemade ricotta is probably the simplest cheese to make. Although you can use full cream milk from the carton, you will get better results from  fresh  milk -- luckily I managed to catch the man who goes around my neighbourhood (on a motocycle) delivering fresh cows milk. (I had to pre-order two litres the week before).

Apart from the milk, whipping cream, salt and lemon juice, you will need a large bowl and a muslin cloth (or a dishcloth) as well. And a stockpot to boil the milk, of course.

First step: Heat the milk and whipping cream; when it comes to a ROLLING BOIL (not just a simmer) add the lemon or lime juice and resume boiling, stirring now and then. Keep stirring until the milk mixture starts to curdle. Depending on the milk (fresh milk works faster than milk from the carton), this may take between 20 to 30 mins.

When the milk starts to curdle -- when you can see clumps amongst the slightly thickened liquid -- put off the heat and let the milk stand for about 15 mins.  If the milk isn't curdling well, add a little more lemon juice.


After 15 mins or so, you will see the curdled milk seperate from the liquid, or  whey.  Place a muslin clothe or dishcloth over a large, deep bowl and pour the curdled mixture into the cloth to physically separate the curd from the whey.

Let the muslin seive do it's work -- leave it for about 30 minutes or until almost all the liquid has dripped  into the  bowl.

Tie the edges of the muslin together to form a ball with the curd and hang it on your tap or somewhere so the remaining liquid drips out.

Once you;re satisfied that there is close to or completely no whey left, put the balled ricotta in the fridge for about 2 hours or so to set.

Click here for more resources for homemade ricotta.

Sunday, October 18, 2009

New day, new diet. Why do i do it?

I have been on a diet since I was 16 -- I am now ... 37. Yup. Don't roll your eyes because I know I need help.

The latest diet I am trying is pretty controversial. It's not really a diet, more a way of eating "healthier" -- therein lies the controversy. Ever heard of Dr Peter D'Adamo? Sometime in the late 1990s, he write a book titled Eat Right 4 Your Blood Type where he recommends food to suit your blood type. His theory (based on studies he and his father before him had done) is that not all blood types react with food the same way. If you eat food that is not quite suitable or agreeable with your blood type, you suffer the consequences. Not serious consequences, exactly ... but you don't feel the best you could and your metabolic rate could be slow because of it.

Yumm. This could work

Ok. I ain't gonna make this post a summary of his study -- check him out on the web if you want.

I am a type-B (blood that is) and although most people with this  blood type have hardy and flecible digestive systems and can therefore enjoy a wider variety of food, it's not a very friendly blood type for vegetarians as many vegetarian staples like soy and lentils are not type B friendly.

What? Just my luck cos  I am a vegetarian!

Should I stick to it?

I decide to give it a try .. for a month. And am going to chart my meals for this month with food thats beneficial for type Bs.

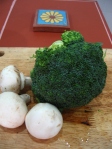
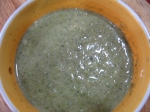
My first meal is a Broccoli and Mushroom soup with cheese (cos dairy is good for me, thank god)

Broccoli and Mushroom Soup ♣


2 cups broccoli, cut small


1 cup white button mushrooms, cut small


leek, 3 inch, sliced


3 - 4 cups vegetable stock


butter


1 cup milk


parmesan cheese


salt and pepper


ground oregano


Melt butter in saucepan. Add leek and saute till soft. Add mushrooms and broccoli and cook for about 5 -7 mins. Add stock and cook till it simmers. Add milk and keep on stove till it simmers. Remove from heat. Blend. Return to heat, add cheese, salt, pepper and a dash of ground oregano.


chewy and creamy too

Related Posts with Thumbnails