Showing posts with label vegetarian.. Show all posts

Saturday, September 21, 2013

Apple Lemon Cake


I made an apple cake today. I think I fell in love with apples all over again while in Germany. It seemed as if there were apples, apples, apples everywhere we went (to eat): from the delicious apfelkuchen (apple cakes) sold in the bakeries near our hotel in Frankfurt (which my husband, R, had for breakfast on three consecutive days!) to the red cabbage cooked with apple sauce (I could have this every day!) which accompanied a hearty Bavarian feast in Munich and the delicious apple pastries we had for tea.

So, yes, I suppose it isn't surprising that I bought a bag of apples the day after I arrived home. 


I'm still working on making a great apfelkuchen, which is perhaps best described as a yeasted apple cake with a crumb topping. Sounds delicious, right? It is. But I haven't yet got it quite right. Thankfully, the good thing about apple desserts is even the imperfect versions are delicious to eat!

In the meantime, I decided to blog about this simple apple cake which is really just the perfect coffee cake. Apple desserts usually have cinnamon and/or nutmeg in them but I decided to make this one without either and used just lemon (juice and zest) as a flavour enhancer.  I marinated the apples in a lemon and sugar emulsion for an hour. Then, I thickened the marinade to use as a glaze once the cake was baked. I also added some lemon zest in the batter.


This cake is moist. The milk AND buttermilk in the batter make for a really tender crumb in which the chunks of cooked apples nestle in quite comfortably. Oh, just looking at the cake feels so comforting.

A word of warning though: the acidity of the buttermilk does tend to make the protein in the eggs coagulate slightly - what this means is your batter will look a little curdled. DON'T throw it away. It isn't spoilt, it's just a reaction to the buttermilk. 


Apple and Lemon Cake

5 red apples, skinned, cored and sliced lengthwise.
juice of 1 lemon
150g butter, softened
1 cup castor  sugar
zest of 1 lemon
3 eggs 
1 tsp vanilla extract
150g milk
150g butter milk
275g flour
2 tsp baking powder
1/2 tsp salt

Marinade the apples in lemon juice and 2 tbsp sugar for about an hour. 

Heat over to 170C.

Sift the flour, baking powder and salt together and set aside.

Cream the butter and remaining sugar until pale and light. Add the eggs and vanilla and beat to incorporate the ingredients well. Add the zest and then add in the flour gradually. Finally, add the milk and buttermilk into the batter and mix to incorporate.

Pour the batter into a greased 10-inch springform pan. Arrange the sliced apples on the top of the cake. Pack as much of the apples as you can in. 

Bake for 50-55 mins or until the a tester comes out clean.


While the cake is baking, heat the lemon marinade until it thickens into a syrup. Once the cake is done, spoon the syrup over the cake.

Cool, dust with icing sugar (yeah, so very old fashioned ... but I love it) and serve.

Sunday, September 1, 2013

Lemongrass Butter Cupcakes


My grandfather used to faithfully fly the Malaysian flag outside his house every year when Hari Merdeka (Malaysia's independence day) approached. He was a patriot, my grandfather - having lived through the Japanese and British occupation in Malaysia, he valued the country's independence and was never remiss in reminding himself (and us) how precious freedom is. My grandfather passed away just months short of his 100th birthday and he used to, until the final years of his life when he wasn't too well, correspond via snail mail to the country's first prime minister, Tunku Abdul Rahman, who hailed from Kedah, the same northern state as my grandad. He was extremely proud of the fact that the statesman actually replied his letters a couple of times. 

I don't fly the flag outside my house nor on my car (as many of my countryman/women do). But to celebrate Merdeka this year, I decided to eat an array of my favourite Malaysian dishes! Why not? After all, food is one of the many reasons I love living in Malaysia. 

Listing out the food fest I had over the weekend would be embarrassing. Suffice to say I haven't eaten so much in a long while and am thoroughly guilt-ridden now. 

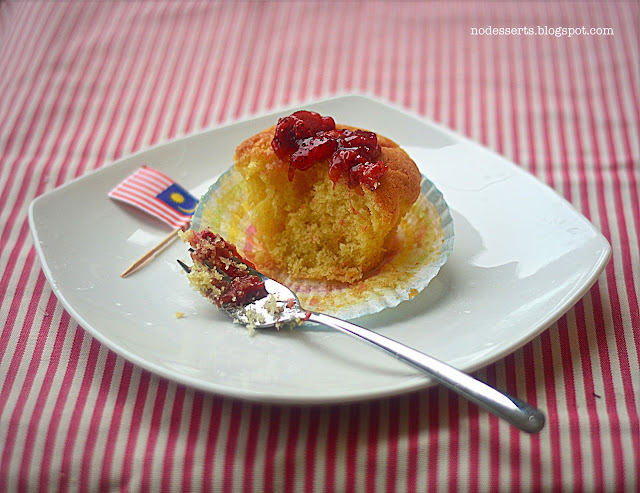
But I do want to highlight these cupcakes I made which were infused with a lemongrass syrup and topped with strawberry and lemongrass compote.


Lemongrass is one of my favourite Malaysian ingredients and though it is used primarily in cooking curries and savoury dishes, it lends a nice flavour to desserts and drinks too.

For the cupcakes, I used a basic butter cake batter that was flavoured with lemon zest and extract.


Once baked, the cakes are then infused with a lemongrass syrup which soaks into the cupcakes making them not only moist but giving them the unmistakable punch of the lemongrass. 

The strawberry compote is also flavoured with lemongrass: I cooked the fresh strawberries in water and some of the lemongrass syrup that I used for the cake. I wasn't sure if strawberries and lemongrass go well together but I am happy to report that they do :)


Lemongrass infused Butter Cupcakes
For the cake
175g self raising flour
1/2 tsp baking powder
pinch of salt
175g butter, softened
100g caster sugar
3 eggs
1/2 tsp lemon extract
1 lemon, zested and then sliced

For the syrup *
180ml water
200g sugar
3 stalks fresh lemongrass, crushed and cut into pieces
3 slices lemon

For the compote
1 cup strawberries
1/2 cup water
1/4 cup syrup*

Preheat the oven to 180C.

Sift together the flour, baking powder and salt and keep aside.

Rub the lemon zest into the sugar until the lemon is well infused and the sugar is fragrant. Cream the butter and the lemon-flavoured sugar until light and creamy. add the eggs (one at a time) until well incorporated into the butter and then add the lemon extract.

Add the flour mixture in three installments, making sure it is well combined before adding more.

Remove and spoon the batter into the cupcake liners and bake for 18-20 mins or until a tester comes out clean.

While the cake is baking, make the syrup. Put the water to boil and then add the sugar, lemongrass and lemon slices in. Once the mixture boils, turn the heat low and allow to simmer for about 15 mins.

Once the cakes are done, use a toothpick (I didn't have any so I used the small, sharp end of a chopstick) and poke holes all over the surface of the cupcakes. Spoon the syrup carefully over the surface, allowing it to seep into the cupcakes through the holes.

Leave to infuse for 10 mins and the repeat.

To make the compote, hull and cube the strawberries. Add the strawberries, the water and the syrup in a small saucepan and cook, under low heat, until the berries start to soften and the mixture starts to thicken.  Spoon the compote over the cupcakes once they are cool.


Monday, June 3, 2013

Edamame, Radish and Corn Salad


After a weekend ... no make that a week ... of unhealthy dining and irregular meals (if a chocolate tart at 10pm for supper (three days in a row) isn't unhealthy, I don't know what is!), I've decided to eat healthy this week. 

No, that doesn't mean just salads and soups and stuff but it does mean cutting back on the sweets, oily, deep-fried, greasy grub that I've been indulging on for what seems like too long.

I started with this simple Monday salad: edamame, sweet corn, red radish, walnuts and Parmesan cheese. The dressing: olive oil, rice-wine vinegar, lemon, honey, garlic, salt and pepper. Purely improvised (which means it doesn't have a fancy name) but tasty nonetheless.


I've never been a big fan of salads, rally. Raw or barely cooked vegetables with dressing? I'd reach for a plate of steaming curry noodles any day. But all it took is one fantastic salad to change my mind. That one fantastic salad was one I had recently at a friend's home. Just green apples, Feta cheese, spinach and walnuts. There was a choice of dressing: a simple red-wine vinegar dressing or a blue-cheese one. I opted for the latter and was in heaven. Wowza. Salad? Really?

That was a while ago and I have to admit that I am now a salad convert.  It won't be the first thing I gravitate towards at a buffet but it wouldn't be the last thing I'd touch with a ten-feet pole either. 

I don't know if this salad will blow your mind the way the apple salad did mine but it's tasty and has some of my favourite ingredients in it: edamame, walnuts, cheese and radish. Delicious, peppery red radish. 

Just a little but of olive oil and salt and pepper would have been enough to dress this salad, really, but I opted for a little tang from the rice-wine vinegar and lemon and then some sweetness from honey (which really goes well with the Parmesan). 


Edamame, Radish and Corn Salad

1 cup edamame (I used frozen ones in the shell so I dunked them in salted, boiling water for a couple of minutes).
1/4 cup corn, steamed. 
2-3 radishes, sliced thin.
Walnuts, toasted and roughly chopped, a loose handful
Parmesan cheese, shaved
Parsley leaves, a handful

For the dressing
2 tbsp olive oil
1 tsp rice-wine vinegar
1 tsp lemon juice
1 clove garlic, chopped fine
1 -2 tsp honey
salt and pepper

Combine the edamame, corn, radish, parsley, nuts and cheese. 

Whisk the oil, vinegar, lemon juice, honey and garlic until emulsified. Add the sugar, salt and pepper (as much as you need) and whisk till combined. 

Dress salad. Eat. 


Saturday, March 2, 2013

Fresh Egg Pasta


Are you thinking what I'm thinking? That this plate of pasta looks strangely misshapen? That the strands are neither round like spaghetti or flat like fettuccine? 

Well, here's what happened. I decided to make my own pasta even though I don't have a pasta machine to roll the dough and cut it into shape AND knowing full well that I lack the patience needed to cut the dough, with a knife, into equal sized strips. It started out well, actually, but rolling and cutting pasta by hand takes some time and after about 30 minutes, my attention to detail was a little slack and my hands were getting tired. 


Since the pasta was an experiment and I wasn't cooking for anyone but me and R (well, hopefully), I wasn't too concerned about appearances. I was, however, worried that the pasta would not cook evenly. Still, I didn't think too much about it: I'd divide the strips according to size and cook the thin ones for shorter time and the thicker ones for a few minutes longer, I figured. Yeah, more work but what was I to do?

Buy a pasta machine, maybe? Well, maybe.

Making the dough was the easiest bit. There are different recipes for making pasta. I based mine on Mark Bittman's recipe which he included in The Minimalist, his column in The New York Times some time back. Here's a link to an article in The Guardian by Felicity Cloake who samples a few different recipes.  

What you need

250g Italian "00" flour: very finely sieved flour typically used to make pasta. 

3 eggs + 2 yolks

1/2 tsp salt

Water (only optional)


And here's what you do:
Whisk the flour and salt together in a bowl.

Make a well in the middle  of the flour mixture and add the eggs +yolks.

Using a fork, lightly beat the egg bringing in the flour from the sides into the egg as you go along.


Once the flour and the egg start to clump together, use your hands to bring the mixture together into a soft ball of dough. If the dough seems dry, add a tbsp or so of water.

Flour the surface of your work top and tip the dough onto the work space. Knead the dough: begin by folding the dough on itself, flattening it out and folding it again (top to bottom, flatten, turn, top to bottom). Once the dough starts to firm up, start kneading the dough. Add more flour onto the work surface if the dough starts to stick. Wetting your hands with cold water also helps, amazingly.

Knead until the dough forms a smooth elastic ball and, when cut down the middle does not show any or many air bubbles and when poked, gently, springs back easily (about 10 mins).

Place the kneaded dough back in the bowl, cover and let it rest for at least 30 mins. The dough can also be refrigerated and used later although, it has to be at room temperature before you roll.


Ready to roll

Once the dough has rested, divide it into 4 portions. Place one on a cutting board and leave the remaining three in the bowl, covered (pasta dough dries out pretty fast).

Roll the though as thin as possible. Turning, smoothing it as you go so as not to create any creases. Roll it paper thin, if possible and using a sharp, sharp knife, trim the edges until you have straight sides.


Again, make sure your knife is sharp. Cut strips, about 1mm thick (or slightly more) lengthwise. Try to be more uniformed than mine!


If you are planning on cooking your pasta immediately, just toss the cut pasta in flour and set them aside as you work on the remaining dough. If you plan on keeping the pasta for another day, you'll need to dry the strips. Hang them carefully on a hanger and hand the pasta to dry outdoors until completely dry and brittle. Store in an airtight container. Homemade pasta doesn't take all that long to dry.


Cooking time
Once you are done with the pasta and are ready to cook, boil a pot of salted water.  

When the water comes to a boil, place your pasta in. (If your pasta is evenly cut, add them together. If yours is as uneven as me, add the thicker pieces in first and 3-4 minutes later, the thinner ones). Add a tablespoon of olive oil in the water as the pasta cooks.

The pasta should take about 6 minutes to cook, al dente. Toss the pasta in a little olive oil. 

I decided to make my favourite pasta: with garlic, chilli and breadcrumbs that have been sauteed in butter. 

The end result was great. I like dried pasta quite a bit but I also love the flavour that egg brings to fresh pasta. And every once in a while, it's perhaps I'll got the extra mile and make my own pasta  .... After I but that darn pasta machine! :)


Sunday, January 27, 2013

Daring Bakers: Gevulde Speculaas


Francijn of Koken in de Brouwerij was our January 2013 Daring Bakers' hostess and she challenged us to make the traditional Dutch pastry Gevulde Speculaas from scratch! That included making our own spice mix, almond paste and dough! Delicious!

One of the best things about taking part in the monthly Daring Bakers' challenges is that I get to try dishes I've never tried before (or in this case, never even heard of before). I was excited, if a little daunted at the thought of having to make my own spice mix, and then almond paste, and then dough AND THEN, finally, the pastry.

But once I read through the recipe a couple of times, I realised that despite the long(ish) list of ingredients,  Gevulde Speculaas (a Dutch spice cookie with almond paste) isn't terribly difficult to make. In fact, as I went about the recipe (last minute, as usual, yesterday morning!), I found myself having quite a bit of fun. You can get Francijn's recipe in PDF format here.

The first step was making the spice mix. The Speculaas spice mix is a combination of NINE (ground) spices: clove, ginger, cardamom, cinnamon, anise, mace, white pepper, coriander and nutmeg. The combination startled me a little as I never thought of coriander or white pepper as typical ingredients for a sweet pastry.


With the spices on hand, I went about making the dough for the Speculaas next as the dough has to chill in the refrigerator for at least 2 hours before it can be rolled. Ingredients for the dough: all purpose flour, brown sugar, Speculaas spice mix, baking powder, salt and butter.  Mix all the dry ingredients in with the flour, add the butter and knead until a soft dough emerges.

Francijn suggests adding a little milk if the dough is dry but I thought mine was soft and moist enough. The dough cracked a little while baking so on hindsight, perhaps I should have added a wee bit of milk. Or perhaps I should have stuck to the traditional way of shaping the Speculaas: by sandwiching the almond paste between two sheets of dough. Instead, I chose to roll the dough around the paste like a log. Oh well. 

Once the dough is ready, wrap it in cling film and refrigerate for at least 2 hours. 

While waiting, I made the almond paste.


With my brand new immersion blender, this paste took less than a couple of minutes to make. I love my new blender! The ingredients are ground almonds, white sugar, lemon zest (which I didn't have and therefore omitted - eeks!) and an egg to bind everything together.

Simple!

Now to put everything together. 


Remove the dough from the fridge and let it soften a little on the counter so that it is easier to roll. According to Francijn's recipe, the dough should be divided in two and each one rolled into a rectangle. The paste is then spread out on top of one dough sheet before the second is laid on top of the paste, a.k.a like a Speculaas sandwich. 

I decided to be different. 

FIrst,  roll the dough into one large rectangle.

Brush the dough with egg wash.


With the long side of the rectangle facing you, place the paste (which I shaped into a log) along the long side closest to you, leaving about a 2 cm border.  (refer to the collage above).

Brush some egg over the top of the log of almond paste. 

Gently roll the pastry to cover the paste. Cut off any extra dough and save for later.

Turn the Speculaas roll so that the seam faces down. Brush the top with egg wash and top with crushed or chopped almonds. 

Bake in a pre heated oven (180C) for about 30 - 40 mins.


I couldn't wait to eat the baked Speculaas. The pastry was a little crumbly when I took it out of the oven but once it cooled down, it firmed up and didn't crumble when I bit into it.

Yumm! I love this pastry. The almond paste was a little sweet for me but the dough itself was yummy.

Speaking of dough, with the excess dough (which I cut off after rolling it over the paste), I made some cookies.


 Spice cookies! Yumm. I loved them. I think these may be a regular in my repertoire of cookies! Thanks Francijn!

Wednesday, January 16, 2013

Rolling with Leeks


I'm smitten. Last week, I made some Green Tea Cheese Buns using the tangzhong method of bread making popularised by baker Yvonne Chen (check out the story here). The buns were delicious. Soft and tender and very, very tasty: buttery (there's quite a bit of butter that goes into the bread) and just slightly sweet.  Really yummy milk buns. And the best part? The roux (which is the "secret" component to the buns) keeps the bread fluffy and nice for a week or so. I

Ever since, I've been obsessed with making more bread using the tangzhong method. Crusty, artisanal bread is fantastic but every now and again, I like soft, pillowy bread. Kinda like how I like watching fluffy TV shows that don't require much thought but are entirely entertaining. Speaking of which, did you see the latest installment of Revenge? I swear that show is getting more soapy by the moment.

Back to bread. The milk buns are tasty enough on their own and don't need to be filled or eaten with anything, except perhaps more butter. But I decided to add a dimension to them by adding leeks and chillies into the dough, fully infusing the bread with the subtle oniony flavour of the leek. 


I cooked the leeks in butter first, just until they softened and released some of their flavour. I then mixed it into the dough right at the start, before the first knead. 

By the end, the leeks (sliced thin and soft) were barely visible in the dough which was coloured and enhanced with the addition of custard powder (my friend and fellow blogger Jane of the waywardoven.blogspot.com introduced me to both the tangzhong process as well as the possibility of using custard powder).


The buns did not disappoint. The taste of the leeks were distinct yet subtle (I used about 2 cups of sliced leek but may increase it by half the next time I make these, which I will!) and the chilli flakes added an unexpected kick every so often. Nice. 


Leek and Chilli Milk Buns
For the roux
2 tbsp bread flour
2 tbsp custard powder
60ml water
60ml milk

For the buns
350g bread flour (scant 3 cups)
2 tbsp milk powder
4 tbsp sugar
1/2 tsp salt
1 egg
1 tsp instant yeast
60ml warm water + 60ml warm milk (I increased the ratio of milk this time)
Tangzhong roux
30g butter, softened
2 cups sliced leeks, cooked in butter until soft and translucent
2 tbsp chilli flakes (more/less dpeending on the heat of the flakes or your tolerance for heat)


Whisk the flour, sugar, salt, milk powder and yeast together. Add the roux (reserve about 2 tbsp to glaze the buns before baking) and egg and mix together by hand until the dough starts to come together. Add the warm water/milk and mix until you get a rough dough. 

Cover with a tea towel/dish cloth and leave for 10 mins.

Gently knead in the softened butter, leeks and chilli flakes to the rested dough, making sure that the butter is well incorporated into the dough, about 3 mins. 

Cover and leave for another 10 mins. The dough should rise just a little in the time. The dough rise will increase after each subsequent knead.

After 10 mins, uncover the dough and gently knead it by gently stretching the ball of dough with the heel of your hand and then folding it back. Repeat this a few times (another 3 mins) and then let it rest for another 10 mins. Repeat this three more times.


The dough will be a little sticky; grease your hands with butter (or oil ) to avoid the dough sticking to your hands.

After the final knead, cover and let the dough rest till it doubles in size, about 60 mins.

Preheat the oven to 180C.

Divide the dough into equal portions. This time, for the first time actually, I weighed each portion to make my buns identical in size. Each portion weighed 105gms. Roll each 105gm portion into a ball on a greased surface and place on a baking tray.  

Brush the tops with the reserved roux (if it has thickened some more, add a tbsp or two of water and dilute it over a very low heat for a minute). Top (if you like) with poppy/sesame seeds (or any seed/spice you wish) and bake for about 20 mins. 


Sunday, September 30, 2012

Daring Bakers: Empanadas


I was quite pleased when I discovered that this month's Daring Baker's challenge was Empanadas. Patri of the blog, Asi Son Los Cosas, was our September 2012 Daring Bakers’ hostess and she decided to tempt us with one of her family’s favorite recipes for Empanadas! We were given two dough recipes to choose from and encouraged to fill our Empanadas as creatively as we wished. I was pleased because I love curry puffs and samosas: both variations of empanadas which has its origins in Portugal or Spain (depending on what source you  go to) and is popular (with slight variations) all over South America. And Asia!

Like Patri, curry puffs remind me of my childhood. They were on the menu at almost every family gathering and my mother used to make them for tea quite often. A crispy, deep-fried pastry with an often spicy filling of potatoes, green peas, carrots and onions. Sometimes (before we became vegetarian) she'd include minced chicken with the potatoes. They were delicious and because they were associated with happy times, curry puffs are still one of my ultimate comfort foods. 


Just for the fun of it, I made a giant empanada! Enough for lunch and dinner!
Empanadas are very similar to the puffs of my childhood. Except, the pastry is more bread-y. (Incidentally, I learnt that the word "empanada" comes from the Spanish verb "empanar" which means to wrap or cover with dough). I followed on of the recipes for the dough which Patri offered and it was an easy, painless process. The dough is oil-based and so it is extremely easy to handle (kneading wasn't as messy a process as it usually is for me) and roll. The original recipe called for a teaspoon of sweet paprika powder which I didn't have; instead I added a sprinkling of pepperoncino (Chilli flakes) which I bought in Italy where I was on holiday a couple of weeks ago (more travel tales at a later date). 

Empanadas are either fried or baked and I decided to stick to Patri's recipe and bake mine. For my vegetarian filling, I went for my all time favourites: mushrooms and cheese. How could I go wrong with these two, right? Actually, I had an ulterior motive for choosing mushrooms. I had fried some oyster mushrooms the day before and had quite a bit left over which I'd stored in my fridge. This seemed a perfect opportunity to re used them. All I did was add some cheese (Gruyere and Mozzarella) and chopped parsley, season with salt and pepper and I was good to go. 


The pastry turned out quite well. It was quite different from any pastry/bread I'd ever tried. It's like a nice mix of the two: crispy on the outside but slightly soft and chewy inside (which soaks up the juices of the filling quite well).

My filling was a little dry — perhaps the fried mushrooms weren't the best idea — but the pastries were tasty nonetheless. To compensate, I made a dipping sauce to accompany them. Since I only used half the dough (I froze the remaining half), I think I'd saute the mushrooms instead and mix in some caramelised onions. Oh yum. I can't wait.

Regular sized ones

Oh and here's another thing I learnt: empanadas aren't necessarily individual half-moon pockets (like the calzone/curry puff). In some parts of the world, empanadas are square and made for the family (much like a pie). Interesting stuff! I decided to stick to the half-moon pockets as I wanted to pass them on to friends to sample and the pockets would be much easier to handle when not at the dinner table.

Also, since my filling was less than stellar, I will only include the recipe for the dough. When I make the second batch, I will include a recipe for the filling!

To look at what the other Daring Bakers did for this challenge, go to the DK page here. You will be blown away by some of the creations. I know I was.

Empanada Dough
31/2 cups all purpose/bread flour
1 cup warm water
1/2 cup (minus 1 tbsp) oil
1 tsp salt
15 g (1 tbsp) dry active yeast
a sprinkling of red chilli flakes
1 egg, lightly beaten (or milk) to brush on the pastry before baking.

Sift the flour into a bowl and make a well in the centre. Add the remaining ingredients (EXCEPT the egg) and mixed till combined. Turn the dough onto the counter and knead for about 8 mins. Place in an oiled bowl, cover an let it rest and rise for about 30 mins.

Once rested, turn the dough onto your work surface and roll it thin (the thicker your dough, the more chewy your empanada. Patri recommends the dough be rolled to about 3mm thick.)


Using a circular cutter, cut circles from the sheet of dough. Place the filling in the bottom half of the circle, leaving about a tiny border to seal the edges. Fold the top half over the filling and seal, crimping the edges with your fingers or a fork.

Preheat the oven to 180C.

Chill the empanadas for about 20 mins (this will help ensure they don't split open in the oven). Brush with the egg and bake for 20-30 mins till golden. Make sure the bottom is cooked before taking them out.

http://thedaringkitchen.com/

Saturday, June 9, 2012

Buttermilk Rolls


I love lazy days. You know, days when I don't have to do anything. Nowhere to go. No chores to get done. No one demanding my attention. Lazy days when I can just do be as inactive as I wish and take it easy. Well, I woke up to lazy day today. I woke up early enough but I decided to give myself a break from my daily gym routine. I'll make up for it tomorrow. Today, I will chill out. I decided to make bread instead. My bread of choice today were buttermilk rolls topped with poppy seeds.

The problem: apparently, my yeast was having a lazy day too. It just refused to foam or froth the way it usually does. Completely inactive.  Drats. Could it have reached its expiration time already? Double drats. I decided to go ahead and use it anyway. I thought I saw a single bubble in the bowl where I mixed it with some tepid water. It should work, right?  Even if it may take twice as long for my rolls to rise.

The good thing about baking bread regularly, is you lose some of the fear that is usually attached to bread baking. A year ago, I would have shelved the project and started on a cake or something. Today I figured I could wing it.

Thankfully, the yeast had some life in it yet and it only took slightly longer for the dough to rise: 90mins instead of 60 — that's not bad.


I chose to use buttermilk instead of water for my bread simply because I wanted a soft, soft bread. Why? I wanted bread which I could use to dunk in soup. Soup is my perfect lazy day meal: a bowl of hot soup and some rolls and TV. Ahhh ... sweet! Milk would have worked fine but I love the slight sourness of buttermilk.

I also added some golden syrup. Honey is sometimes used in bread for that very slight sweetness but I really am not a fan of honey and so I used the syrup instead. The quantity of syrup is only slight so you won't end up with sweet rolls; you get dinner-type rolls with a beguiling sweet flavour that's barely detectable.

For the sheen and golden tops, I brushed the top surface of the rolls with egg wash. And, I added some poppy seed for some crunch. I would have added some oats as well ... but I ran out. And, speaking of running out, I usually used white bread flour for these rolls but I didn't have enough white bread flour so I mixed it with some whole wheat flour (2 cups white to 1 cup whole wheat). The rolls were slightly more chewy but still really soft.


Buttermilk Bread Rolls
31/4 cups flour
1/4 tsp salt
11/4 tsp instant yeast
3 tbsp tepid water
1 cup buttermilk (or mix 1 cup milk and 1/2 tsp white vinegar and let it sit for 5 mins)
1 tbsp golden syrup/honey
poppy seeds
1 egg, beaten + 1 tbsp water

Perfect for dunking in my Mushroom and Chilli Soup.
Dissolve the yeast in water and let it sit for about 10 mins or until the mixture starts to foam.

Whisk together the flour and salt. Add the yeast to the flour and then the honey and mix together. Add the buttermilk and bring the dough together. Knead for about 10 mins or until smooth and elastic.

Cover and let it rise until it doubles in size: between 60-90 mins.


Grease the bottom of a round or square 9-inch baking pan with olive oil.

Preheat the oven to 220C.

When the dough has doubled, gently punch it down with your fingers and then divide equally (you can measure or estimate) into 9 portions. Roll into tight balls and place next to each other (maybe leaving a 2mm space in between) in the baking pan. Brush tops with egg wash and sprinkle seeds (or any topping you prefer).

Cover and let the rolls rise, about 20-30 mins.

Bake for 15-17 mins.

Wednesday, May 9, 2012

Homemade Jam and Tarts


As a child, I loved, loved, loved jam tarts. Mum didn't make them but once in a while, she'd buy a dozen or so from English Hotbreads, our go-to bakery for birthday cakes and tea time snacks. They sold the most delicious pineapple jam tarts I'd ever tasted and I could wolf down three or four jumbo tarts at one go. Yeah! I'd finish them so quick m mum had to ration the tarts: four each for the three of us kids. Sometimes, I'd steal one (or two) of my sister's share: she wasn't as greedy as me and more generous.

I still love tarts. The combination of tasty, crispy pastry against a sweet, gooey, jam filling is just soooo good. Though I love the pineapple tarts Malaysians have become quite renowned for (I've come to think our Nyonya tarts are among the best in the world), I also like other fruit-jam tarts too. Strawberry, lemon-curd, apple ... comfort food, for sure.

So when I read Dan Lepard's recent post on jam tarts in the Guardian, I was inspired to make some of my own. Lepard uses leftover jam for his tarts but as I don't usually store much jam at home, I had to make my own jam instead. My two favourite jam flavours are apple and strawberry and wouldn't you know it, I had both fruits at home. What luck!


Making jam is really quite simple; definitely easier than it sounds. You dice your fruit and cook it in a little water and some sugar (depending on how sweet your fruit is and how sweet you want your jam) and just let it cook until the fruit softens and the mixture thickens. You can add some corn flour (or pectin) to help thicken the mixture too.

That's a basic recipe/method for jam but you can also add to your flavours by combining ingredients (strawberry and raspberry, apple and citrus...) in a jam compound or you could spice up your jam with ... well, spice. I added some roughly crushed pink peppercorns into my strawberry jam and cinnamon into my apple jam.


I used Lepard's recipe for the crust which I must say produced the best tart crust I have ever made or maybe even tasted. I had to adjust the measurements a little -- a little less water and a little more flour. The pastry was soft but sturdy enough not to crumble en route to your mouth. It has a small measure of icing sugar in it but it's not at all sweet; there is a great balance between the sweetness of the sugar and the saltiness of the butter and the added salt. It was the perfect casing for my mini tarts so, "Thank you, Mr Lepard".


Strawberry and Apple Tarts

For the pastry recipe, refer to Dan Lepard's post in the Guardian.Here's the link.

Strawberry Jam 
24 strawberries, hulled and diced 
1/4 cup sugar (adjust according to taste)
1/2 cup water 
1-2 tsp pink peppercorns, roughly crushed
1 tsp cornflour, diluted in 1 tbsp water 

Put the strawberries, sugar, water and peppercorns in a heavy-bottomed saucepan and heat over low heat, stirring occasionally. As the mixture begins to boil, cover and leave to simmer, continue to stir from time to time, until the strawberries get really soft and mushy. Using a wooden spoon or a potato masher, roughly mash the softened fruit (you may want to leave some chunky pieces in for texture). Taste for sweetness (add more sugar if you want) and then, just before you're ready to take it off the heat, add the cornflour and stir until the jam thickens. 
Remove and allow to cool.


Apple Jam
2 large apples, skinned, cored and diced
1/4 tsp cinnamon
1/4 cup sugar (approximate, to taste)
1/2 cup water

Add all the ingredients in a heavy-bottomed pan and cook over low heat, stirring occasionally. Cover and cook until the apples soften and can be mashed. Keep stirring until the jam thickens.


Related Posts with Thumbnails