Showing posts with label spreads and sandwiches. Show all posts

Saturday, September 11, 2010

Twisted and loopy


I love soft, flavourful breads. All breads are flavourful, you may argue. Well, most home-made breads are indeed flavourful but I find that  store-bought breads are mostly pretty bland and have no character (I am talking about the loafs that are pre-packed and have a 2-week shelf life!).  Since I successfully baked my first loaf about seven months ago, I think I've eaten store-bought bread less than five times. Why buy when you can bake, right? Sure, baking takes time (unless you have a bread machine -- but where's the fun in that?). Also, baking my own bread means I can add any herb/nut/grain/seasoning I like depending on my mood.  Now that's really  swell especially since I love herb buns and they're not that easily available in stores.

So, anyway. I was in the mood for some bread making and was mentally going through a list of breads I could possibly make. What about Pretzels? I've never made them before even though I've read quite a few recipes and articles about making a good pretzel. Why not? I was feeling relaxed (a  four-day weekend would get anyone to relax, right) and adventurous. So, why not?

Usually whenever I get a craving for pretzels (not very often, thankfully) I head over  to Auntie Anne's Pretzels for a sour-cream and onion or cinnamon flavoured knot.  I like em. So the question is, could I make mine as nice?

I used a recipe I had earlier bookmarked from thefreshloaf.com, a great resource of you like making bread. I intended to make the  Laugenbrezel or the Lye Pretzel -- a basic pretzel that is first dipped in boiling water+ a drop of Lye and then baked. The recipe on thefreshloaf however skips the lye bath, deeming it unnecessary for homemade pretzels. Ok, great. Am all for skipping a lye bath for it kind of reminds me of a tic bath I have to administer on my dog, Mojo, from time to time. Urrgh.


As it turned out, my pretzels weren't as pretty as auntie anne's but they were really tasty. Especially the ones with grated cheese topping. Not bad (pat on back, pat on back) :)

Home made pretzels

(from thefreshloaf.com)

Makes 6 large pretzels
1 tsp instant yeast
1 tbsp brown sugar
2-3 cups bread flour
1 tsp salt
1 cup warm milk (approximately 110 degrees)

1 egg (for egg wash)

1 saucepan boiling water

Combine all the ingredients in the bowl of your electric mixer and mix until the dough forms a ball. Use 2 cups of  flour first and add more, if necessary. I used a little less than 21/2 cups. Mix it for about five mins on low speed (speed 2 on my Kenwood) and then anpther 5-7 mins on 4 until the dough is all smooth and shiny.

Remove the dough and form into a ball. Place in a greased bowl, cover with plastic wrap and let it rise till double the size, about an hour.

Degas the dough gently and then transfer onto a work surface.

Preheat your  oven to 220C.

Cut the dough into 6 pieces. Roll each one into a short log, cover with a towel and let the dough relax for 5 to 10 minutes. This makes it easier to  roll it out and stretch it.

Roll each log into long ropes about as thick as your index finger, 15cm in length. You may have to let it rest as you roll/shape them.

To shape the pretzel, form the dough into a"U". Cross the ends and cross them again. They fold the crossed ends downwards. Confused? Check out THIS site for guidance.

Once all 6 have been shaped, bring a saucepan of water to boil.

Now, using either two metal spatulas or a big wire strainer (the kind you use to deep fry stuff) dip each pretzel in the boiling water (one by one) for about 10 seconds. Drain and place on a baking sheet.

Brush each one with egg wash and sprinkle with salt and any topping of your choice: poppy seed, sesame seeds, nuts, onion powder, grated parmesan, etc.

Bake for about 15 mins or till nice and golden.

Eat it while its hot!

Wednesday, September 8, 2010

Miso like this!


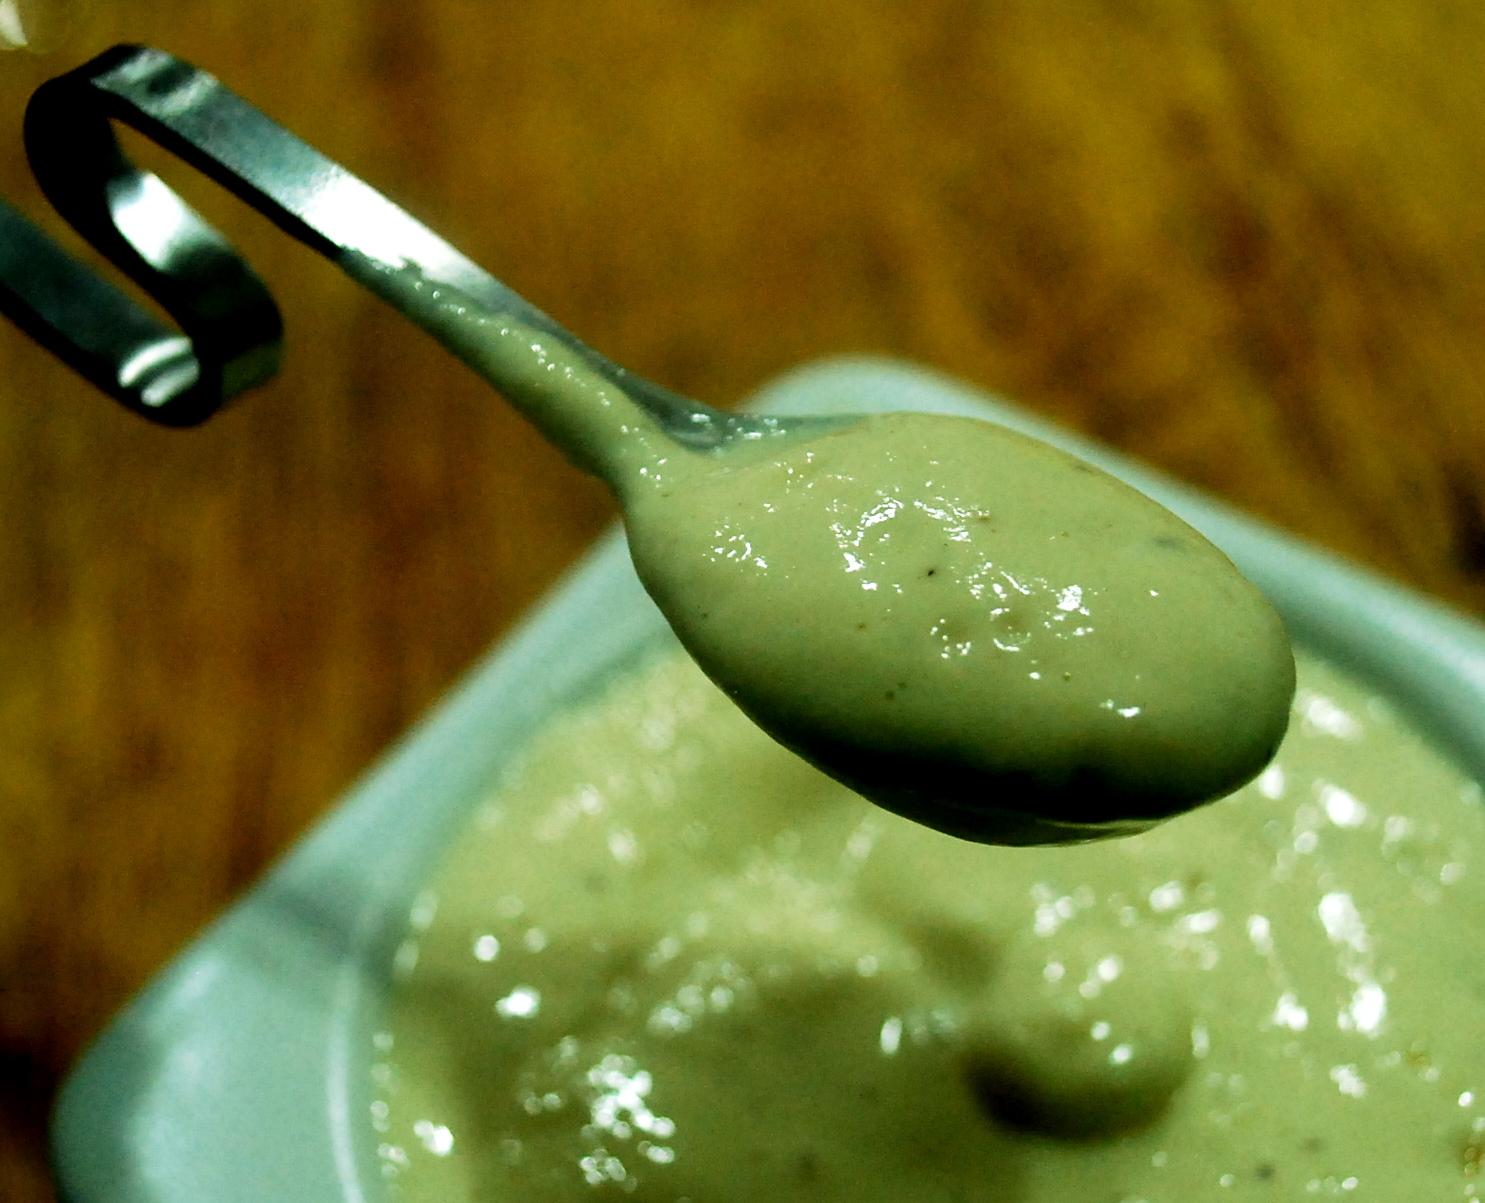
Still on a Japanese food bend,  I tried to recreate a delicious dip I had in a Japanese fusion restaurant called Shokan in Tokyo. Served with a selection of raw vegetables, the dip was so good. The earthiness of the miso blended well with the freshness of the tomato paste; the saltiness of the miso went so well with the sweetish tomato paste. It was a marriage waiting to happen.

I tried to get the recipe for the dip from the owner /head chef of the restaurant -- a friendly guy who knew just enough English to converse with us -- but he subtly evaded my prodding again and again. The dip was his own concoction and I guess he wasn't going to pass it out  to just anyone.

No matter. I remembered the taste and I thought that I should be able to come up with something similar, if not identical. Half the fun is in the trying right? (WELL, not if you read my last post about Spekkoek!)


First, I had to determine the right ratio between the tomato paste and miso. 2:1 was what I settled upon. (You may have to set your own ratio depending  on the type of miso you use and how strong it is).

What else should I use?

The tomato and miso alone tasted yummy but there was still something missing. It wasn't the same as the one I had at Shokan. I tried adding a few different ingredients: minced ginger (not bad), pepper (not great), vinegar (just a bit is actually quite nice), japanese mayonnaise (oh, so yum: with less tomato paste).

Ok, so I may not have cracked the code and replicated the dip at Shokan exactly but who cares? I still have a very tasty miso sip ... actually I have several and that's good enough for me.

Thursday, August 5, 2010

Apam balik, anyone?


Sunday morning breakfasts have always been special. As a kid, Sunday mornings meant going out as a family, first to the market for our weekly shopping and then to our favourite food stalls to buy breakfast.

From noodles to Tosai (indian pancakes) to nasi lemak (rice cooked with coconut milk and served with sambal, anchovies and peanuts), we could quite literally have anything we wanted for breakfast ... but only on Sundays.  For years, this was the highlight of our Sundays.

I now live on my own and family trips to the market aren't possible: my brother lives 200 kms away and my sister has her family to feed and care for. I still savour my Sunday mornings and though I still go to the market almost every Sunday, I only occasionally stop at the food stalls for breakfast as giving in to cravings now means extra hours at the gym to work off the extra calories. That's what happens when we hit the 30s, eh?


One of my favourite Sunday morning breakfast indulgences is the Malaysian peanut pancake or Apam Balik. It's like a bread-waffle-pancake hybrid: spongy and crispy with a delicious sweet peanut filling. There really is nothing like it.

I have never thought of making this at home... until I came across a recipe for it on dodol-mochi.blogspot.com. The photos of her Apam Balik were awesome and she made it seem like a cinch to make. All I had to do was buy some unroasted peanuts ... which I did the very next day I read her post.


If you like Apam Balik or actually if you like peanuts and waffles, you must, must try this. The skin of my Apam Balik didn't brown as evenly as I would have liked it (I blame my inferior quality skillet which doesn't distribute heat evenly ) but the pancake tasted AWESOME. Thank you dochi-mochi, I will surely make this again and again. And again.

Apam Balik

200ml tepid water

1 tsp instant yeast

100g high protein/bread flour

50g tapioca starch

1/4 tsp salt

35g castor sugar

B

2 eggs, at room temperature
60ml cooking oil
1/2 tsp air abu or alkaline water
Keep some tepid water on standby in case your batter is too thick

C

2 cups finely crushed roasted peanuts
2-3 tbsp castor sugar
roasted white sesame seeds (optional)
Salted butter, cut into small cube

Mix all the ingredients in A together and let it sit, covered, for about 60-90 mins or till the dough doubles in size. It may start bubbling after an hour or after doubling: don't panic. It's how it should be.

When it has doubled, mix all the ingredients in B together. Add it to the dough and blend well with a hand whisk. Add more water if the consistency is too thick -- it should be the same consistency as pancake batter. Let it sit for about 10 mins.

Heat a skillet and oil the base and sides. Ladle in the batter (how much depends on how thick you want your apam to be) and lower the heat to med/low. Let it cook undisturbed until the top is set and the bottom is starting to get golden. Spread a thick layer of the peanut filling on half the pancake, flip the other side over, press down with something heavy like a lid of a pot and remove.

Repeat.

Monday, August 2, 2010

Yes, I Can


This month's Don't Call Me Chef challenge put me in a real tizzy: cooking with canned food. I  admit that I always have some canned food stocked in my pantry. Usually it's a can or two of green peas (my all-time favourite can food which I featured in the column),  a can of Campbell's soup (a quick sauce/casserole solution), a can of chickpeas (when cravings leave you no time to soak dry beans overnight) and a few cans of pureed tomatoes - Italian variety tomatoes, cut and sometimes herbed are such a wonderful shortcut.

My, it does seem like I use canned food quite a bit. Anyhow, looking at my stock, I realised that nothing I had was quite exciting enough to be featured. Except the green pea because nothing compared to canned green peas. Yes, I will stand by this.

I usually feature recipes that I am inspired by but this time I decided to use this space to report on my first encounter with a canned food I am unfamiliar with. For that, I had to go grocery shopping. Oh Joy. I decided to scout around: visiting small sundry shops as well as big-chain grocery shops -- just so that I could suss out the selection.

Like a kid in a candy store (or a dude in a tool shop) I spent hours looking at canned food. The kind of food Michael Pollan would balk at. Canned beets, spinach, sliced potatoes, refried beans, sauerkraut, canned raspberries, pineapple, mandarin oranges ... the choices were endless and, mind you, that's only the vegetarian options. For meat eaters, there's more to play with: anchovies, corned beef, luncheon meat and spam.

I really wanted to buy the canned chestnuts and artichoke hearts but at RM15 a can (a small one at that) I was hesitant. Well, actually I turned around and walked the other way, down the next aisle.


I found what I wanted in my neighbourhood shop: Kedai Runcit Peng Soon. My choice was a can of fake meat or "mock chicken". Made wholly out of gluten, this was a challenge indeed. Firstly, the texture of the canned gluten is rubbery. Next, the taste is salty because of the brine in which it sits.  The canned gluten is  actually pre-cooked but you will not want to eat it as is. Salty with a tinge of chemical is not really appetizing. On the plus side,  the canned meat was visually interesting because the fake meat actually had fake chicken skin.

Anyway, to cut a long story short, I decided to make a curry with the mock chicken. While I couldn't alter the rubbery texture of the gluten, I discovered that sugar and spice can make anything nice. Cinnamon, star anise, curry powder, ginger, garlic, shallots and lemon grass and a little coconut milk made this gluten curry a tasty side dish which I ate with plain white bread.

The verdict: Would I used canned gluten again? Probably not but it isn't because the dish wasn't tasty; rather, why used a canned alternative when using fresh ingredients are not only tastier but easier?

Monday, July 12, 2010

Do you roll with bananas?


It's strange. I don't quite like eating bananas but give me banana cake or bread and I'd gladly gobble it up. But, being a fussy eater, even with banana breads and cakes I prefer it when the taste of the fruit is not all empowering and is instead tempered  with spices like cinnamon or nutmeg. I've made banana bread before but I wasn't quite satisfied because though tasty, it tasted suspiciously like cake. I have been on the lookout  for an alternate recipe. So, when I spotted a recipe for a yeasted banana bread on My Diverse Kitchen, one that seemed more bread than cake -- i.e very little sugar and a moderate measure of banana, my curiosity was piqued. Actually, more like my greed. My hopes and expectation were high as the picture of the rolls depicted  on My Diverse Kitchen was tantalising.

So, I actually made it a point to get up real early on Saturday (to beat the traffic at the morning market -- believe it or not, it gets insane after 730am!) and got myself a bunch of ripe bananas: I chose the small, sweet pisang mas because I think they cook  well.  I had all the other ingredients in my pantry already: all purpose flour, cardamom, butter, salt, sugar and yeast so I was all set.

I followed the recipe to a T, with one exception: I used instant yeast instead of active dry yeast --  a small inconsequential adjustment. The recipe was easy enough to follow but let me caution you: it takes about 3 hours to make these rolls. You need to allow the dough to rise twice and the first rise is for 2 hours. Yes, 2 hours. Anyhow, it was worth the time. The rolls turned out well. They were soft and fluffy and just a little moist. And, it looked like a football/soccer ball! How apt that the World Cup final starts in less than 6 hours!

The only problem was that I could hardly taste the banana; they tasted too much like dinner rolls. Delicious dinner rolls, no doubt,  but where'd the taste of the cup full of mashed banana go? Perhaps the bananas I bought weren't sweet enough...


Told you I was fussy. No  matter, I finished the eight rolls the recipe yielded with the help of a couple of  friends and guess what I did? I  decided to give it another go, adding more banana this time around. After all,  I reasoned, I wasn't going to eat the remaining fruit in a hurry ...

Instead of 1 cup of mashed bananas, I used close to 2 cups. I added a bit more cardamom and a little nutmeg too. This time, it was just  perfect.

Here's the recipe.

31/4 cups all purpose flour
1/2 cup lukewarm water (plus a bit more, in case)

½ cup buttermilk

1 1/2 tsp instant yeast

3/4 tsp salt

1 tsp sugar

2 tbsp butter, at room temperature

1 cup banana, mashed

1/2 tsp  cardamom powder

1/2 tsp nutmeg powder

Melted butter for brushing on rolls once they're out of the oven

Whisk together the banana, water, buttermilk, yeast, salt, sugar, cardamom,  nutmeg and butter in the bowl of your stand mixer till all the ingredients are well incorporated. Fix the dough hook attachment  and,  adding the  flour in two batches, mix  the wet and dry ingredients till a dough forms, about 5 mins. The dough should be sticky and moist.

Remover the bowl from the mixer and cover with a damp cloth. Let it sit in a warm spot, allowing the dough to rise for about 2 hours. It should double it's size and deflate. If it hasn't deflated, de-gas it gently after the two hours are up.

Flouring your hands, gently form balls (the size is up to you; mine were half the size of a tennis ball) and arrange them (touching each other) in an 8-inch round cake tin.The balls need to be the same size: they look prettier and will cook more evenly.  Cover and let the dough balls rise again for about 30 -45 mins. Bake at 180C for 30 to 40 mins or till the tops are golden.

For soft rolls, brush the top with melted butter once you've taken them out of the oven. Set aside to cool. Best eaten warm.

Thursday, July 8, 2010

Mushroom magic


I learnt my lesson the hard way. About six years ago, I was lunching with  some buds in a deli-styled eatery in KL and I ordered a mushroom burger thinking it would be a vegetarian burger made of mushrooms. The menu didn't offer a description of the burger so I assumed...

Imagine my embarrassment when the burger arrived: a huge chunk of beef patty with a generous mushroom topping and some white sauce, some variation of mayonnaise I assume. I protested, but to no avail of course. The waiter thought I was being ridiculous: who would order a burger made of mushrooms (he didn't say it but his expression shouted it!).

I pushed my plate aside, dejected, an sipped on my smoothie. Oh bother, these all-meat eateries.

Mushroom burgers are not something I conjured up, in case you are wondering. Portobello mushroom burgers are quite popular, perhaps not in our cafes. I've had them (they serve them at The Daily Grind in Bangsar Village) and I love them. You can't go wrong with mushrooms, really. Especially not the Portobello, surely a royal mushroom.

At home, I make mushroom burgers/sandwiches all the time. I either incorporate them in vege burger patties or, like the one above, I make sandwiches with a variety of mushroom fillings. The one above is made from sautéed mushrooms in a creamy cheese sauce, served with roasted tomatoes on sprouts. I usually use lettuce or salad but I had some sprouts at home and used them instead.

Cheesy Mushroom chompers

1 cups mushrooms (swiss brown, button white and fresh shiitake), separate the stems from the caps.

1/4 cup cheddar

1/4 cup parmesan (you can add blue cheese too if you feel extravagant)

4 tbsp butter

1/4 cup chopped walnuts

2 sprigs thyme

1 med onion, chopped

2 garlic cloves, minced

Chop the mushroom stems; quarter the caps.

Heat 2 tbsp butter and saute the caps with thyme, season with salt and pepper, remove and set aside.

Heat  butter. Add onions and then garlic and saute till soft. Add chopped stems and cook till soft, about 5 mins. Stir in cheese and nuts. Cook for a couple of mins.

Lay sautéed caps on baking sheet and pour half the cheesy sauce over. Bake in 180C oven for about 15 mins. Remove. Pour remaining sauce over.

Assemble the chomper: Layers of sprouts, mustard, cheesy mushrooms and roasted tomato in between sesame burger buns.

Wednesday, July 7, 2010

Give (homemade) vegannaise a shot


Ever wake up and find that you no longer like the things you used to obsess over? Well, it happens to me quite a lot. I used to love mayo, for example. I'd slather on a thick layer of mayo in all my sandwiches. So much that my Egg Mayo sandwiches looked more like Mayo cream sandwiches with egg. I'd even use Mayo to dress a salad or to spread on crackers for a snack. Mayo madness, if you will.

Then one day I woke up from a pretty unspectacular sleep and found myself turned off mayo completely. Suddenly the thought of eating raw eggs (emulsified with oil and vinegar/lemon juice) was just such a turn off and I was put off forever. Wierd, huh?

So, I substituted Mayo for mustard and home-made relishes and spreads. But sometimes there can be no substitute for mayo. An Egg Mayo sandwich needs to be an Egg Mayo sandwich. How now?

A vegan mayo, of course -- vegannaise! I remember my sister whipped up a vegan mayonaise made with tofu many years back, while I was yet a giddy teenager. It tasted good but I pooh-poohed it, opting for the original instead.  Funny how things come full circle, eh?

So I decided to make my own vegan mayo and, having tried making regular mayo before (you whisk egg yolks, dry mustard, salt and pepper and gradually add oil and watch as the mixture emulsifies in the blender) I can attest to how much easier it is to make a vegan version. It sometimes takes me a few tries before I  make  one successful batch; with the vegan version you will be guaranteed success immediately. It's that simple.

The vegan mayo is tofu-based. Hold on all you tofu haters. I guarantee, it won't be like you're spreading tofu paste on your sarnies. Nope. Mixed with mustard, lemon juice, salt and pepper (you can try variations like a curry vegan mayo with curry powder or a basil mayo) the tofu is well masked.

If tofu really is a turn off, try THIS RECIPE for almond mayo, also vegan and also tasty.

The texture of the vegan mayo is lighter than the regular mayo.

What you will need

250 gm silken tofu

1 tbsp mustard

1 tbsp sugar or honey

1 tbsp lemon juice or cider vinegar

salt and pepper

1/4 cup oil

Blend all the ingredients except the oil. Once smooth, gradually add the oil and blend till they emulsify. Voila, you have your creamy vegan mustard. You can add/reduce the sugar/sat and pepper to your taste, of course. You can add seasonings too like herbs or nuts, spices like curry powder is great too. Or tomatoes.

Monday, July 5, 2010

I wanna jam it wid you ...


I've been going jam crazy over the last couple of weeks. Mango, apricot, apple, blueberry ... I have more jam in my fridge than I know what to do with. It's easy to get carried away because it's really so easy to make jam and, trust me, homemade jams taste undescribably better than store bought ones. Check out the recipe for the mango jam I made HERE. The picture above is an apricot jam I made using organic apricots: an indulgence surely, but organic fruit (or food for that matter) is much tastier and better and I was in the mood for some superior goodness.  I used just 4 smallish apricots which yielded slightly more jam to filla 30 ml jar with. I included the recipe for the apricot Jam in this month's Don't Call Me Chef column which focused on preserved food. Click HERE for the article/recipe.

Over the course of the last couple of weeks, I've found numerous sites on jam making online that are quite  interesting. My next jam project is with tomatoes. I haven't quite completed my research on tomato jam (I kinda go crazy with "research") yet but  you could check out THIS link for a Tomato Jam which looks quite fun to make.

For simple, basic tips on making your own jam check THIS site which gives you ten tips for making the perfect jam, jelly or marmalade. It's really all you need to know if you aren't keen on trawling the net for 100 different ways to make a simple bottle of jam.

If you too, like me, have gone J-amok and have too much jam on your hands, you may want to consider baking with Jam.  I made some PEANUT BUTTER AND JAM COOKIES last week and they were an easy and tasty alternative to your standard PBJ sandwich. HERE's another pretty cookie I want to try sometime soon: Almond Linzer star cookies, they're called.

Pies and tarts are also a wonderful way of utilising your jam. I like this recipe for Italian Jam tart on The Fresh Loaf:  just click here.

If you've got any ideas, I'd love to hear them and try them too. Let's all jam together, shall we?

Saturday, July 3, 2010

The Cinderella of soy


Textured vegetarian protein or soy meal or soy meat is a forgotten delight. When I first became a vegetarian in 1989, textured soy chunks were the meat replacement staple for vegetarians: they were rich in protein and low in fat and were able to ably compensate vegetarians for the sudden loss of protein from meat.

These chunks are  made from defatted soy flour, made by extracting soybean oil. It contains no fat which is good but, on its own the chunks were quite tasteless as they contained no MSG or other artificial flavouring. My mum used to cook them in curries, seasoning the chunks with curry powder and other spices. You could still taste the strong protein of the soy, though.  Simply put, we ate them because they were good for us not because they tasted amazing or were deceptively like meat.

The popularity of soy meal took a dramatic nose dive when other, tastier meat analogues came into the forefront in the early 1990s. The alternative? Wheat gluten or seitan that is flavoured to taste like meat. Definitely a tastier option as you could replicate any meat dish using seitan. Curry Fish, Beef rendang, pork chops, vegetarian ham, butter chicken, spare ribs ... you name it, you can have it. The texture of the wheat gluten products were also more refined. If the soy meal was a little springy, the wheat gluten products were smooth and, for want of a better word, meaty.

For a while, I too was taken up by the possibilities that wheat gluten brought to the table. And, for a while, I too forgot about the humble soy meat.  Just for a while though for while gluten is tasty, eating too much gluten made me feel bloated and uncomfortable. So I began reading up on gluten and found that the protein from gluten comes from hard-to-digest protein that can cause indigestion. Check this out. While I still use  gluten-based vegetarian produce from time to time,  it's no more than once a month.

Instead, I decided to go back to soy meal and try and make it more appetising. Playing around with seasoning and cooking techniques, I admit I may have brushed off the flavour of soy meal too easily.

This soy meal burger was my first successful soy meal experiment and I do want to share my joy. Try it, you'd be surprised too.

Soy meal burger

1 cup soy meal

4 cups water

5 fresh mushrooms (shitake/swiss brown is fine)

1 clove garlic, chopped

Mixed spices *

1/2 cup cheddar cheese

1 cup breadcrumbs

salt and pepper

* I used a spice mix that Marty got me from Morocco but you can use cayenne, cumin, chilli (or curry), coriander powders or experiment with any other spice you fancy.

Boil the water in a saucepan. When it's bubbling, add the soy meal chunks and cook for a minute. Turn off the heat and let them soak in the hot water for about 5 mins. They should be soft and spongy. Drain the water, squeezing as much water from the soy chunks as you can.

Rub your spices and black pepper all over the chunks and transfer them into your food processor/blender. Pulse a couple of times till their  chunks are broken up but DO NOT  blend till smooth.

Tranfer to a bowl. Mix in the cheese and breadcrumbs and season with salt and pepper. Don't use all the breadcrumbs at a go. Use a half cup and add more if its necessary to bind the mixture together.

Form patties from the mixture, make sure you compress them tight. Place them on a lightly greased baking sheet and bake for 20-30 mins or till they're nice and golden and have firmed up. Let them cool. They may be a little soft when out of the oven but will firm up as they cool. If they're still soft after 10 mins or so, let them rest in the switched-off (this isn't a word, I know) oven for about 5-7 mins.

I assembled my burger using lettuce, apple and raisin chutney and mustard.

Sunday, June 27, 2010

Apple and raisin chutney


Originating from India, chutney is truly one of the best condiments there is. No sauce can truly compare. Sweet or spicy, chutney is your food's best friend. Southern Indians eat idli (steamed rice cakes) and thosai (Indian pancakes)  with spicy chutneys -- usually coconut, tomato or mint. Though dhal curry is also often added to make the meal less dry, chutney is undoubtedly the main attraction.

Sweet chutneys are quite different and are almost always made from fruit -- mango is a popular Indian sweet chutney --  and are eaten with Indian breads and also rice.

From India though it may be, the popularity of chutneys also spread to the West. As stories go, chutney was imported from India to Western Europe in the 17th century. These are primarily the sweet chutneys, not so much  the spicy ones.

Let's focusing on sweet chutneys for now. Actually, they're sweet-sour. The consistency of chutney is similar to salsa or relish . It almost always contains fruit or vegetables (crushed or mashed),  sugar, vinegar and onions. Other ingredients like spices are also added: cardamom, mustard seeds, cinnamon ... the choices are endless.

Basically, the ingredients are mixed and then simmered in a long, slow process. Time is what you must have when you embark on a chutney project.

The good thing about chutney is you can practucally use any fruit you wish: from strawberries to apples to tomatoes and mango -- you can create a fruit chutney of your choice and chances are it'll turn out great. You can also use blemished (not rotten) fruit: the fruit will be crushed and cooked for a looooooooooong time so it's ok.

Chutney can be chunky or smooth and can keep refrigerated for about a month.

Apple raisin chutney (from One Perfect Bite)

4 cups cooking apples (like Granny Smith),  peeled, cored and chopped.

1/2 cup water

1 cup finely chopped onions


1 tablespoon minced garlic


1 can (14.5-oz.) peeled, chopped tomatoes, undrained


3/4 cup apple cider vinegar


1 cup raisins


1/2 cup brown sugar


2 tablespoons curry powder


2 teaspoons mustard seeds


1/2 teaspoon salt


Place apples in a 3 quart pan with water and cook, covered for about 20-30 mins or  until apples are soft.
Meanwhile, combine onions, garlic, tomatoes, vinegar, raisins, sugar, curry powder, mustard seeds and salt in another heavy bottomed saucepan, low heat. Stir to mix well.
Once apples are cooked, mash apples and add to mixture in saucepan. Mix well and bring to a rolling boil over medium-high heat. Keep stirring occasionally, reducing the heat. let it simmer for about 1 hour and 15 minutes. Stir often to keep the mixture from sticking to the bottom of the pan. The chutney should be thick (though still slightly wet) when done.


Remove from heat and let it cool to room temperature. Transfer to lidded jars. It will keep in refrigerator for up to 3 weeks. It will keep in freezer up to 6 months.

Friday, June 25, 2010

Jam packed goodness


When I told my friend Shirley  I would be making jam, she asked if I'd been watching re-runs of Freinds a lot recently. You remember the episode when Monica goes mad over jam making and ends up making and bottling jars and jars  of homemade jam (and joey dipping his fingers in the mix and contaminating a couple of batches?). I wish I were Monica: that woman can cook up a storm and still look gorgeous.

Well, actually it wasn't Monica I was channeling.  Our  theme for next month's (July's) Don't Call Me Chef (a monthly column in The Star) is preserved food. Not cooking with preserved food but preserving food: it can be pickles, jam, preserved fruit ... the choices were open.  Thing is, I've never really done it before so it required quite a bit of legwork: I'm  a bit anal that way.

I decided to start my research by making a simple jam. Actually, I 've had jam on my "things I have to make)  list for quite a few years now. But though poeple say lists help you focus and achieve your goals, my lists just keep on growing ... they grow at a rate I doubt I'll ever be able to catch up. Don't believe it? I have 150 items on my "things I have to make" list!

So anyway, I did a lot of reading up on jam making and turns out it isn't complicated. Traditional jam is fruit cooked, usually to a pulp, with sugar to set. That's it. What you would need is fruit (basically any fruit you fancy though I would be wary of durian for jam!), sugar and lime/lemon juice or vinegar). Some add pectin (to set the jam and get the right consistency) but this really depends as the natural pectin from the fruit is usually quite sufficient for the jam to set.

The sugar content is usually quite high and though you, like me, may consider cutting down on the sugar (fruit is sweet, after all) you may not want to be overzealous in doing so as the sugar actually helps preserve fruit. Reducing the sugar may result in reducing the preserving power of your jam.

I chose to make mango jam simply because I love mangoes are they are in season at the moment and easily available.

Mango Jam

1 kg ripe, sweet mangoes

1 cup sugar

1 tbsp lemon juice

Peel and cube mango. Blend 3/4 of the cubed fruit to a puree. I didn't blend all the fruit as I wanted the jam a little chunky. Mix the pureed+cubed jam with the sugar in a stainless steel bowl and let it stand for 30 mins or longer (to allow the flavours to mix).

Using a heavy bottomed pan (cast iron, anodized aluminium, copper are good) so that the heat is distributed evenly and the sugar does not burn. Add the mango+sugar and cook (med to high heat), stirring ocassionally so that the mixture doesn't stick to the bottom.

The mixture will soon bubble up: big, rolling bubbles that rise up the sides of the pot. Should there be a light-coloured foam on the surface, skin it off gently. Stir every now and then. The almost jam should start to  boil down and smaller, thicker bubbles will replace the boisterous ones.  bubbles.

How long to boil? Well once it boils down and the jam starts to leave the sides of the pan, you can test the consistency  by putting a teaspoonful of the hot mixture on to a cold plate. It should set almost immediately. If it's the consistency you like, it's almost ready. If not, continue boiling for a bit.

When it reaches the consistency you like, add the lemon juice and stir it in. Turn  off the heat and  ladle the jam into the sterilised jars – douse the jars and the lid with boiling hot water. Seal the jars tight, place them upside down in about 4 inches of hot water for a few minutes to seal shut. When the jam is cool, store in a cool, dark place or in the refrigerator. The jam  should last for about 6 months  if properly sealed. Once opened it has to be refrigerated.

Thursday, June 24, 2010

Almost chunky peanut butter


Man cannot live by bread alone. He must have peanut butter ≈ Bill Cosby


I think I discovered peanut butter when I was in my teens. You're amazed? Yeah, me too. My mother never included peanut butter in her grocery lists ... ever. I don't really know why ... I never asked her. But when I was 13 or 14 I had a sleepover at a friends house and for breakfast, we were served PBJs: yeah, the all famous Peanut Butter and Jelly (Jam) sandwich.  Imagine how blown away I was. I took a while to get over my reaction to the peanut butter: what was this creamy, buttery, nutty spread that made bread taste like cake? And, wait a minute, Peanut Butter and Jelly. PBJ. That's what those kids on TV have all the time.  Cool!


And so began my love affair with PBJ which lasted about six years. Needless to say, after that sleepover, I bugged my mum to buy peanut butter for us. She acquiesced -- she couldn't bear the many, many "please, mummy, please" pleas any longer, I guess.


As I grew, I kinda ate less PBJ sandwiches though. Breakfast became a jumbo cup of thick, sweet tea and nothing more. But, if you've read this blog often enough, you know how many random cravings I have all them time and lately it's been for a PBJ: a think chunky layer of peanut butter and layered with Jam. I love store bought peanut butter; jam, not so much (they're always just too sweet). But I decided to make my own: both peanut butter and jam. I'm on vacation from work for a couple of weeks and I wanted to stay home and chill with my pal, Mojo the Dachshund.


This first installment (Part I) is making the peanut butter. It's simple and actually a lot easier than getting dressed, putting on make-up, driving to the store and buying a jar. All you need are some skinned peanuts and salt and a little sugar (optional). The sugar is optional as some peanuts are sweater than others and also because it depends on how sweet you want your PB. I  added just a tbsp  sugar as I prefered the  nutty flavour to stand out.


Homemade peanut butter


400g peanuts, skinned


4 g fine salt


2 tbsp sugar (optional)


Roast the peanuts in the oven till they're lightly toasted (just slightly brown). Add the sugar, salt and sugar in the blender and ... blend, blend, blend. The nuts will first be blended to powder and then with more blending, their natural oils will be released and the mixture will form  a paste. More blending and you will get your buttery treasure.  TIP: You may want to add the roasted nuts bit by bit (three batches) especially if yours is not a high powered blender (mine wasn't either). If you prefer your PB chunky, set some nuts aside and add them towards the end of the blending process).  Oh, and blending takes a while: about 30 mins with my ratty blender. So, while waiting for the peanuts to transform into butter, check out some PB trivia here.


Next up: Home made jam!

Wednesday, June 16, 2010

I'm on a roll


I am on the hunt. I want to find the perfect recipe for the perfect dinner roll. I love dinner rolls. Love them. (Gosh, can I gush or can I gush) From the rolls you get at  Kentucky Fried Chicken  to the real nice home made ones, dinner rolls rock. Soft, fluffy and puffy, dinner rolls need not be eaten with anything. In fact, they're best eaten alone without even any butter.

I made some wholemeal buns last week, topped with poppy seeds and they were tastey .. and healthy. But being wholemeal buns, they were a little dense. I think I still prefer my dinenr rolls with white flour.

I found a recipe on allrecipes.com that got a lot of positive reviews and so I decided to give it a go. Angie's Perfect Dinner Rolls was what they were called -- which was just ... well, perfect. I read through the recipe and was happy that the process of making the dough was pretty straighforward. The only snag was that the recipe called for four rises -- as in you mix the dough and then let it rise to double it size. Then you de-gas it and let it rise again; de-gass it again and let it rise; shape it into little balls and let it rise one last time.

Boy, I wondered if I had the patience or the time. Somehow, I always start my baking projects after 9pm -- four rises would take me at least three hours. I decided to skip one rise -- after all, some of the others who used the recipes and commented on teh site did the same and still achieved lovely results (or so they said).

I also halved the recipe since the original yielded 36 buns. What would I do with 36 buns other than put on some unsightly pounds? I ended up with 16 buns.

The buns were really tasty. They weren't puffy and only slightly fluffy (perhaps a fourth rise would have made a difference?)  but they were soft and buttery and slightly sweet.

Lovely.

Adapted from Angie's Perfect Dinner Rolls

11/4  cups warm milk

2 teaspoons active dry yeast

1/2 cup and 1 tbsp sugar

1 egg

1/4 cup butter, softened

1 teaspoons salt

3.5 cups high protein flour/all purpose flour

1/4 cup butter, melted

Warm milk till it's tepid: don't bring it to a boil. It should be just warm enough for you to  be able to stick your fingers in for ten seconds without being scalded. Sprinkle the yeast into the milk and add 1 tbsp sugar. Let it sit for 5-10 mins till yeast is activated and the mixture becomes frothy.

Beat in the sugar, eggs, softened butter (1/4 cup), and salt and mix. I used my stand mixer, using the dough hook on a low speed (4). Once blended, gradually add in the flour and continue kneading until a soft dough forms. Cover the bowl and leave it in a warm place to rise. Should take 1 hour for the dough to double in size.

Punch down the dough and cover again to rise again (another 30 -40 mins) . Repeat this step. Dough will be slightly sticky, don't panic.

Meanwhile, preheat your over to 200C.

Now, back to your dough. Pinch enough dough to form small balls (about a golf ball or slightly bigger) -- roll them into shape. Don't know how? Click here.

Place the balls close to each other in a greased baking dish. They can be almost touching each other. Cover and let rise until doubles in size -- just another 30-40 mins.

Bake rolls until it gets golden: about 10 - 15 minutes. When done, remove from oven and drizzle the 1/4 cup melted butter over them. Eat them while they're hot.

Wednesday, June 2, 2010

Saving stale bread


I don't know about you but when itc omes to bread, the biggest problem or rather, conundrum, I face is not how to bake a good loaf but what to do with stale (or about to be stale) bread? Unlike commercial bread which can keep for a week or so, home made bread keeps for four days, if you are lucky. Unless you freeze it, in which case, you can store it for a month or two or three.

Usually, I use stale bread to replenish my supply of breadcrumbs. Sometimes, while toasting the bread en route to crumbling them into crumbs I season them with a little oil and herbs or parmesan or black pepper. But I've been doing that so often now that my supply of homemade breadcrumbs is  close to obscene. Don't believe me? You know the huge peanut butter jars? Well, I have six jars of breadcrumbs. Six. Yes, six.

I needed to find some new use for stale bread because my little Dachshund Mojo (my next resort, after making breadcrumbs)  has also had enough of stale bread. I swear he rolls his eyes everytime he sees me adding the bread to his chunk of beef. Poor thang.

So, what to do with stale bread. That was my mission last night. I baked some wholemeal buns on Saturday and forgot to freeze the two leftover buns.  I needed to act quick. I decided to cut them up in strips, drizzle them with some olive oil, sprinkle with herbs and pepper (lotsa pepper) and a little salt and grill them in the oven for about ten minutes or till they were crunchy.   Good idea. These turned out wonderfully flavourful and dipping them in olive oil/balsamic vinegar would have sufficed.


But I decided to go a step further.

I tried adding pesto to the mix. Spreading it on the bread sticks or simply dipping the ends in. I had some parsley pesto in the fridge ... hmmm, pretty good.

What else. Oh, I made some almond nut butter a couple of weeks ago and had about a couple of spoonfuls left. I slathered on a thick layer on two of the strips. And I mean, a really thick layer. Oh, my.


And finally when all else fails, stale bread = crutons + soup. Never fails.

If you've got any ideas for stale bread, would love to hear em. God knows I forsee a lifetime supply...

Monday, May 31, 2010

Snack time, part one.


I am a snacker which is really the biggest challenge to any diet plan I embark on. Rice I can skip. Pasta, who needs you. Pies and tarts, I do not miss. But a bag full of nuts? Some cheezy pretzels? Crispy Indian muruku? Oh woe! Mostly I snack in front of the TV. I mean, where's the fun in watching TV if there's nothing to munch, right? Funnily enough, I don't ever eat popcorn at the cinema... don't know why! Go figure. Yes, it's the TV that really gets me going and going and going.

With the World Cup coming up in less than a week, we decided to devote  June's installment of Don't Call Me Chef  (a monthly food column I co produce with Marty Thyme and Hungry Caterpiller) to snacks fit for TV. I think it was the easiest challenge ever. There were many recipes I had to share, but I narrowed it down to one... watch for this space next Monday. Since I could only highlight one in the paper, I decided to do a run-up highlighting some of my other favourite snacks.

Am starting with sweet potato fries. They're so easy to make it's ridiculous. You need very few things: sweet potatoes (of course), salt, pepper, cayenne or paprika. Oh, and a nice, clean, scouring pad.


First, scrub the sweet potatoes clean because we're going to cook the skins along with the flesh.

All cleaned up? Great. Now it's time to cut em up. This depends on the size of your sweet potatoes. If your's are 6 inches or shorter, just cut them in half lengthwise and then into wedges.  If you have really long sweet potatoes, cut them in half horizontally before cutting them lengthwise and into wedges.

OK. Now, to season. All you need is salt, pepper and paprika/cayenne. A huge pinch of everything is good enough for one sweet potatoe. Just rub them good and proper on the wedges, making sure all of them are coated well. I was frugal with the seasoning pre-frying as I like to sprinkle some salt and pepper on the fries once they're done.

Once seasoned, heat about 1/2 cup oil in a wok/saucepan. When it's hot, lower the heat and slowly slide in the wedges. Fry till the centre is cooked. You don't have to poke them; they're usually cooked if the outside is golden and crisp.

Drain them on paper towels and sprinkle with salt and pepper before serving.

Told you it was easy!

Monday, May 24, 2010

Bun in the oven


I bake bread every weekend and each time, I try and vary my breads/buns a little by adding or substituting ingredients: basic wholemeal, multigrain buns, herbed buns (mixed italian herbs, rosemary, parsley, lavender, basil...), black pepper buns ... it's exciting trying new variations each week. One of the best parts about baking breads at home is how my house smells every weekend -- it's like I'm living in a bakery and truth be told, I've stopped spraying on perfumme after a shower on weekends because I leave the house smelling of fresh bread. A new fragrance? That's an idea!

I truly think the smell of freshly baked breads is one of the best smells in the world. It's a wholesome and awfully comforting smell; enough to make me forget any stress of the week past or to come. I actually  used to dislike the smell of yeast fermenting in the dough; now I love even that. I love watching the dough rise and I am pretty sure that I may even come to like kneading by hand and forsake the dough hook.

I'm still pretty new at bread baking but I am definitely more adept at it than I was a couple of months ago. Practice goes a long way, I guess. Still, one lesson I am constantly learning is that vigilance is key. The moment I lose my focus and decide to compromise -- i.e use chilled butter instead of waiting for it to soften at room temperature OR measure a little too little water, the result is a dough that takes a little (sometimes more than a little) too long to rise. There are some basic rules to bread baking you can never forget.

This week, I baked some herbed wholemeal buns with sesame topping. The recipe calls for 4 cups of flour (3 high proten, 1 wholemeal or 2:2), dry milk (1/4 cup), yeast (1tbsp) , butter (6 tbsp), honey (2 tbsp), water (11/2 cups) and salt (2 tsp). Instead of the 6 tbsp of butter required, I decided to use 5 tbsp + 1 tbsp  olive oil for added flavour. I added dried Italian herbs -- about 1.5 tbsp as well. The method is similar to that of the Pullman loaf. You first whisk the flours, milk and yeast in a mixing bowl. Add the softened butter/oil and mix with  the dough hook till it's intergrated. Add the water, honey and salt, up the speed of the mixer, and let the machine knead on for about 7 mins. Transfer the dough (should be a little sticky to the touch) onto a lightly floured surface, shape into a footbal, cover with cling film and let it rest for 15 mins. Uncover and pumch the dough down gently. Gently, you hear. shape it into a rectangle (the size of the pullman pan) and then turn the rectangle 90 degrees and reshape it. Fold in the sides and the edges and transfer into the pullman tin. With these buns,   you add  the herbs once the water has been added and the dough is moist. Also, instead of shaping it into a loaf, you cut it into 8 equal parts and roll and shape them into buns -- like so.

The oil was a good idea (olive oil usually always is a good idea) as it not only gave the bread flavour but made it more moist too. The herby flavour was fantastic and though I didn't do it this time, I sometimes also add a couple of tbsp of cheese (parmesan or cheddar) to the dough for even more punch and a richer loaf/bun.

I also decided to brush the tops of the buns with an egg wash (egg yolk + water) to give it a shiny, darker complexion.

Am pretty happy with the results. The buns were soft and slightly chewy, not too dense. The herby flavour and smell was therapeutic and the egg wash gave it a rich glaze.

The only thing you have to be wary about home made breads is that they don't keep for long outside or in the fridge -- 3 or 4 days is the average life of homemade breads. Unless you freeze them ... this way you can keep them for a month or so. But, chances are, you won't have to cos they're so tasty they'll be eaten up in a jiffy.

Saturday, May 8, 2010

Butter me nutty


After seeing the creamy nut butters featured in the April-May issue of Flavours (a food magazine) I knew I had to make some for myself. Homemade nut butters? Oh my, I was as excited as those pre teen and tween girls at the Tokio Hotel concert just last week.  And as I peered into the blender as the butter was being processed, I too was in tears as those screaming groupies of the German band.

I was a wreck. An emotional wreck.

I was particularly pleased because I didn't have a high-powered blender and used my reliable just-barely mid range Philips blender, praying all the while that the motor wouldn't give way. I love you, my Philips blender. Thank you.

I never realised how simple it is to make nut butters -- peanut butter, almond butter, cashew butter, hazelnut butter... you name it. All you need is some fresh good quality nuts and a little bit of salt and a sturdy blender.

The catch is that the nuts (except for the modest peanut) can be pretty expensive and making a jar of these creamy beauties can cost you close to RM12.  Oh, well. the satisfaction and the rich creamy spread you get is all the payoff you need.


What you  need is 400g of your choice nuts. I used almonds. First, you roast them in the oven: it's up to you if you want it slightly roasted or if you prefer a dark roast. I chose a dark roast. Although you can opt not to use unroasted nuts, the roasting process helps release some of the flavour from the nuts, hence your  nut butter will be richer.  So, if you want just a light roast, heat up your oven to about 120C, spread the nuts on a flat tray and roast for about 10 mins. for a dark roast, leave it about 5 mins longer or till they brown.

Remove and let cool a little. Transfer into a blender and add a pinch of salt and blend. And blend. And blend. First, will be the grinding and you will see your nuts turn to coarse powder. Blend some more and you will start seeing the crumbs get creamier, and creamier until they resemble a thick buttery paste. A high-powered blender will, naturally, yield results faster. My basic Philips took a while longer (about 20 mins) with some one minute rests in between (I really was afraid the motor would go bust).

Most store-bought nut butters have some kind of hydrogenated vegetable oil, sugar  and colouring to enhance the taste and texture. Home made nut butters are pure nut butters although you may add some like-flavoured liquers (like amaretto for the almond butter) to enhance the taste. I didn't have almaretto at home, dang-it, so mine was totally original.

So, it's goodbye peanut butter and jelly sandwiches (for a while) and ola to almond butter/jelly! Oh, and almond butter cream cookies. And almond butter slices, perhaps!

Monday, April 26, 2010

Yamburger for one, please


I've been wanting to incorporate Yam (or Taro root) in a vege patty for the longest time. I just never got around to it just like I haven't got around to a lot of things in my life ... cleaning out the store room, paying my bills, clearing my wardrobe of clothes I haven't worn in a year, etc. Butlet's get back to the yam-burger. It's nothing revolutionary nor is it particularly innovative. Instead of using boiled potatoes (as many do in a vege or non vege patty), i used steamed and then mashed yam. It's more flavourful than the spud and less starchy ... and it's perfect for binding the rest of the ingredients together.

What can you add to a yamburger? (The PIC above is the patty before it was fried btw) Well, the choices are endless. If you want it healthy, you can add some bulgar wheat, beans, wheatgerm to regular vegetables like chopped carrots, peppers, celery and the like. I retained my primary patty ingredient -- tofu -- but reduced the quantity from two whole square to just one. I chopped some carrots, red peppers, mushrooms, coriander, green chillies and wheat germ ) in place of breadcrumbs and seasoned it with oregano, pepper and salt. Oh, and chilli flakes and onion powder.


I didn't coat this patty with breadcrumbs; instead a left some wheatgerm for the cakes to lighty  roll on prior to frying. It doesn't take long to cook ... heat the oil first and when it's hot enough, slilde in the patties, reduce heat and cook till both sides are golden. Since the yams are already steamed the only thing you need to worry about is the tofu which doesn't need to cook  for long.

The result was delicious, yay! If I were to change anything, I would use more of the yam and less tofu. For this patty, I used 1 tofu, 1 cup roughly mashed yam, 1/4 cup chopped coriander, 1/2 chopped green chilli, 2 tbsp carrots, red peppers and mushrooms -- all chopped small, 1/2 cup wheat germ and more for coating, 1 tsp oregano, dash of soy sauce and salt and pepper.


Of course, you can add other vegetables and you can spice it up with some red chilli flakes too. Sometimes though, too many ingredients (like too many cooks) spoil it all. So, be mindful.

Wednesday, April 14, 2010

The ultimate veggie burger


Most vegetarian burger patties use  potatos for flavour and bulk. But, I don't like taters. They're so filling and ultimately just taste of starch. (I can feel the potato lovers aiming their  potatos to my head, Sorry!). So, whenever I experiment with vegetarian burger patties, I avoid using them spuds. This is not really a problem  because there are dozens of vegetables and beans you can use to make a fantastic vegetarian burger. And no, these patties don't mimic the original. They don't taste like meat, they taste better!

Mushrooms, carrots, garbanzo beans, cheese and spinach are what I made this patty from. I didn't mash the beans much as I wanted to be able to taste them when I bit into the patty. You can also use black beans, broad beans, corn, yam (they;re way better than potatos), tomatos, broccoli, celery ... so many vegetables. I don't think you should try cabbage, though if you succeed let me know.

Anyway, back to my dinner. I seasoned the patty with southwestern spices -- cayenne pepper, chilli pepper, paprika, ground cumin, pepper, oregano and onion and garlic powder. This combo really gave the veggie patty kick! Don't worry though, it's won't be a  drop-everything-and-rush-like-a-mad-cow-for-water hot; just spicy.

Instead of lettuce, I lay my patty on a bed of grean pea shoots. They're crunchy and real tasty; don't be put out just cos they're in the sprout family. Healthy can be tasty, people. Add some slices of tomato and, of course cheese -- cheddar or mozerella, is fine -- melted like crazy over the patty and I was good to go. Oh, and I didn't use mayonnaise. Instead I opted for a little mustard and some tomato sauce (not bottled, good grief!).

Sunday, April 4, 2010

Celebrity bread dreams


Last night, I dreamt I was trapped in a loaf of bread and could not get out. Not even Johnny Depp (he was the hero of my dreams) could cut me out of the hard-as-rock loaf of plain white pullman.


I woke up in a cold sweat.


I didn't need a dream analyst to interpret the dream.  I am fretting about my new adventure with Marty -- you've read about her here before right? My partner in Kitchen Grimes?


Well, we've decided to start a sandwich catering business, small scale of course. Miniscule actually, starting with some of our colleagues at work. Writers and designers: we eat a lot. Anyway, the idea is home made gourmet sandwiches for lunch every Monday. We offer three choices each Monday (customers have to pre-order) and everything -- from the bread to the spreads (no store bought Mayo, thank you very much) is home made.


Seeing as how I am an amateur bread maker, I am naturally nervous. What if my loaves fail? What if no one likes my bread? What if the loaf does not rise? What if ... what if... what if...


Hence the nightmare.


And that's how I ended up baking a loaf of bread at 11pm; finishing only at about 3am. I couldn't leave it to Sunday ... remember the list of "what ifs"? I made a black pepper pullman loaf for the Curried Tempeh sandwich: one of two vegetarian options on our first menu. The other is a Grilled Eggplant and Cottage Cheese on Foccacia and the non vegetarian option is a Roast Chicken and Thyme on Wholemeal.


For our first week (hopefully it won't be our last), Marty is making two sandwiches: the chicken as well as the  eggplant.  We have 23 orders in total and Marty's got two types of bread to bake and a chicken to roast. We've decided to assemble all the sandwiches together on Monday and pack them before delivering them to our colleagues. I hope we do well, because it's been a real ride so far: the planning, the experimenting on flavours and fillings, the bread making. A ride indeed.


And the name of our sandwich outfit? We're called Crazy Juliet, a name that harks back to the time when Marty and I first started working together -- more than a decade ago. Can't tell you more, but you can guess ;)


A little about the black pepper pullman. You have the usual suspects as ingredients:   active dry yeast, tepid water,  sugar,  high protein bread flour, unsalted butter,  coarse ground black pepper, salt and  milk. For the full recipe, click on the link below. Now, it's 4 am and it's time to sleep. Wonder if Mr Depp will re appear..


Black Pepper Sandwich Loaf

Related Posts with Thumbnails