Showing posts with label Western. Show all posts

Friday, August 13, 2010

Cloudy with NO chance of meatballs.


Neatballs? I went online to see the kitchen exploits of fellow vegetarian cooks and came across several sites featuring recipes for Neatballs. One click later and I realised neatballs is a term that's been coined for vegan meatballs.

Why "Neat"?  Well, the "N" represents the "normal" ingredients that go into a neatball. Normal as in common, everyday, easy to find ingredients. Seriously?

A neatball is really a new-fangled way of saying vegetarian or vegan koftas. Instead of ground meat as the base, vegetarians use beans, tofu, nuts, mushrooms, eggplant or pulses as the base for their balls/cutlets. The different base ingredients determine not only the taste of your cutlet but also the texture. Using eggplant, for example, will yield you a smooth, soft cutlet while a nut-bean combo will give you a rough, crunchy texture. Mushrooms, of course, make anything taste good :)


Mushrooms are my favourite base ingredient for vegetarian koftas. And, unlike most recipes using mushroom, with koftas, I find the stems more useful than the caps so I buy the king oyster mushrooms (the one where the stems are at least a couple of inches thick and the caps are tiny and pale) and mix them with some shitake (stems and caps). The stems give you the koftas a kind of toughness you won't find with most vegetables.

I drained the mushrooms (about 2 cups)  and roughly chopped them up. Next, I seasoned them with just salt and pepper and dry roasted them for about 30 mins (150C). Let them cool.

Once cool, mix the caps with other ingredients of choice: I used walnuts (1/4 cup), some carrots (1/2 cup), parsley (a handful, chopped) and eggplant (1/2 cup, lightly roasted) and blend them till they are slightly pureed -- allow for some chunkiness. Add some mash potato (1 potato) and breadcrumbs (just 1/2 cup, optional) and season with oregano, soy sauce, salt and pepper. Roll into balls, and you're set.

Bake at 180C for 20 mins or till they're nice and browned. I cooked my koftas in a tomato-based stew and ate it with spaghetti but I kept several aside to eat on their own for my dinner tomorrow. They're that tasty ..

Tuesday, July 27, 2010

Cereal killer


I was inspired by crack (pie). Haven't heard of crack pie? Well neither had I until my colleague and fellow blogger Marty brought a deliciously sinful plate of pie to work and declared that it was called Crack Pie.

A Momofuku creation, Crack Pie is essentially all butter and sugar on a homemade oatmeal crust (read more here). Oh Marty, how you tempt me. She  made the pie to collaborate with another colleague and fellow blogger, The Hungry Caterpillar who was doing a review of the Momofuku cookbook. This is beginning to sound all too confusing isn't it? Simply put, I jumped on the Momofuku bandwagon minutes after perusing the book and corresponding website. You will too, if you dare to check it out.

So anyway, I was attracted to the Cereal milk panna cotta recipe. Why did I find it so appealing? Firstly, the idea of using cereal milk -- not the cereal itself mind you, just the milk you steep them in -- was intriguing.  The pana cotta itself uses very little sugar -- less than a tbsp -- so the flavour is really from the cereal.  A breakfast dessert if you will.

Now the other attraction to this recipe is the garnishes: caramelised corn flakes and a slab of home-modified chocolate dubbed, the Chocolate Hazelnut Thing (chocolate with hazelnut praline and caramelised cornflakes in it -- oh yum).


I have to apologise for my picture which barely does any justice to the recipe. To see a more aestheically pleasing version of the dessert, click HERE.

The panna cotta is also served with an avocado puree but I prefered mine without it.

Here's how you do it. Be warned, there are more than a couple of steps to the recipe but they're really easy to follow and pretty quick to execute.

Cereal panna cotta

First, toast  4 cups of corn flakes lightly in the oven (150C) for about 10 to 15 mins. Then, mix 2 cups of milk with 2 cups of heavy cream in a bowl. Add the cups of cereal to the milk + cream mixture and steep for 45 mins. Now, strain the milk from the cereal (get as much of the milk out). Now, add 3/4 tbsp  sugar and a pinch of salt to the milk heat the milk+cream mixture slowly until the sugar dissolves. Keep stirring.

Set aside 1 tbsp agar agar flakes or 1/2 tbsp agar agar powder in a bowl. As the milk+cream+sugar heats up, ladle some of it into the bowl with the agar-agar and let it dissolve. Once done, whisk soaked gelatin back into remaining milk + cream mixture. Strain the mixture so that any undissolved bits of agar agar or sugar are containes and pour the liquid into wither ramekins or wine/cocktail glasses. Refrigerate until set (at least 2 hours).

Chocolate hazelnut thing

Part A: Caramelised corn flakes

Mix 1 cup of corn flakes + 2 tbsp sugar + 2 tbsp millk powder. Spread the coated flakes out on a tray and bake (120C) for about 15 mins or until it's a deep golden colour. Set aside.

Part B: Hazelnut Praline

Roast 1/2 cup skinned hazelnuts till they're nice and toasty. Set aside.  Heat 3/4 cup sugar on the stove (low heat) until it melts and becomes a syrup. Add the nuts and stir the mix so the nuts are nicely coated. Turn off and let the sugar+nuts cool.

Blend or pound the mixture  to a paste/powder. Set aside.

Part 3: Melting the chocolate and assembling all parts

Choose a choclate of your choice: plain or one with a nutty flavour would be good. Melt the chocolate in a stainless steel bowl over simmering water. Once melted, add the praline and caramelised corn flakes and spread the mixture on a tray. (I kept aside some of the praline  powder to sprinkle on the panna cotta seperately). Freeze till it sets and break it up into pieces.


Once the panna cotta and the chocolate are set, it's time to put the sum of all parts together and enjoy the fruit of your labour :)

Monday, July 19, 2010

Guarding my cuppa (corn)


Corn is one of my all-time  favourite comfort food. Simple steamed sweet corn, seasoned with salt, pepper and a sprinkling of herbs and eaten out of a cup in front of the TV.  It has to be that way, only then is it my perfect comfort indulgence.

Strangely, I haven't much eaten steamed corn in a while. It's not that everything's all hunky dory with my life; more like I've been too spoilt for choice these days and consumed by my newfound hobby: baking.

Still, you never can forget true love and it took very little to jog my taste buds into attention. Last Friday, after watching the almost unbearable new Predators flick starrting Adrien Brody (this is totally my opinion, of course), I was feeling completely unfulfilled. Wish Arnie would stop mucking about and get back to Hollywood already. Anyways, as I was walking petulantly down to the carpark, I spotted a food stall selling steamed sweet corn. Now, steamed sweet corn as a "fast food" snack emerged sometime in the late 1980s. Back then, a cup was only RM1. This little stall was selling a really small cup for RM3.5o. Sure, there were many flavours (compared to thos days when the choice of seasoning was only salt and pepper. This exhorbitant corn had several choices of flavours: original (salt), lemon and pepper, cheese and lemon and chilli.

I stuck to the original. Not because I lack a sense of adventure but rather, I've learnt that when it comes to corn, it doesn't pay to be adventurous. A couple of years ago while traveling in India, I tried a local version of steamed corn: masala (mixed spice) corn. It wasn't vile but I vowed never to try exotic flavoured corn. The masala spices overpowered the natural flavour of the sweet corn and I tasted all spice and no corn.

From then, corn went only with salt and pepper ... and melted butter, of course. Last night, I decided to throw caution to the wind (am exagerating, come on!) and added some fresh thyme to the corn once it had steamed. Lovely. So for now, subtle hints of herbs are an accepted extra to my cuppa sweet corn.

A case for mushrooms


I have way too many cookbooks. Some of these cookbooks I inherited but most of them I bought. I have so many that there are some I haven't used -- sure, I've browsed through them but haven't tested the recipes.

Since we started reviewing cookbooks for Don't Call Me Chef column in StarTwo (together with Marty Thyme and The Hungry Caterpillar), I've accumulated even more cookbooks. Yowza!

So, for today's review, I decided to unearth a cookbook I bought about six months ago at a book sale dubbed the Big Bad Wolf sale: the Good Housekeeping Step-By-Step Cookbook. The 460-odd paged book is an essential for beginner cooks as it has step-by-step instructions on basic but fundamental cooking techniques with recipes to accompany.

But it is also a keeper for those of us who know a little about cooking and are  learning: especially Asian cooks who need to know the fundamentals of western cooking styles using Western flavouring.

From jams to pot roasts, chocolate brownies to paella, the cook book is replete with recipes to try out. For the column in the newspaper, I tested two recipes, one for herbed butter and another for a basic lemon cheesecake. Read the full review and get the recipes HERE.

Having tried the two recipes, I wasn't quite done with the book. There were several other recipes I wanted to try: tomato sauce, chilli sauce, the sweet mocha bread (which looked divine), the chocolate chip cookies (if this book could guide me to baking great cookies, it's definitely gold-star worthy as I am hopeless at cookies) and many more.

I started with the recipe for Mushroom Baskets simply because I love mushrooms and had some on hand.  They're really tasty (you can't really go wrong with mushrooms) and though the baskets in the recipe are individual meal-sized portions, they'd make really good canapés if you make downsize them to tartlets.


There are just two steps to these baskets: Step 1 is making and pre- baking the pastry and Step 2 is making the mushroom filling.

Pastry

250 g plain flour

150g chilled butter, cubed

1 large egg

Crumble the butter in the flour till it resembles fine breadcrumbs. Add egg and mix (by hand or pulse in a food processor) till the mixture comes together. Knead lightly on a floured surface and shape into six balls. Wrap and chill for 30 mins. Once chilled, roll the pastry out on a floured work surface (big enough to fully line the tart tins) and line the tins (loose based tart tins are recommended) . Prick the base with a fork and chill for 20mins. Heat the oven to 200C. Line the base of the cases with parchment paper and fill with beans. Blind bake for 10 mins. Remove the beans and bake for a further 5 mins or till cooked. reduce oven temp to 180C.

Making the filling

15g dried mushroom

50g butter

2 onions, finely chopped

450g mixed mushrooms, sliced

1 clove garlic, cruched

300 ml med-dry sherry (I used red wine)

250 gm double cream

salt and ground black pepper

fresh thyme to garnish

Soak the dried mushrooms in boiling water for 10 mins. Heat the butter in a pan and add the onions. Cook for 10 mins. Add the fresh mushrooms and garlic and cook for 5 mins. Remove from pan and set aside.

Put the dried mushrooms and the liquid (about a cup) in a pan with the sherry. Bring to a boil, bubble for 10 mins and add the cream. Cook till it becomes syrupy.

To serve

Put the pastry cases in the oven to heat them up, about 5 mins. Add the cooked fresh mushrooms to the sauce  and season on low heat. Pour into cases and garnish with thyme.

Monday, July 12, 2010

Do you roll with bananas?


It's strange. I don't quite like eating bananas but give me banana cake or bread and I'd gladly gobble it up. But, being a fussy eater, even with banana breads and cakes I prefer it when the taste of the fruit is not all empowering and is instead tempered  with spices like cinnamon or nutmeg. I've made banana bread before but I wasn't quite satisfied because though tasty, it tasted suspiciously like cake. I have been on the lookout  for an alternate recipe. So, when I spotted a recipe for a yeasted banana bread on My Diverse Kitchen, one that seemed more bread than cake -- i.e very little sugar and a moderate measure of banana, my curiosity was piqued. Actually, more like my greed. My hopes and expectation were high as the picture of the rolls depicted  on My Diverse Kitchen was tantalising.

So, I actually made it a point to get up real early on Saturday (to beat the traffic at the morning market -- believe it or not, it gets insane after 730am!) and got myself a bunch of ripe bananas: I chose the small, sweet pisang mas because I think they cook  well.  I had all the other ingredients in my pantry already: all purpose flour, cardamom, butter, salt, sugar and yeast so I was all set.

I followed the recipe to a T, with one exception: I used instant yeast instead of active dry yeast --  a small inconsequential adjustment. The recipe was easy enough to follow but let me caution you: it takes about 3 hours to make these rolls. You need to allow the dough to rise twice and the first rise is for 2 hours. Yes, 2 hours. Anyhow, it was worth the time. The rolls turned out well. They were soft and fluffy and just a little moist. And, it looked like a football/soccer ball! How apt that the World Cup final starts in less than 6 hours!

The only problem was that I could hardly taste the banana; they tasted too much like dinner rolls. Delicious dinner rolls, no doubt,  but where'd the taste of the cup full of mashed banana go? Perhaps the bananas I bought weren't sweet enough...


Told you I was fussy. No  matter, I finished the eight rolls the recipe yielded with the help of a couple of  friends and guess what I did? I  decided to give it another go, adding more banana this time around. After all,  I reasoned, I wasn't going to eat the remaining fruit in a hurry ...

Instead of 1 cup of mashed bananas, I used close to 2 cups. I added a bit more cardamom and a little nutmeg too. This time, it was just  perfect.

Here's the recipe.

31/4 cups all purpose flour
1/2 cup lukewarm water (plus a bit more, in case)

½ cup buttermilk

1 1/2 tsp instant yeast

3/4 tsp salt

1 tsp sugar

2 tbsp butter, at room temperature

1 cup banana, mashed

1/2 tsp  cardamom powder

1/2 tsp nutmeg powder

Melted butter for brushing on rolls once they're out of the oven

Whisk together the banana, water, buttermilk, yeast, salt, sugar, cardamom,  nutmeg and butter in the bowl of your stand mixer till all the ingredients are well incorporated. Fix the dough hook attachment  and,  adding the  flour in two batches, mix  the wet and dry ingredients till a dough forms, about 5 mins. The dough should be sticky and moist.

Remover the bowl from the mixer and cover with a damp cloth. Let it sit in a warm spot, allowing the dough to rise for about 2 hours. It should double it's size and deflate. If it hasn't deflated, de-gas it gently after the two hours are up.

Flouring your hands, gently form balls (the size is up to you; mine were half the size of a tennis ball) and arrange them (touching each other) in an 8-inch round cake tin.The balls need to be the same size: they look prettier and will cook more evenly.  Cover and let the dough balls rise again for about 30 -45 mins. Bake at 180C for 30 to 40 mins or till the tops are golden.

For soft rolls, brush the top with melted butter once you've taken them out of the oven. Set aside to cool. Best eaten warm.

Thursday, July 8, 2010

Mushroom magic


I learnt my lesson the hard way. About six years ago, I was lunching with  some buds in a deli-styled eatery in KL and I ordered a mushroom burger thinking it would be a vegetarian burger made of mushrooms. The menu didn't offer a description of the burger so I assumed...

Imagine my embarrassment when the burger arrived: a huge chunk of beef patty with a generous mushroom topping and some white sauce, some variation of mayonnaise I assume. I protested, but to no avail of course. The waiter thought I was being ridiculous: who would order a burger made of mushrooms (he didn't say it but his expression shouted it!).

I pushed my plate aside, dejected, an sipped on my smoothie. Oh bother, these all-meat eateries.

Mushroom burgers are not something I conjured up, in case you are wondering. Portobello mushroom burgers are quite popular, perhaps not in our cafes. I've had them (they serve them at The Daily Grind in Bangsar Village) and I love them. You can't go wrong with mushrooms, really. Especially not the Portobello, surely a royal mushroom.

At home, I make mushroom burgers/sandwiches all the time. I either incorporate them in vege burger patties or, like the one above, I make sandwiches with a variety of mushroom fillings. The one above is made from sautéed mushrooms in a creamy cheese sauce, served with roasted tomatoes on sprouts. I usually use lettuce or salad but I had some sprouts at home and used them instead.

Cheesy Mushroom chompers

1 cups mushrooms (swiss brown, button white and fresh shiitake), separate the stems from the caps.

1/4 cup cheddar

1/4 cup parmesan (you can add blue cheese too if you feel extravagant)

4 tbsp butter

1/4 cup chopped walnuts

2 sprigs thyme

1 med onion, chopped

2 garlic cloves, minced

Chop the mushroom stems; quarter the caps.

Heat 2 tbsp butter and saute the caps with thyme, season with salt and pepper, remove and set aside.

Heat  butter. Add onions and then garlic and saute till soft. Add chopped stems and cook till soft, about 5 mins. Stir in cheese and nuts. Cook for a couple of mins.

Lay sautéed caps on baking sheet and pour half the cheesy sauce over. Bake in 180C oven for about 15 mins. Remove. Pour remaining sauce over.

Assemble the chomper: Layers of sprouts, mustard, cheesy mushrooms and roasted tomato in between sesame burger buns.

Wednesday, July 7, 2010

Give (homemade) vegannaise a shot


Ever wake up and find that you no longer like the things you used to obsess over? Well, it happens to me quite a lot. I used to love mayo, for example. I'd slather on a thick layer of mayo in all my sandwiches. So much that my Egg Mayo sandwiches looked more like Mayo cream sandwiches with egg. I'd even use Mayo to dress a salad or to spread on crackers for a snack. Mayo madness, if you will.

Then one day I woke up from a pretty unspectacular sleep and found myself turned off mayo completely. Suddenly the thought of eating raw eggs (emulsified with oil and vinegar/lemon juice) was just such a turn off and I was put off forever. Wierd, huh?

So, I substituted Mayo for mustard and home-made relishes and spreads. But sometimes there can be no substitute for mayo. An Egg Mayo sandwich needs to be an Egg Mayo sandwich. How now?

A vegan mayo, of course -- vegannaise! I remember my sister whipped up a vegan mayonaise made with tofu many years back, while I was yet a giddy teenager. It tasted good but I pooh-poohed it, opting for the original instead.  Funny how things come full circle, eh?

So I decided to make my own vegan mayo and, having tried making regular mayo before (you whisk egg yolks, dry mustard, salt and pepper and gradually add oil and watch as the mixture emulsifies in the blender) I can attest to how much easier it is to make a vegan version. It sometimes takes me a few tries before I  make  one successful batch; with the vegan version you will be guaranteed success immediately. It's that simple.

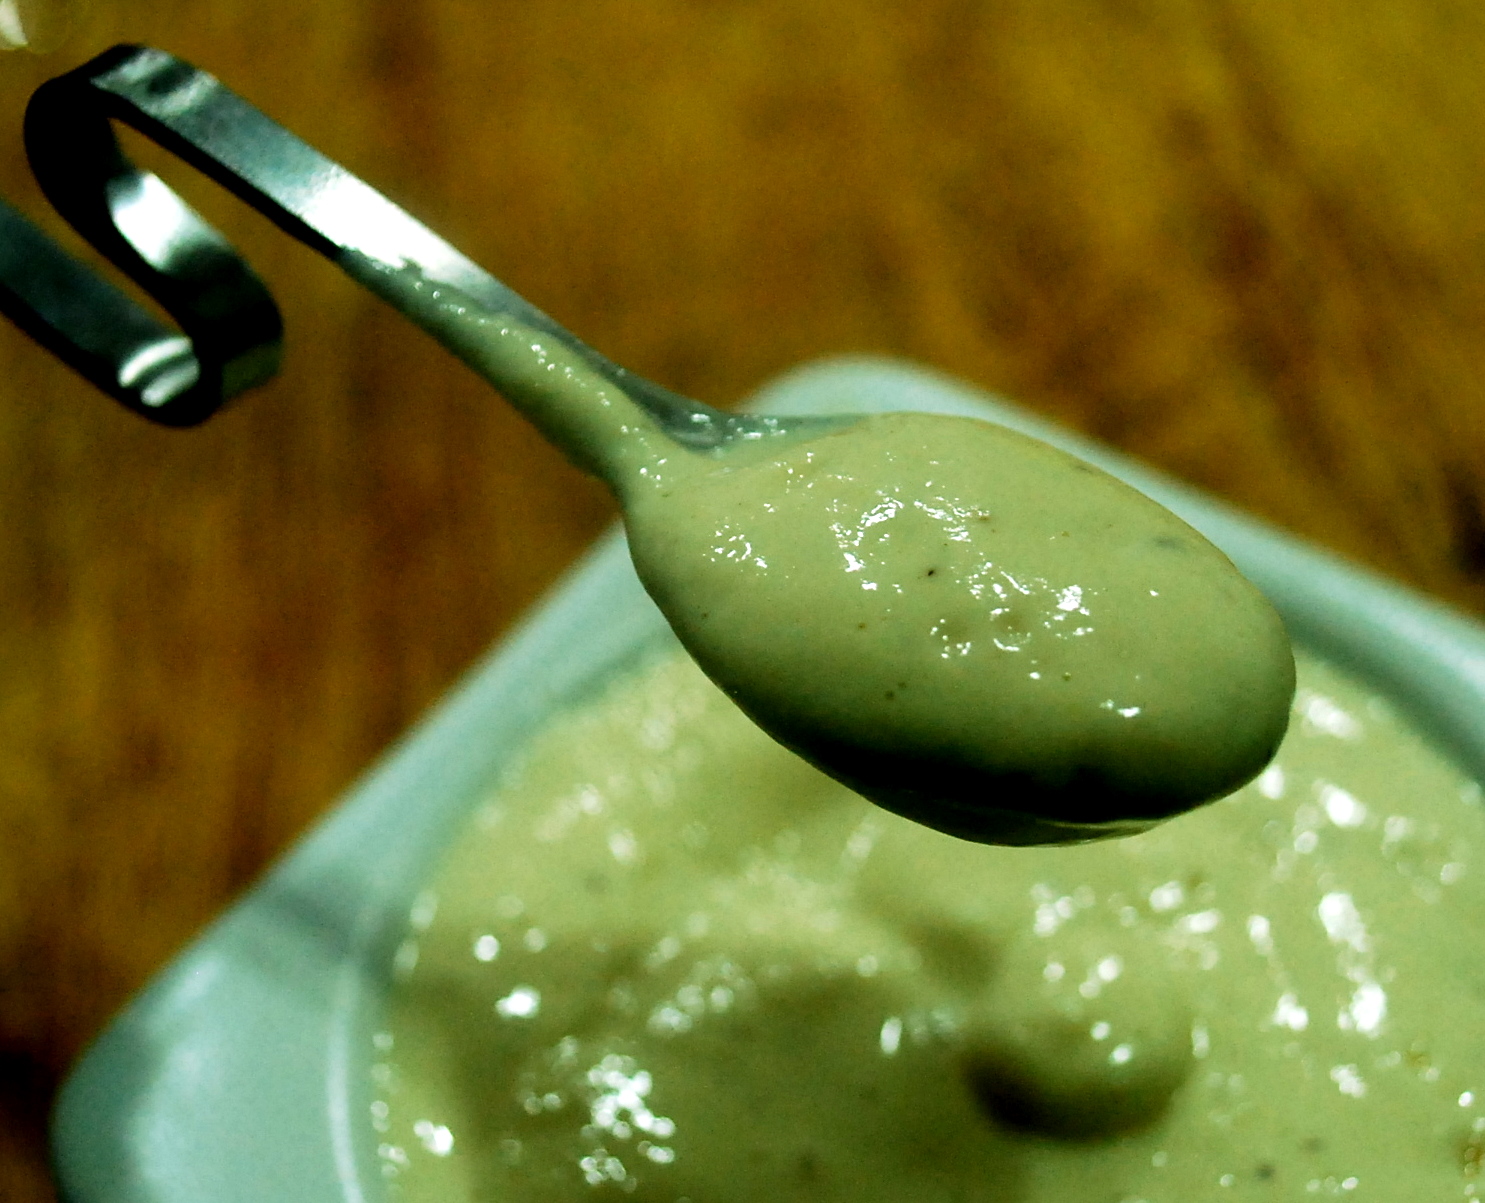
The vegan mayo is tofu-based. Hold on all you tofu haters. I guarantee, it won't be like you're spreading tofu paste on your sarnies. Nope. Mixed with mustard, lemon juice, salt and pepper (you can try variations like a curry vegan mayo with curry powder or a basil mayo) the tofu is well masked.

If tofu really is a turn off, try THIS RECIPE for almond mayo, also vegan and also tasty.

The texture of the vegan mayo is lighter than the regular mayo.

What you will need

250 gm silken tofu

1 tbsp mustard

1 tbsp sugar or honey

1 tbsp lemon juice or cider vinegar

salt and pepper

1/4 cup oil

Blend all the ingredients except the oil. Once smooth, gradually add the oil and blend till they emulsify. Voila, you have your creamy vegan mustard. You can add/reduce the sugar/sat and pepper to your taste, of course. You can add seasonings too like herbs or nuts, spices like curry powder is great too. Or tomatoes.

Sunday, June 27, 2010

Apple and raisin chutney


Originating from India, chutney is truly one of the best condiments there is. No sauce can truly compare. Sweet or spicy, chutney is your food's best friend. Southern Indians eat idli (steamed rice cakes) and thosai (Indian pancakes)  with spicy chutneys -- usually coconut, tomato or mint. Though dhal curry is also often added to make the meal less dry, chutney is undoubtedly the main attraction.

Sweet chutneys are quite different and are almost always made from fruit -- mango is a popular Indian sweet chutney --  and are eaten with Indian breads and also rice.

From India though it may be, the popularity of chutneys also spread to the West. As stories go, chutney was imported from India to Western Europe in the 17th century. These are primarily the sweet chutneys, not so much  the spicy ones.

Let's focusing on sweet chutneys for now. Actually, they're sweet-sour. The consistency of chutney is similar to salsa or relish . It almost always contains fruit or vegetables (crushed or mashed),  sugar, vinegar and onions. Other ingredients like spices are also added: cardamom, mustard seeds, cinnamon ... the choices are endless.

Basically, the ingredients are mixed and then simmered in a long, slow process. Time is what you must have when you embark on a chutney project.

The good thing about chutney is you can practucally use any fruit you wish: from strawberries to apples to tomatoes and mango -- you can create a fruit chutney of your choice and chances are it'll turn out great. You can also use blemished (not rotten) fruit: the fruit will be crushed and cooked for a looooooooooong time so it's ok.

Chutney can be chunky or smooth and can keep refrigerated for about a month.

Apple raisin chutney (from One Perfect Bite)

4 cups cooking apples (like Granny Smith),  peeled, cored and chopped.

1/2 cup water

1 cup finely chopped onions


1 tablespoon minced garlic


1 can (14.5-oz.) peeled, chopped tomatoes, undrained


3/4 cup apple cider vinegar


1 cup raisins


1/2 cup brown sugar


2 tablespoons curry powder


2 teaspoons mustard seeds


1/2 teaspoon salt


Place apples in a 3 quart pan with water and cook, covered for about 20-30 mins or  until apples are soft.
Meanwhile, combine onions, garlic, tomatoes, vinegar, raisins, sugar, curry powder, mustard seeds and salt in another heavy bottomed saucepan, low heat. Stir to mix well.
Once apples are cooked, mash apples and add to mixture in saucepan. Mix well and bring to a rolling boil over medium-high heat. Keep stirring occasionally, reducing the heat. let it simmer for about 1 hour and 15 minutes. Stir often to keep the mixture from sticking to the bottom of the pan. The chutney should be thick (though still slightly wet) when done.


Remove from heat and let it cool to room temperature. Transfer to lidded jars. It will keep in refrigerator for up to 3 weeks. It will keep in freezer up to 6 months.

Thursday, June 24, 2010

Almost chunky peanut butter


Man cannot live by bread alone. He must have peanut butter ≈ Bill Cosby


I think I discovered peanut butter when I was in my teens. You're amazed? Yeah, me too. My mother never included peanut butter in her grocery lists ... ever. I don't really know why ... I never asked her. But when I was 13 or 14 I had a sleepover at a friends house and for breakfast, we were served PBJs: yeah, the all famous Peanut Butter and Jelly (Jam) sandwich.  Imagine how blown away I was. I took a while to get over my reaction to the peanut butter: what was this creamy, buttery, nutty spread that made bread taste like cake? And, wait a minute, Peanut Butter and Jelly. PBJ. That's what those kids on TV have all the time.  Cool!


And so began my love affair with PBJ which lasted about six years. Needless to say, after that sleepover, I bugged my mum to buy peanut butter for us. She acquiesced -- she couldn't bear the many, many "please, mummy, please" pleas any longer, I guess.


As I grew, I kinda ate less PBJ sandwiches though. Breakfast became a jumbo cup of thick, sweet tea and nothing more. But, if you've read this blog often enough, you know how many random cravings I have all them time and lately it's been for a PBJ: a think chunky layer of peanut butter and layered with Jam. I love store bought peanut butter; jam, not so much (they're always just too sweet). But I decided to make my own: both peanut butter and jam. I'm on vacation from work for a couple of weeks and I wanted to stay home and chill with my pal, Mojo the Dachshund.


This first installment (Part I) is making the peanut butter. It's simple and actually a lot easier than getting dressed, putting on make-up, driving to the store and buying a jar. All you need are some skinned peanuts and salt and a little sugar (optional). The sugar is optional as some peanuts are sweater than others and also because it depends on how sweet you want your PB. I  added just a tbsp  sugar as I prefered the  nutty flavour to stand out.


Homemade peanut butter


400g peanuts, skinned


4 g fine salt


2 tbsp sugar (optional)


Roast the peanuts in the oven till they're lightly toasted (just slightly brown). Add the sugar, salt and sugar in the blender and ... blend, blend, blend. The nuts will first be blended to powder and then with more blending, their natural oils will be released and the mixture will form  a paste. More blending and you will get your buttery treasure.  TIP: You may want to add the roasted nuts bit by bit (three batches) especially if yours is not a high powered blender (mine wasn't either). If you prefer your PB chunky, set some nuts aside and add them towards the end of the blending process).  Oh, and blending takes a while: about 30 mins with my ratty blender. So, while waiting for the peanuts to transform into butter, check out some PB trivia here.


Next up: Home made jam!

Monday, June 14, 2010

Believe it: an avocado + chocolate cake


Avocado? Are you puzzled? I couldn't quite believe it myself when I saw a recipe for an Avocado Chocolate cake on Joy the Baker recently.  I mean I love avocado but so far, I've had it as a dip, a spread and in salads. But in a cake and frosting?

I bookmarked the recipe about a week ago and even bought some avocados: they were going at RM2.70 each: a steal by KL standards. Today, despite having to go into work (on a Sunday, can you beat that?) and despite having to bake 18 buns and a meatloaf for Crazy Juliet's orders tomorrow I decided to bake the Avocado Chocolate cake. I wasn't convinced yet but I was mighty curious.

There were a few things I was concerned about: although carrots go amazingly well  in cake, would avocados confuse things? I decided to google -- wonderful thing the internet, you can find answers to almost any question you have. I discovered that the avocado+ chocolate combo isn't exactly alien (as it was to me). There were pages and pages of recipes for avocado+chocolate mousse, avocado+chocloate shakes, avocado+chocolate cup cakes, pudding... you name it. There was even a recipe for a banana+avocado+chocolate cake. Holey moley!

I followed Joy the Baker's recipe for the cake but I reduced the sugar and altered the recipe for the  frosting just a little. Also, she made hers a double layered cake but I was a little lazy and decided to make mine a single layered one.

My verdict. The best, best part about this cake is the texture. It's the most moist chocolate cake I have ever tasted. So moist and yummy. Not surprising I suppose, given the rich, creamy texture of avocados. And, it's also pitch black .. well, daaaaaaaaaark chocolate!   You can't really taste the avocado, although there is a distinct taste about this chocolate cake that sets it apart.

Even though I reduced the sugar, I found the cake a little too sweet with the  frosting. Next time, I will put next to no sugar in the frosting and perhaps reduce the sugar in the cake some more.

Oh yes, the cake has no butter and is therefore vegan but the frosting has cheese!
Chocolate Avocado Cake (adapted from Joy the Baker)

3 cups all-purpose flour

6 tbsp  cocoa powder

1/2 teaspoon salt

2 teaspoons baking powder

2 teaspoons baking soda

1.5 cups granulated sugar

1/4 cup vegetable oil

1/2 cup soft avocado, mashed

2 cups water

2 tbsp white vinegar

2 tsp vanilla extract

Preheat oven to 180C.  Grease an  8 inch round tin and set aside.

Sift together the flour, cocoa, salt, baking powder and soda. Set aside.

Mix the water, oil, vinegar, mashed avocado and vanilla and mix well. Add the sugar and mix well again. Pour the wet mixture into the bowl of your stand mixer and using a low speed (4-6) add the flour mix gradually and mix till smooth. Remove and pour into baking tin. Bake for 30-40 mins or till a tester comes out clean.

Butter cream frosting

4 oz cream cheese

2 oz butter

3 tbsp mashed avocado

2 tbsp lemon juice

1 cup icing sugar

Using a paddle attachement, mix the cream cheese and butter till light and fluffy. Add the avocado, lemon juice and the sugar (gradually) and mix till well incroporated. Remove and chill till you're ready to ice the cake. The lemon will prevent the avocado from browning.

Wednesday, June 9, 2010

Snack, crackle and pop, pop, pop!


I don't get why our cinemas don't serve salty popcorn! They used to ... about ten years ago but all we have now is the sweet caramel flakes. Urrrgh. If that's not discrimination, I don't know what is? Not everyone has a sweet tooth after all.

Anyway, no use complaining as popping popcorn at home is easier than frying an egg ... I  mean seriously. And it's a lot cheaper than buying a carton at the cinemas. Since I watch a lot of movies at home (my DVD collection is insane), I can have my salted popcorn at the (home) movies anytime I wish.

It takes less than fifteen minutes from start to finish and it could take about the same time to polish off  a bucketful of the salty flakes. What you need? A medium sized sauce pan with a lid; 3 tbsp vegetable oil; butter (melted); salt and black pepper and corn kernels (of course: be sure not to get the ones for the microwave!).

Heat the oil in the saucepan and add a couple of kernals and cover the saucpan. When you hear the kernals pop (its loud enough, don't worry), fill the saucepan with about 1/3 cup kernels (there should just be a thin layer of kernals at the base of the pan). Cover and let them pop, pop and pop; shaking the pan from time to time.

When the popping stops, remove from fire immediately. The hot oil in the pan will work on the  kernels that have yet to pop.

Melt butter and add salt. Pour the melter butter over the popcorn, sprinkle some pepper and toss to coat it as evenly as possible.


Now,  as easy as it is, there are a few things to look out for.

* Don't let the oil heat up too much --  you'll end up with partially popped kernels with hard centers.

* Not too low heat either as you will end up with some  entirely unpopped kernels

* Not too many kernels in a pan. Just one layer at the base of a saucepan.

* Pop them with oil, not butter unless burnt is your flavour of choice!


If you are more adventurous and like sweet or unusual seasonings for your popcorn, visit Marty Tyme's blog. For our recent Don't Call Me Chef coloum (a monthly food column I co produce with Marty and The Hungry Catterpiller in The Star) Marty tried three flavours of popcorn which  were interesting to say the least. She even made a trail-mix pop corn! That Marty ...

Sunday, June 6, 2010

Homemade cheese, louise!


My mother used to make butter and ghee and though she never said it, I could tell that it gave her great satisfaction. It wasn't a matter of economics; rather it was a desire to consumme less preservatives (yes, butter has preservatives which allows us to keep it for a long time, albeit refrigerated). At the time, I admired her for it although I don't think I fully realised the satisfaction she got from it.

Yesterday, I made my own ricotta cheese and all at once I understood.  For me, it was partly  economics that prompted me to try it (it is much cheaper to make ricotta than buy it). I also was curious. If I could make cheese at home (my next project is mascaporne), I wouldn't have to pay those exorbitant prices  for imported cheese at supermarkets. Well, at least I'd save a little.

For a RM15 block of store bought ricotta, it cost me just about RM8 to make it at home. I needed two litres of full cream milk, a cup of whipping cream, lemon juice and salt.


Homemade ricotta is probably the simplest cheese to make. Although you can use full cream milk from the carton, you will get better results from  fresh  milk -- luckily I managed to catch the man who goes around my neighbourhood (on a motocycle) delivering fresh cows milk. (I had to pre-order two litres the week before).

Apart from the milk, whipping cream, salt and lemon juice, you will need a large bowl and a muslin cloth (or a dishcloth) as well. And a stockpot to boil the milk, of course.

First step: Heat the milk and whipping cream; when it comes to a ROLLING BOIL (not just a simmer) add the lemon or lime juice and resume boiling, stirring now and then. Keep stirring until the milk mixture starts to curdle. Depending on the milk (fresh milk works faster than milk from the carton), this may take between 20 to 30 mins.

When the milk starts to curdle -- when you can see clumps amongst the slightly thickened liquid -- put off the heat and let the milk stand for about 15 mins.  If the milk isn't curdling well, add a little more lemon juice.


After 15 mins or so, you will see the curdled milk seperate from the liquid, or  whey.  Place a muslin clothe or dishcloth over a large, deep bowl and pour the curdled mixture into the cloth to physically separate the curd from the whey.

Let the muslin seive do it's work -- leave it for about 30 minutes or until almost all the liquid has dripped  into the  bowl.

Tie the edges of the muslin together to form a ball with the curd and hang it on your tap or somewhere so the remaining liquid drips out.

Once you;re satisfied that there is close to or completely no whey left, put the balled ricotta in the fridge for about 2 hours or so to set.

Click here for more resources for homemade ricotta.

You had me at Aglio Olio


My friend Premah asked me a couple of days ago if I had a recipe for Pasta Aglio e Olio. Unfortunately, I didn't, although the Angel Hair pasta with garlic and breadcrumbs I often make is a variation of the classic Aglio e Olio. Well, it's been two days and I haven't been able to get Aglio Olio out of my mind. Not that I was particularly craving for it, but I was itchy to try and make it. It isn't complicated and it's essentially vegetarian; vegan even as it  doesn't have cheese.

Aglio Olio has neither a tomato base nor a creamy base. It's a simple, straightforward, rustic pasta dish but that really doesn't mean it's a no brainer.

Aglio Olio is Italian for garlic and oil. And that's basically what it takes to make this dish what it is. Parsley is also an essential ingredient as is chilli flakes or dried chillies while seasoning is salt and pepper.

Linguini is supposed to be the original pasta of choice for Aglio e Olio but I had angel hair so I didn't have the luxury of choice.

Cooking the pasta: I decided to cook the pasta in vegetable stock to add flavour. At the World Gourmet Summit I attended in Singapaore a month or so ago, I attended a cooking masterclass by Italian Chef  Andrea Berton who cooked his pasta in stock to wonderful results. So I decided to follow suit. It was a great tip as the pasta soaks up the stock well. I would think a thicker noodle would perhaps be better but I made do with what I had.  As usual, cook in al dente.


In a skillet, heat about 4 tbsp of olive oil and add the garlic (8 cloves, squished and minced) and chilli flakes (2 tsp) and 2 tsp chopped flat leaf parsley (opt for the Italian flat leaf parsley as it's more flavourful).  Toss the ingredients around and make sure you don't let the garlic burn.

When it's all toasty and fragrant add the cooked pasta. You can add the pasta straight from the saucepan or stockpot you boiled it in so that it's still moist. Also add 3-4 tbsp of the stock in with the pasta. Season with salt and black pepper. Toss the pasta so it's coated with the olive oil, garlic, chilli, parsley and the seasoning.

Cook on low heat for a few minutes, adding a little more  parsley. The pasta will be a little wet, but it should never be soupy.

Remove and serve.

Now, this is the basic Aglio e Olio and you will find variations like  adding seafood like  prawns or mussels, tomatoes and sometimes even minced meat. I tried it with some sauteed mushrooms -- it tasted good but honestly, I preferred it plain with no frills.

Friday, June 4, 2010

Snack attack: Part III. Onion rings, Indian style.


Ever heard of the Awesome Blossom a.k.a Blooming Onion a.k.a Onion Blossom? Well, commonly found in American establishments (diners and steakhouses commonly serve them), this onion dish originally used the Vidalia onion, a large sweet onion. The onion is cut to resemble a flower, breaded and deep fried. As you can imagine, it's oily and naturally,  loaded with calories.

A relative of the bloom is the onion ring which is kinder to the arteries. Though fried, onion rings aren't necessarily deep fried. Pan-frying with an inch or two of oil will suffice.  Western recipes for onion rings call for the onions (cut in rings, hence the name) to be coated in white flour or cornmeal. Seasoning is mainly salt or sometimes garlic salt. New York Times columnist Mark Bittman dips his onions in milk and then flour and proceeds to fry them  in olive oil. Some recipes call for the rings to be breaded. Others mix some baking powder in a flour batter for puffy rings.


While these rings are pretty nifty, I prefer the Indian version of the onion ring called the onion Bhajee. The concept is the same but the batter has a lot more kick in it. Instead of plain white flour, the Bhajee employs gram flour (that's chickpea flour by the way) mxed with a little rice flour and chilli powder. I used about a cup of gram flour, 1 tbsp rice flour, 3/4 tbsp chilli powder. Oh, you also need a pinch of asofoetida. Finely chopped green chillies and curry leaves (and sometimes parsley) are also added. The dry mix is mixed with enough water to form a thick batter.

The onion rings are then coated generously with the batter (just chuck them into the bowl with the batter and mix them with your hands, ensuring they're well and truly bathed in the batter).  Heat oil to about 180C and fry the battered rings till they're golden. Drain and enjoy.

Indian snacks use gram flour a lot and not just as a batter. The Bonda, for example, is a fried flour ball that's made primarily of gram flour. Once again, mix the gram flour with some rice flour, chilli powder and asafoetida. Add finely chopped chilli, finely chopped spinach (lightly sauteed, just about 2 tbsp) and curry leaves (finely chopped also) and add just enough water to allow you to make little  dough balls.


Again, heat about an inch of oil in a skillet and when hot, drop the dough balls (uneven shapes are customary!) into the oil and fry till golden.

Both the onion bhajee and the bonda are snacks, usually tea time snacks. Because of the gram flour, they're quite filling. The bonda is best eaten with a coconut chutney (a southern Indian dip/sauce) while the onion bhajee is usually eaten with a mint chutney.

To top is off, have some lovely Indian spice tea (masala tea) and you'll have a nice smile on your face. I guarantee.

Monday, May 31, 2010

Snack time, part one.


I am a snacker which is really the biggest challenge to any diet plan I embark on. Rice I can skip. Pasta, who needs you. Pies and tarts, I do not miss. But a bag full of nuts? Some cheezy pretzels? Crispy Indian muruku? Oh woe! Mostly I snack in front of the TV. I mean, where's the fun in watching TV if there's nothing to munch, right? Funnily enough, I don't ever eat popcorn at the cinema... don't know why! Go figure. Yes, it's the TV that really gets me going and going and going.

With the World Cup coming up in less than a week, we decided to devote  June's installment of Don't Call Me Chef  (a monthly food column I co produce with Marty Thyme and Hungry Caterpiller) to snacks fit for TV. I think it was the easiest challenge ever. There were many recipes I had to share, but I narrowed it down to one... watch for this space next Monday. Since I could only highlight one in the paper, I decided to do a run-up highlighting some of my other favourite snacks.

Am starting with sweet potato fries. They're so easy to make it's ridiculous. You need very few things: sweet potatoes (of course), salt, pepper, cayenne or paprika. Oh, and a nice, clean, scouring pad.


First, scrub the sweet potatoes clean because we're going to cook the skins along with the flesh.

All cleaned up? Great. Now it's time to cut em up. This depends on the size of your sweet potatoes. If your's are 6 inches or shorter, just cut them in half lengthwise and then into wedges.  If you have really long sweet potatoes, cut them in half horizontally before cutting them lengthwise and into wedges.

OK. Now, to season. All you need is salt, pepper and paprika/cayenne. A huge pinch of everything is good enough for one sweet potatoe. Just rub them good and proper on the wedges, making sure all of them are coated well. I was frugal with the seasoning pre-frying as I like to sprinkle some salt and pepper on the fries once they're done.

Once seasoned, heat about 1/2 cup oil in a wok/saucepan. When it's hot, lower the heat and slowly slide in the wedges. Fry till the centre is cooked. You don't have to poke them; they're usually cooked if the outside is golden and crisp.

Drain them on paper towels and sprinkle with salt and pepper before serving.

Told you it was easy!

Tuesday, May 25, 2010

Smooth like red velvet


Whoa! A red cake? It was the colour that got me. Not the terribly decadent name, nor the rich, delicious taste. I'd never seen a red cake before I laid my eyes on a Red Velvet cake in a bakery somewhere in New York some years ago. Deep ruby red it was, cushioned and layered with a thick white frosting (cream cheese it was, I later learnt) and topped with dessicated coconut. Oh my. If ever there was a vampy cake, this was it.

Why hadn't I seen the red velvet cake before this? Was I so unobservant or is this a relatively new (old; revived) craze. I remember when I was a pre pubescent kid, the "it" cake at the time (it was the 1980s) was the blackforest cake. At the time, it was ... almost exotic. It's still tasty but it's lost the allure it had (at least for me) then. Then in the late 1980s and 1990s it was cheese cakes that ruled my world. Bakeries everywhere touted their cheese cakes -- Boston, New York, Philadelphia, Oreo, Marble, Blueberry, Strawberry, Mango ... you name it, they had it. Somewhere in between there were phases where carrot cakes took center stage for a bit; and, of course, who could dismiss the Chocolate Banana craze. Now that's one combo I still can't appreciate, but never mind me.   Of course, most recenty the craze has been for cupcakes. Cupcakes for meetings, parties, reunions  and even for weddings! So now, it seems, its time for the Red Velvet cake to come front and centre.


Anyway, I tried a slice. I  liked it and vowed to look it up and make it when I returned home. Fast forward some four years and I have finally gotten down to it. Why's it take me so long? Well, in case you haven't figured it out I a tough challenger for the title of "world's biggest procrastinator". I'll get things done ... but on my own schedule.

The problem with this cake is that its appeal lies mainly, at least initially, in it's appearance. Don't get me wrong; a good Red Velvet is moist (the texture is almost velvety, I swear) and the almost chocolate-could be vanilla flavour melded with the cream cheese topping ... divine. But, because people get caught up with the colour, many eateries get away with mediocre Red Velvets: dry, crumbly chocolate cake rip offs that make you go, "that's it?".

The origin of the Red Velvet is apparently unclear. Some say it's from the  South  (in the US) while others say New York, An article in the New York Times quotes an urban legend where sometime in the 1920s had the cake at the Waldolf  and was impressed, she asked for the recipe and was charged some US $100 for her cake. To protest, she passed the recipe along to abyone she knew ...

Doesn't really matter where it came from. Google red Velvet Cake and you;ll find hundreds of recipes and hundreds of interpretations to the cake. Many achieve the red by way of food colouring (gels, not liquid) but some prefer to find a more "natural" way of colouring the batter. Beetroot? Rhubarb? Cherries?

I decided to stick with the food colouring. Rhubarb is next to impossible to find here  and beetroot wasn't available in the grocer last weekend. Cherries cost a bomb (well, the fresh ones do).   Apart from the colour, the cake has cocoa, buttermilk, butter, sugar and, naturally, flour. Also, a baking soda+vinegar combustion. Nice.


I must say beforehand that I halved the recipe that follows as I didn't want to make a huge 1 kg cake. Instead I made two mini cakes and 6 cupcakes. Kept a couple of cupcakes for myself and shared the rest with some friends at work.

What you need:

500g superfine flour/cake flour

4 tbsp cocoa

1 tsp salt

2 cups buttermilk

red food colouring

230 g unsalted butter

2.5 cups castor sugar

4 eggs

2 tsp vanilla extract

2 tsp vinegar

2 tsp baking soda

For the frosting:


500 g cream cheese


dash of lemon juice


1 cup icing sugar


2 tbsp butter


dessicated coconut for garnish.


1. Whisk together flour, salt and cocoa. set aside.

2.  mix red colouring with buttermilk till you get a deep, deep red.

3. In the bowl of your stand mixer, add butter and sugar and whisk till fluffy. Add eggs, one by one. Add the vanilla.

4. Add the flour and buttermilk mixture alternatively (3 or 4 rounds) and mix till well incorporated. Set aside.

5. Meanwhile, add the baking soda to the vinegar and let it fizz.   Fold it into the batter.

6. Spoon the batter into your greased baking pans and bake at 175C for 30 to 40 mins or till tester comes out clean.


If you are making cupcakes, just spoon batter into a cupcake pan. If you're making a layered Red Velvet you can either divide the batter into 4 portions, bake one layer at a time (about 15 to 30 mins each) OR divide into two and slice each into half to get 4 layers.

After removing the cakes from the oven, CHILL them overnight (or about 8 hours) before frosting them. Believe me, it's a lot easier. Just out of the oven, the cake is crumbly and soft, making frosting it a messy, tiresome endeavor.

To make the frosting, cream the cheese and butter and sifter  sugar and lemon.

Top with desiccated coconut.

Monday, May 24, 2010

Bun in the oven


I bake bread every weekend and each time, I try and vary my breads/buns a little by adding or substituting ingredients: basic wholemeal, multigrain buns, herbed buns (mixed italian herbs, rosemary, parsley, lavender, basil...), black pepper buns ... it's exciting trying new variations each week. One of the best parts about baking breads at home is how my house smells every weekend -- it's like I'm living in a bakery and truth be told, I've stopped spraying on perfumme after a shower on weekends because I leave the house smelling of fresh bread. A new fragrance? That's an idea!

I truly think the smell of freshly baked breads is one of the best smells in the world. It's a wholesome and awfully comforting smell; enough to make me forget any stress of the week past or to come. I actually  used to dislike the smell of yeast fermenting in the dough; now I love even that. I love watching the dough rise and I am pretty sure that I may even come to like kneading by hand and forsake the dough hook.

I'm still pretty new at bread baking but I am definitely more adept at it than I was a couple of months ago. Practice goes a long way, I guess. Still, one lesson I am constantly learning is that vigilance is key. The moment I lose my focus and decide to compromise -- i.e use chilled butter instead of waiting for it to soften at room temperature OR measure a little too little water, the result is a dough that takes a little (sometimes more than a little) too long to rise. There are some basic rules to bread baking you can never forget.

This week, I baked some herbed wholemeal buns with sesame topping. The recipe calls for 4 cups of flour (3 high proten, 1 wholemeal or 2:2), dry milk (1/4 cup), yeast (1tbsp) , butter (6 tbsp), honey (2 tbsp), water (11/2 cups) and salt (2 tsp). Instead of the 6 tbsp of butter required, I decided to use 5 tbsp + 1 tbsp  olive oil for added flavour. I added dried Italian herbs -- about 1.5 tbsp as well. The method is similar to that of the Pullman loaf. You first whisk the flours, milk and yeast in a mixing bowl. Add the softened butter/oil and mix with  the dough hook till it's intergrated. Add the water, honey and salt, up the speed of the mixer, and let the machine knead on for about 7 mins. Transfer the dough (should be a little sticky to the touch) onto a lightly floured surface, shape into a footbal, cover with cling film and let it rest for 15 mins. Uncover and pumch the dough down gently. Gently, you hear. shape it into a rectangle (the size of the pullman pan) and then turn the rectangle 90 degrees and reshape it. Fold in the sides and the edges and transfer into the pullman tin. With these buns,   you add  the herbs once the water has been added and the dough is moist. Also, instead of shaping it into a loaf, you cut it into 8 equal parts and roll and shape them into buns -- like so.

The oil was a good idea (olive oil usually always is a good idea) as it not only gave the bread flavour but made it more moist too. The herby flavour was fantastic and though I didn't do it this time, I sometimes also add a couple of tbsp of cheese (parmesan or cheddar) to the dough for even more punch and a richer loaf/bun.

I also decided to brush the tops of the buns with an egg wash (egg yolk + water) to give it a shiny, darker complexion.

Am pretty happy with the results. The buns were soft and slightly chewy, not too dense. The herby flavour and smell was therapeutic and the egg wash gave it a rich glaze.

The only thing you have to be wary about home made breads is that they don't keep for long outside or in the fridge -- 3 or 4 days is the average life of homemade breads. Unless you freeze them ... this way you can keep them for a month or so. But, chances are, you won't have to cos they're so tasty they'll be eaten up in a jiffy.

Sunday, May 23, 2010

Would you like a cutlet with that?


As a kid, I used to look forward to the weekends cos that's when my mum used to make cutlets -- fish and mutton cutlets were my favourites. This was, of course, before I became a vegetarian. Cutlets are still one of my favourite things to eat and also to make.

Cutlets are real easy to make because there really isn't one fixed recipe to follow. As long as you add some mashed potato to the main ingredient (chicken/meat/fish for non vegetarians; and beans or soy or a mix of vegetables for vegetarians) and you bread them before frying/baking, the rest (i.e the  seasoning) is really up to you.

For Indian vegetable cutlets, seasoning is usually with chilli powder/cumin/coriander/fennel powders and salt and pepper. You can also use curry powder or  masala powder. It's really up to you. The seasoning for Western styled cutlets are naturally different and you can add cheese, herbs, lemon, paprika ... these are some of what you may use for seasoning.

So versatile; just switching around the seasoning can alter the taste tremendously and you can have countless varieties of cutlets.

We used to eat our cutlets with rice but you can eat them with bread, salads, pasta or just as is. Nowadays, I eat them just as they are ... the potatoes take care of the carbs I need for a day!

The two cutlets in the picture look identical but they're actually very different. One is made of vegetarian chicken (soy chicken and gluten) and potato while the other just vegetables (mushrooms, carrots, zuchini),  cheese and potato. The vegetarian chicken cutlet was seasoned with salt, pepper, chilli, tumeric, fennel, onion and garlic  powders. The vege-cheese one was seasoned with dried italian herbs, onion and garlic powder and paprika.

For added flavour, I seasoned the breadcrumbs too. To make homemade breadcrumbs use stale but not mouldy bread. Toast them in the oven till brown but not burnt; let cook and then, crumble. To season, I added cracked black pepper and herbs. I sometimes add some crumbled parmesan cheese too.

Mince all ingredients and add them to the mashed potatoes. How many potatoes you use again depends on how you want your cutlets to taste. I used one small potato to make 6 cutlets as I didn't want the potato to overpower the flavours of the other ingredients.

Once mixed, divide them into balls (bout the size of a golfball) and then flatten.

Beat an egg; spread the breadcrumbs into a bowl.

Dip the cutlets, one at a time, in the egg (coating both sides) and then cover them with the crumbs. Set aside for about 15 mins.

Pour oil into a skillet (oil should be 1 inch deep) and heat. Once hot, gently slide in cutlets and fry till both sides are golden brown.

Remove gently with slotted spoon and leave to cool.

Wednesday, May 12, 2010

A little slice of heaven


The main ingredient in a Carrot cake is carrot. Ok, that's pretty obvious. But while traditional carrot cakes stick to carrots to flavour the batter, you can  find pretty interesting additions to the carrot cakes these days.

Pineapples are a more common new addition. You mix 2 cups of grated carrots and 1 cup crushed canned pineapple (reducing the sugar since the pineapple is already pretty sweet) and you get a really nice fruity cake.

Another fruity option that some recipes include is papaya -- not crushed but diced small. I am not inclined to go with the papaya but was intrigued by the addition of some other ingredients like pumpkin, oranges, mashed sweet potatoes and ... wait for it.. zucchini!

I didn't have any zucchini and was too lazy to get some. But I did have pineapple and I did have some leftover pumpkin pie puree from... a while back. So I decided to make the basic carrot cake batter (flour, baking soda and powder, salt, cinnamon, vegetable oil and eggs. I then divided it into two and added carrot+pineapple in one and carrot+pumpkin in the other.


It turns out, the humble carrot cake is very versatile. Both cakes turned out to be delicious and moist, making me quite certain that the zucchini would have worked pretty well too.

I wasn't very adventurous with the frosting though and stuck to the classic cream cheese frosting. I decided to frost only the carrot-pineapple cake and leave the carrot-pumpkin one frost free. Actually, they both taste great even without the frosting but I am a sucker for cream cheese and so I decided to indulge.

I decided to tempt fate and do a little deco with the frosting: nothing ambitious, just crafted a little cream cheese carrot atop the cake. You see, I'd bought some gel food colouring and was dying to try the colours out. Gorgeous. The sunset orange yielded the perfect shade and the leaf green too. Goodbye liquid colour, hello gels!


So, here's the recipe. Go try it out.

Carrot cake: two ways

2 cups all-purpose flour

2 tsp baking soda

1 tsp baking powder

1 tsp salt

2 tsp ground cinnamon

1 1/4 cups white sugar

1 cup vegetable oil

3 eggs

1 teaspoon vanilla extract

2 cups shredded carrot

1 cup chopped walnuts

1 cup  crushed pineapple (drained)/ pumpkin pie filling

Frosting

8 oz cream cheese, leave to soften at room temp

1/4 cup butter, softened

3/4 cup icing' sugar

Sift flour, baking powder+soda and salt. Add cinnamon powder and mix. Make a well in the centre and add the oil, sugar, vanilla and eggs. Mix well tell you get a smooth batter. Add the carrots, nuts and pineapple/pumpkin.

Pour into a greased 9 inch pan and bake at 180C for 35- 45 mins or till a tester comes out clean.

For the frosting, blend butter and cheese till creamy. Add sugar and beat till smooth.

Spread frosting on cake, cut and eat!

Sunday, May 9, 2010

Humble genius


As a journalist, I've had the honour and, often, the pleasure of interviewing many inspiring individuals. As a food writer, I've had the opportunity to speak to quite a few acclaimed chefs, New York Times columnist Mark Bittman being one of them. Nothing however quite prepared me for meeting and interviewing, albeit briefly, Ferran Adria (pictured above; photographed by my colleague, fab photographer Yap Chee Hong) who is unarguably one of the best chefs of our time.

In his 20-year plus career, Adria has revolutionised the way we think of food preparation. Traditional methods, while still highly respected by him, have been taken apart and unrecognisably re assembled to produced food in forms that are simply quite breathtaking. Caviar pearls made solely from olive oil, a perfect white egg shell made from coconut milk, translucent star anise and mandarin lollipop. You have to see these creations to believe them. Click on this link if you want to  read my interview with Adria featured in The Star.


What was most striking about meeting Adria is how accessible he is. Ironic really, given as how unaccessible El Bulli is to the majority of us: his world famous El Bulli (three michelin stars) just outside Barcelona in Spain has close to two million people on its waiting list.

He has his share of detractors -- many who claim he uses fancy technique to dazzle; who claim a meal at El Bulli isn't really a meal, even after 35 courses. But these are no thorns in his side for Adria merely says, those who diss him either have never been to El Bulli ("you have to be at El Bulli to understand El Bulli") or they just "don't speak the language of El Bulli".

The language of El Bulli is the language of creativity. And creativity is Adria's life breath. The need to create is the reason why, despite its popularity, Adria recenlt announced the impending closure of El Bulli in 2012. El Bulli, he says, has reached it's peak and he and his team (Adria, his brother Albert and three others form the creative force of El Bulli) need to take on greater challenges. In two years (by 2014), Adria promises greater things for El Bulli and for cuisine.


That's me in green, by the way, smiling from ear to ear.

Though Adria explained in some detail how he works and how he achieves some of  the textures and forms in his food, I will never even attempt to replicate his style. What I did take away from him was his single minded dedication and passion for his art (for he produces not dishes, but works of art) and the need to constantly better my work, not merely in the kitchen but on the page.

Whatever his plans are for El Bulli in 2014, we can be sure it'll be something worth looking out for. It was a pleasure, Chef Adria. And a privilege.
Related Posts with Thumbnails