Showing posts with label Eggs. Show all posts

Tuesday, August 13, 2013

Heston Blumenthal's Scramble With Brown Butter


When I watch cooking shows on TV, I am often inspired to try the dish the chef/cook on TV is making. In most cases, I'd have to go shop for the ingredients first and so the dish never gets done. Or maybe it does ... months later. But when I saw British chef Heston Blumenthal demonstrate his method of cooking scrambled eggs on MasterChef Australia (Season 5, episode 49), I got up right after the episode and tried his recipe out - all I needed was eggs, milk, cream and butter, all staples in my pantry.

Heston doesn't scramble his eggs in a pan. What he does is combine all the ingredients (eggs, milk, cream and butter) in a heat resistant bowl and place it over a saucepan of boiling water. He then stirs and stirs and stirs the mixture until the butter melts into the egg and milk and cream (and salt and pepper) and the eggs start to curdle. 

To get the creamiest eggs, Heston says you have to cook the eggs very gently - not directly over the heat but  over a water bath/bain marie. Well, he's right, of course.


What you end up with is a deliciously creamy bowl of eggs that are as smooth as satin. Well, kinda. But boy, are they creamy and nice.

But that's not all. He tops the eggs with some brown butter or beurre noisette (literally translated to mean hazelnut butter). OH MY GOD. Is this the food of kings or what! (He also adds a few drops of sherry vinegar which I didn't have and so didn't use).

Eaten with toast and maybe with a sprinkling of chopped parsley and this is a breakfast to get you going!


Heston's Scrambled Eggs

3 large eggs
15g butter
15g milk
15g cream
salt and pepper

Put all ingredients in a heat resistant bowl. Boil a saucepan of water. When the water has started boiling, place the bowl on top of the pan (make sure the water doesn't touch the base of the bowl). With a spatula, gently stir the mixture until it starts to curdle. Take it off the heat and plate.

Brown Butter
Heat some unsalted butter in a pan over low heat. Swirl the butter around until it melts and then starts to brown and smell nutty. Take it off the heat and strain through a coffee strainer. Spoon over the eggs.

Sunday, May 27, 2012

Japanese Cheesecake


There was a time when I devoured cheesecakes. I ate them so much, it began to show on my person. My waistline grew and my clothes needed to be altered. I am serious; ok maybe a little exaggeration. But I was obsessed. I think it was sometime in the late 1980s. A new cheese cake shop opened in town - I think it was actually called The Cheesecake Shop - and I was introduced to a whole array of flavours to my favourite cake. There was chocolate, chocolate marble, Oreo ... oh my. It was heavenly. I used to visit the shop on my way back from school (I was in the sixth form and took the public bus home. The Cheesecake Shop was a slight detour but, hey, I felt I earned a slice every now and then).

That was a long time ago and it's been a while since I craved cheesecake like that. In fact, it has been a while since I've eaten any cheesecake at all.

Truth be told, I may have gone off cheesecakes. If I could eat a whole slice by myself in a split second before (ok, who am I kidding ... I could eat two slices, easily), I now can't even take a bite before feeling like I've had too much.

So, it was mighty strange that I woke up this morning with an urge to make .... cheesecake. 


Go figure, right? So, yeah, I wanted to make a cheesecake but I didn't want to make a creamy cake that sat on a biscuit crumb. I wanted something lighter, something more cakey and not too rich. I was about to give up and make something completely different (like a quiche or a crepe -- yes, my thoughts are always so random) when I remembered a Japanese cheesecake I'd eaten a long while ago (like five years ago) that I really liked. Yes! Perfect!

The Japanese Cheese Cakes (I'm not quite sure if it really does originate in Japan; I have never eaten one there either of the times I'd been there) are light and soft and have a more subtle (though not at all insipid) taste of cheese. The cake isn't overly sweet and there is no crust, so put away our digestive biscuits!

The cake also comes unadorned. There are also no toppings (no strawberries on top, no Oreo cookies in he middle ...) and though I have tasted a matcha-flavoured one before, I prefer the authentic, unflavoured Japanese Cheesecake the best.

 
Some compare the texture of this cake to flan, a souffle or a chiffon cake but, truth be told it's also almost like eating a slice of brie (although no brie is used; only cream cheese). The texture is the result of the emulsification of corn starch and eggs in the recipe -- this is what I've read. I figure it also has to do with the whipped egg whites (six, mind you) that are gently folded into the batter.

I don't know the science of it ... yet ... but I like the result. This cake is light, cheesy, not too sweet and oh-so-comforting. I am pleased that this is one cheesecake I am still fond of.


Japanese Cheesecake
(from thelittleteochew)
Ingredients
140g Castor sugar
6 egg whites
6 egg yolks
1/4 tsp cream of tartar
250g cream cheese
50g butter
100ml milk
1/4 tsp salt
60g cake flour
20g corn flour

1. Melt the butter, cream cheese and milk by combining them in a bowl and placing the bowl atop a pot of boiling water. Do not allow the bowl to actually touch the water. Stir until the cheese and butter melts. Set aside and allow to cool.

2. Sieve the flours and add the salt and whisk together.

3. Preheat the oven to 160C. Line a 24cm spring form pan with parchment paper.

4. When the butter mixture has cooled, add the egg yolks and flours and stir to mix.

5. Beat the eggs whites and the cream of tartar using the whisk attachment of your mixer until the eggs get frothy. Add the sugar and whisk on high speed till soft peaks form.


6. Fold in the whited to the batter, gently but well.

7. Pour batter into lined pan.

8. Fill two ramekins with hot water and place them diagonally in the bottom tray of your oven (below the rack where your cake is going to sit). Put in the cake and bake for 70 mins.

9. When the cake is done, turn off the oven and let the cake cool in the oven with the door slightly ajar for 30 mins before removing the cake. This helps prevent the top from cracking.


Tuesday, February 1, 2011

Spoilt for choice


I've been baking a lot lately. I mean A LOT, really. One night last week, I made two desserts one after the other. Not because I was craving desserts or anything. Neither was I expecting guests. I just experienced a sudden spurt of baking which lasted five days.

The result: a fridge FULL of desserts.

Good, you'd think? Well, not for a serial midnight snacker (that's me, by the way) who has been trying to shed unwanted pounds for the past 20 years.
Sigh. I wish I had some control over these sudden spurts of baking activity.

Anyways, what's in my fridge? Let's you and me explore.


On the top shelf, in between a small carton of fresh creme and a bottle of jam is a lime tart which I baked four days ago. The tart is the outcome of my  love affair with Nigel Slater. A one-sided affair, of course, because well, he doesn't know I exist. Still, I can deal with the unrequited love, especially when it yields something  truly delicious such as this lime tart (featured in Kitchen Diaries. Read the review here).  

The lime tart is lovely. The crust (flour+butter+icing sugar) is nice and flaky but not brittle -- you can literally hold a wedge (like a slice of pizza) and eat it without it crumbling. The crust is sweetish but not sweet (I hope that's as clear to you as it is to me) and the lime custard is just tart enough to pep you up without making you cringe. Lovely.

Next to the tart, in a small space the size of a fist (not a tiny fist ... more like Rocky Balboa's fist, I think) is a small container with two pieces of Slater's brownies (SEE PIC BELOW ) which I baked about a week ago. A week ago! I think I'll have to finish it off as I type this ... don't want it to go bad in the fridge, right? Ohhhh....


Let's get on with the exploration. On the second shelf is a lemon slice (pictured BELOW). This is courtesy of Martha Stewart , the model-turned-stock broker-turned-domestic diva-turned-author-turned-entrepreneur-turned jailbird. No, she didn't give the recipe to me, per se. She doesn't know I exist either but its from one of her many cookbooks: The Martha Stewart Living Cookbook: The New Classics.

I made this really by accident. Well, because of an accident. As I was re organising my kitchen, I dropped Stewart's cookbook on the floor and when I bent down to pick it up, it was open to this recipe. What could I do but make it, right? I had all the ingredients, after all. It was meant to be.


The slice has a crust too. But, with more flour in the mixture and some baking powder, the texture of Stewart's lemon slice is more cakey compared to the above-mentioned tart. The refreshingly sweet-sour taste of the lemon is unmistakable but not overpowering. It's soft, a little chewy, tangy and sweet.

(In case you're wondering why I have two similar desserts in my fridge, let me explain: I love limes and lemons and basically, anything from the citrus family. I use them for cooking curries and pies but mostly I love them in desserts. A simple lemon flavoured cheesecake is one of my all time favourite cakes. I love lemon shortcakes. Lemon pound cakes. Lemon curd-filled cupcakes. Lime sorbets. Lime sables. ... the list is, quite honestly, endless.)

Now we come to the bottom shelf in my fridge. Wedged in between a jar of homemade vegetable stock, a tub of yoghurt and a bottle of dry yeast are three bars of dark chocolate just waiting for me to melt and mould them into yet another dessert.

While I think of a good way to use the chocolate, I will end this post with the recipe for Slater's lime tart. Look out for the lemon slice recipe soon.

Lime Tart
(adapted from Nigel Slater's Kitchen Diaries)
1.5 cup plain flour
1/3 cup icing sugar
90g butter
1 tbsp cold water
for the filling:
6 large eggs
250g caster sugar
3/4 cup lime juice (from 7 -9 limes)
1/2 cup double cream

Slater starts off his recipe with a stern warning: make sure there are no holes in the crust, he cautions more than once.  He explains why:


"Halfway through baking, I check the tart’s progress only to find the pastry shell empty and the citrus filling forming a lemon-coloured pool on the baking sheet. I pile the whole damn failure into a bowl (and later eat it in secret after everybody has gone) and start again.”

OK. Now on with the recipe.
Sieve the flour and icing sugar into the bowl of a food processor. Add the butter (cut into chunks) and mix until it resembles fine breadcrumbs. Mix in the egg yolk and the water. Tip into a mixing bowl and bring the dough together with your hands and shape it into a thick log.
Wrap in greaseproof paper and refrigerate for at least half an hour.
Cut thin slices from the log of pastry, then press them into a 23-24cm tart pan with high sides, pressing the pastry gently up the sides and over the base. Don't roll the pastry! It's too fragile for that.

Once again. make certain that there are no holes.

Place a sheet of greaseproof paper into tart case and fill it with beans. Blind bake the pastry for 10 minutes. Then, remove the greaseproof paper and bake for 5 mins more until the pastry is dry to the touch.
Turn the oven down to 150C. Finely grate the zest from two of the limes and squeeze enough limes to get 3/4 cups of juice. Mix the eggs and sugar, beating lightly for a few seconds. Don't let it get frothy. Next, stir in the lime juice and cream. Pour through a sieve and stir in the lime zest. Pour into the pre-baked crust and bake for 45-50 minutes. Remove while the filling is still a little wobbly... it will get firmer as it cools.

Leave to cool.


Saturday, November 20, 2010

Twice removed French Apple Cake


I've been experimenting a lot with apples lately.You see, my husband only likes apple desserts. I am not joking.

I've baked chesescakes, chocolate-cheesecakes, cupcakes, pound cakes and red velvet cakes. The response was always just lukewarm. Nope, actually the response was pretty darn cold. And even though I tell him he HAS to PRETEND to be excited  (cos no cook likes a lackluster response), I get nothing more than a, "Yeah babe, it's tasty". At best.

Hungry for validation, I decided the only way I was going to elicit some enthusiasm was to cook what the man liked. Trying to get him to like what I cook obviously has not worked...

Hence my experiments with apples. I bought a dozen Granny Smith green apples and a half-dozen Fuji reds. I meant business.

Last weekend I made an apple crumble. Turned out ok but the crumble wasn't as crusty as I wanted it. But, guess what? I (or rather the dessert I was holding) was greeted with an ear-to-ear smile ... AND a request for seconds. Whoa. The force is strong in this one after all ...


Encouraged, I began thinking of my next project.

I usually visit my bookmarked cooking blog sites for inspiration or ideas and I just happened to click on David Lebowitz's site and would you believe it, his most recent post was on a French Apple Cake. Chance? I don't think so. The recipe he featured was an adaptation of Dorie Greenspan's. She's another of my favourites. Once again: Chance? Nope. I had to make this cake.

This cake will dispel any notion you may have of French cooking: that its complex, difficult, inflexible, too rich or whatever. The recipe for Dorie's French Apple Cake is not only so easy, its uncomplicated. Use four apples she says, doesn't matter which variety.In fact, mix them up if you will. How much easier a recipe get?

So that's what I did. Even though I had plenty of the same variety, I used two Granny Smiths and 3 Fuji reds (3 because they were significantly smaller than the greens). You don't need much else: butter, a little sugar and some flour. Oh. and baking powder, salt and eggs. That's it. The texture of the cake is very moist. So moist you may think it's pudding. Doesn't matter, its just delicious.

Oh. I almost forgot. The cake did the trick and was devoured by the man. But truth be told, making this cake was so satisfying,  it didn't really matter what the reaction was!  Validation? Nope, don't need it ... :)


French Apple Cake
From David Lebowitz, adapted from Dorie Greenspan

3/4 cup (110g) flour
3/4 tsp baking powder
pinch of salt
4 large apples 
2 large eggs (at room temperature)
3/4 cup (150g) sugar
3 tbsp dark rum
1/2 tsp vanilla extract
8 tbsp (115g) butter, salted or unsalted, melted and cooled to room temperature


Preheat the oven to180C, make sure the rack is in the center of the oven. Heavily butter a 20-23cm (8 or 9 inch) springform pan and place it on a baking sheet.

In a small bowl, whisk together the flour, baking powder, and salt.

Peel and core the apples, then dice them into 3cm or so pieces. In a large bowl, beat the eggs until foamy then whisk in the sugar, then rum and vanilla. If you are not using rum (but, why?), add another portion of vanilla. Whisk in half of the flour mixture, then gently stir in half of the melted butter. Stir in the remaining flour mixture, then the rest of the butter.

Fold in the apple cubes until they’re all well-coated with the batter. Transfer them into the prepared cake pan and smooth the top a little with a spatula.

Bake the cake for 45 mins to an hour or until your tester inserted into the center comes out clean. Cool the cake for about ten minutes before you loosed the edges and remove the sides of the springform pan. Serve with crème fraîche or ice cream!!


Tuesday, October 26, 2010

Souffle, Demystified.

Didn't fill the ramekin enough with the batter.
I am addicted to Top Chef, the American TV show  that pits a group of cooks against each other in a series of cooking challenges. The chefs are judged by a panel of professional chefs and food critics and each week, the chef that doesn't meet the mark is eliminated. Season One of the reality show aired in the US in 2006 but the show only recently made its way to Malaysian TV. Thank goodness, though we may be late in getting most top TV series,  we play catch-up pretty good and we're currently watching Season 3 and 4 simultaneously (Season 8 will air in the US in December). 


So anyway, I love the show. I love how these chefs (they're quite eccentric, these cooks!) tackle the challenges that are thrown their way: an upscale barbecue challenge  (champagne + barbecued meat -- why not?),  frozen food challenge (creating frozen pasta dishes) and reinventing family favuorites (lasagna, pork chops, souffle) are some examples. Seems easy? Well, not at all. The chefs have a time limit: sometimes its as little as 60 minutes to come up with the idea, execute and plate their dish -- and given that they're trying to outdo each other, the dishes aren't run of the mill .. well most of the time.


What am I getting at? Well, I was supposed to get down to a challenge of my own last night: making a cheese souffle under the guidance of Julia Child. Yup, since buying her books (Mastering the Art of French Cooking, Vols I and II) I have been obsessed with, well, mastering some techniques of French cooking. No, no, I have no intention of being the next Julie Powell but it's hard not to want to dive into Child's recipes.


So anyway, I planned to make souffles: bought the eggs, cheese and butter but after stuffing myself at dinner, I grew a little lazy. I decided to plant myself in front of the TV: two episodes of the latest season (7) of House and an episode of Top Chef seemed way more appealing. 


As luck would have it, two of the chefs had to make souffles (sweet or savoury, it was up to them). Whoa! What are the chances??? Of all the dishes they had to make, a souffle? I took it as a sign for me to get off my lazy arse and execute my plan. 


Ok Julia, lets see if its as easy as you make it sound.


Now, a souffle is really kind of a cool dish to make. If you want to impress a dinner guest, a souffle that has  puffed up significantly will do the trick. Thing is, as cool as they are, souffles are also extremely temperamental: if you don't make them right, they may just flop the minute you take them out of the oven. Or, they may not puff up much at all. In which case, it would be quite embarrassing. 


This one was better

Thankfully, Julia's recipe and technique worked and my souffles rose. Too bad there wasn't any one else to witness it. Well no one other than my husband, R and my dachshund, Mojo. Both looked vaguely impressed but would have preffered it if I'd made some beef. Oh well.

The souffles behaved quite well out of the oven: they stayed up for about 20 minutes, enough for me to fiddle about with my camera to take these shots. Not bad. I didn't fill a couple of the bowls with enough of the souffle batter and so these didn't rise as much over  the ramekin as I would have liked (top pic). But thankfully, I got a couple right (middle pic). I'd already eaten my dinner so I ate only a portion of one souffle and decided to keep the rest and double-bake them for dinner tomorrow.

Double baking is one way of salvaging a flopped souffle. For me, its a way to add flavour and form to the dish. A souffle is slightly crusty on the outside but soft and airy inside. Not my favourite texture. By double baking them (taking them out of the ramekin, chilling them if you want, and baking them for a short period before serving), you make them a little more crusty (a lovely cheese crust appears) and a little firmer inside. Nice.

Double-baked.

Julia Child's Souffle Au Fromage (Cheese Souffle)

A. Souffle moulds or ramekins
1 tsp butter
1 tbsp swiss cheese or parmesan, grated

Butter the moulds/ramekins and sprinkle with cheese. Set aside.

Preheat oven to 200C.

B. Cream base
A 1 liter saucepan
Wooden spoon/spatula
Wire whisk
60 gms butter
3 tbsp flour
1 cup boiling milk
1/2 tsp salt
1/4 tsp pepper
Pinch of cayenne pepper
Pinch of nutmeg

Melt the butter in the saucepan. Stir in flour and mix with a wooden spoon and cook over moderate heat until the flour and butter foam together -- about 2 mins, without it browning. Remove from heat. When the mixture has stopped bubbling, pour in the boiling milk and whisk vigorously until blended. Beat in the seasonings and return to the heat, stirring with the whisk till it boils: about 1 min. The sauce will be very thick. Set aside. 

C. Adding the eggs 
4 eggs 

Seperate the 4 eggs: the whites go into the mixing bowl of your standing mixture.
Drop the egg yolks, one at a time, in the middle of the hot sauce (B), beating until they are blended into the sauce. Add Correct the seasoning (add more if required).

D. Egg whites
4 egg whites (from above) + 1 extra egg white
pinch of salt
80 g swiss cheese or parmesan, grated

Beat the egg whites and salt till the mixture forms stuff peaks.
Stir in a large spoonful of the whites into the sauce, gently. Stir in all but one tbsp of the cheese. Fold in the rest with a spatula, very gently.

Spoon in the souffle mixture into the prepared ramekins: the dishes should be 3/4 full. Gently tap them on your counter/table top till the tops are smooth. Remember be gentle.

Place on the middle rack of your preheated oven and immediately turn heat down to 180C. Bake uninterrupted for 20-25 mins (DO NOT OPEN OVEN DOOR). The souffles should rise to at least 4 cms above the moulds and they should be browning on top nicely. Bake for another 4-5 mins to firm it up a little more. Serve immediately.


Tuesday, October 19, 2010

Lessons in omelette making.

DO I really need a step-by-step guide to making an omelette? A friend of mine asked me this after noticing that I had my head burried in Julia Child's Mastering the Art of French Cooking (my latest acquisition) all morning, pencil in hand and all. I wondered the same thing myself. I've been making omelettes for myself at least once a week for years and although I realise my omelettes are completely method-free or cincai as we say here in Malaysia (i.e. apart from the eggs, ingredients for my omelettes change all the time depending on what I have in my fridge), I didn't think there was much to learn about making an omelette.

But, as with many of my assumptions, I was WRONG.

It's is easy to make an omelette and it takes only 30-45 seconds. But, if you want to make a perfect omelette -- one that is firm and fleshy on the outside and creamy inside, you need technique.

en route to the perfect rolled omelette 
Apparently, making an omelette isn't as simple as whisking a few eggs, adding some seasoning and fillings and cooking it in some butter in a skillet. There are several important considerations en route to the perfect omelette:
1. Beat your eggs only as much as needed to blend the whites and the yolks. Don't overbeat them.
2. Adding a little water when beating the eggs will make your eggs fluffier. Just a little -- maybe 1 tbsp for 2 eggs.
3. Don't add milk to the egg batter. Milk can have the opposite effect and may take the fluff out of the omelette.
4. Cook your omelette in butter. 
5. The temperature of the butter in the pan when you pour in the egg batter is very important. It cannot be too hot but it should be quite hot. (read the recipe below, it's not as complicated as I make it sound).
6. Be rough with your eggs, omelettes-making is not for namby pambies.
7. Don't let the eggs linger on the fire. Even if you don't like your omelette too soft, you shouldn't keep it on the heat for longer than 45 seconds.


 What do you think? Cooked the Julia Child way, my omelette was close to how Child described a French Omelette should be: "a smooth, gently swelling, golden oval that is tender and creamy inside". Obviously, there is room for improvement  (this was only my first attempt) but I could not believe how different the omelette, done with the proper technique, tasted from my usual cinchai omelettes.
Whoa! So many rules for an omelette? I decided to adhere to all the rules, just to see how different an omelette made the correct way would taste.

The eggs were soft and fluffy, the insides were creamy but not too soft and the taste was simply eggs-quisite (pardon the pun). They tasted great even though, I must admit, I made a little boo boo and added more butter than was recommended!. My eyesight must be going as I age as I read 1 oz (30g) butter instead of 1/2 (14gm) listed in the recipe!!!

I need to practice my technique a lot more but I am positive that I will not make my future omelettes any other way. Note: Read through the recipe and, if you need a visual tutorial, click on the link below the recipe for a video of Child making an omelette.

The perfect omelette

2 or 3 eggs
1 tbsp water
Big pinch of salt
Pinch of freshly ground black pepper
A mixing bowl
A fork

Beat the eggs, water and seasoning in the mixing bowl for about 20 to 30 seconds until the whites and yolks are nicely blended.

1/2 oz butter
A omelette pan or skillet about 17cm in diameter (non stick or cast iron frypan is best) 
A fork

Place the butter in the skillet over high heat. As the butter melts, tilt the pan in all directions to film all sides. When the foam has almost subsided in the pan and the butter is just about to brown, pour in the eggs. It is of utmost importance that the butter be of the correct temperature.
Let the eggs settle in the pan for about 2 to 3 seconds, forming a film of coagulated egg in the bottom of the pan.
Grasp the handle of the pan with both hands, thumbs on top. Immediately begin jerking the pan vigorously and roughly towards you at an even 20 degree angle over the heat: about one jerk per second.
The sharp pull of the pan towards you throws the egg towards the far lip of the pan and then towards you again. 
You must have the courage to be rough or the eggs will not loosed themselves from the bottom of the pan. After several jerks, the eggs will begin to thicken. 
Add any filling (cheese, herbs, mushroom) at this point of time.
Then increase the angle of the pan (about 45 degrees). This will force the egg mass to roll over to the far lip of the pan. As soon as the omelette has shaped up, hold the bottom of the pan at an angle to brown the bottom slightly for a few seconds. Not too long as the insides of the omelette should remain soft and creamy. Tilt the pan onto a plate so the omelette slides off the pan onto the plate.
Rub the top of the omelette with a but of butter and sprinkle with chopped herbs, if you wish. 

For a more visual guide to Child's method of making an omelette, go to  http://www.youtube.com/watch?v=LWmvfUKwBrg


Thursday, May 20, 2010

Sponge egg, square pan


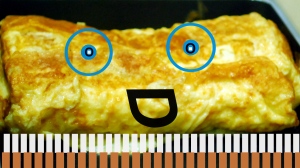
Ok. That's a pretty pathetic recreation of Spongebob. Gotta give me marks for trying though, right? I was away in Langkawi (an Island off the northwest coast of Malaysia) for a work engagement and came home with makiyakinabe or a  Japanese rectangular omelette pan that is used to make Tamagoyaki or Tamago or Dashimaki.

Foreign as they sound, they all mean the same thing: grilled egg or a Japanese omelette that's make by simply rolling layers of omelette into a rectagular "cake" like roll. It's a popular feature in the Japanese bento (llunch) box and a sushi sushi neta (topping) too. I like it cos it's pretty to look at and, well, cos I like all omelettes. If you're not feeling like a Japanese meal, the Tamagoyaki can work as a side dish to any meal too.

There are sweet and savoury tamagoyaki, depending on your preferance. I prefer the savoury one which generally means you mix the eggs (about 3) with dashi (stock) and Japanese soy sauce and beat them well. I added pepper too and a dash of salt.  If you want it sweetish, add some mirin and sugar -- just a little, mind you.

Making the tamayogaki isn't difficult but there is an art to rolling the layers of egg while the pan is still on the stove without browning it too much. Watch this video on how it's supposed to be done. It's pretty amazing.


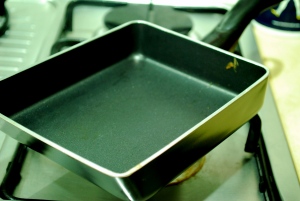
This is the makiyakinabe. You can find it at some kitchen shops in KL but in langkawi, where there is no tax, it's a lot cheaper. I got my Maxim pan for just Rm30.

Now, once you have beated the egg-dashi-spy sauce mixture, heat the makiyakinabe and grease it with some butter/oil. Have some melted butter reasy in a bowl for you have to keep brushing the pan. Watch the video link to get an idea of how this is done.

Once grease, pour a portion of the egg mixture into the pan and swirl it around so that the surface is equally covered with egg. You just want a think layer so be wary how much you pour. Let it set for  a minute or tow and then using a pair of chopsticks (if you're adept at it) or spatula/spoon, roll it inwards to form a rectangle at the far end of the pan. Brush the pan with butter again. Use a heat resistant brush or you may be in trouble.

Pour another layer of egg -- make sure you gently lift the rolled egg cake so the liquid egg mixture flows under it. Turn the pan 180 C and start rolling the egg cake up again, till you get a thicker roll. Repeat till egg mixture finished.


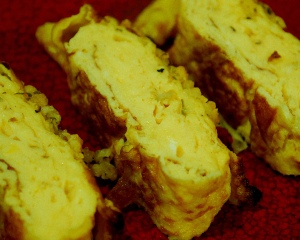
To keep your tamagoyaki pale yellow, keep the fire low. Mine ended up a little brown as I wasnt watching the heat. You also would want to use light soy sauce to avoid darkening the egg batter too much.

You can, of course, add some tamagoyaki by adding finely chopped scallions to the egg batter. Or green chillies, onions, garlic, or  you can slip in a thin sheet of  nori seaweed. on the egg layer before rolling it upwards.


If you are like me and prefer your tamayogaki firm, you can slip it under the grill for a about 5 mins. Or you could it microwave it for a bit too. The egg roll/squares are usually eaten with soy sauce or grated radish. You could also make a dip with Japanese mayonnaise too.


Ingredients

3 eggs

1/4 cup dashi

pinch of salt and pepper

dash of soy sauce

Saturday, May 15, 2010

Lazy gourmet


It's that time of the month again. I mean, the time when my fridge is bare and I find myself hungry but too lazy to go out and buy dinner. I have to make do with what I had: 3 eggs, 2 local sweet potatoes, half a can of green peas, about a cup of pureed tomatoes and a packet of vegetarian chicken -- seitan if you will. After scratching my head for a few minutes (more like 30 mins) I decided to make my version of a chicken pot pie. I had no frozen puff pastry on hand and didn't feel like making it from scratch (told you it was a lazy night) and I was trying to reduce my carbs to shed some pounds so I decided to use the eggs to bind the chicken, peas and sweet potato together. It's kinda like mix between a pot pie and a terrine.  A pierrine?

Sweet potato and (veg) chicken, you frown? Yeah, well I was wondering myself how that would turn out but I had no choice. So I lightly steamed the potatoes till they were just a little tender -- just about 10 mins. Make sure it's not so tender that a fork can pierce right through it. I wanted it still firm. Skinned it and sliced it into 2mm thick slices.

I then roughly cut the chicken (1 cup) into 1 inch pieces. I lightly toasted it in 1 tbsp olive oil, seasoned it with black pepper and some paprika. Added about 2 tbsp tomato paste and mixed in all on the heat for about 5 mins. I used a cylindrical cake pan with a loose bottom for this. Grease the pan. Layer half the sweet potato to form a nice base. Grease the tops of the potato base with melted butter so they'd stick. And then piled in the chicken onto the potato. Top the chicken with the remaining sweet potato.


Beat 2 eggs and season with salt and pepper. Add in the green peas. Pour the egg + peas mixture into the cylindrical pan (onto the chicken) and let the egg flow down and all over the chicken and potatoes. Bake for about  30 mins. Take it out, sprinkle some parmesan cheese over the top and bake again for about 15 mins. Oven temperature should be about 180C. Remove and let cool.

The egg actually worked quite well in encasing the ingredients; although you might want ttry pastry if you have some or are feeling more industrious than me. Once you remove the dish from the oven, let it cook completely, remove  the loose bottom of the pan and serve. Goes well with pesto or sauce or even yoghurt.

Tuesday, May 4, 2010

Meringue mystery solved


Ignorance, really, isn’t bliss. For the longest time, I assumed that making a meringue (and derivatives of it) requires super chef skill. Although "whip egg whites till they form firm peaks" doesn’t sound remotely like  "remove the starter motor from the engine. Bolt the bellhousing to the engine block, and torque to the manufacturer’s recommendations ..." (that’s for installing your car’s engine, btw); I was still certain it was a complicated process.

Anyway, since our theme for this month's Don't Call Me Chef (a monthly column in The Star) was centered on eggs, I decided to be brave and make some meringue cookies.

Being a little clumsy, even the idea of having to separate the egg whites from the yolks was daunting enough. I have done it before but it hasn’t been pleasant. Often, a little of the yolk seeps through and sometimes I let it be. Of course, when more than a little yolk gets in, I end up having to start from scratch and use the contaminated batch for something else ... like an omelette or such.

Once I had to two contaminated batches, which made my neighbour quite happy to have a batch of egg tarts for no rhyme or reason. Anyway, that’s why I hesitate when a recipe calls for egg separation. With the meringue there is no escape. You use only egg whites and no contamination is allowed.


Thankfully, I came upon a tip on separating eggs: it’s easier to separate the eggs when they’re chilled. Ah, so! They were much easier and I got it right my first attempt.

Next the whipping. Thanks to my new toy — the Kenwood Pattisier — this was a cinch. Start with the egg whites — I used three for a batch of 10 meringue cookies. Whisk the whites (speed 12) till they become firm but not too stiff. They should still be a little liquid-y. Add 1/4 tsp cream of tartar into the whites.

Now, add the sugar in gradually — I used about 1/2 cup + 1 tbsp. (the recipe called for 3/4 cup but I find this too sweet). Continue whipping till it becomes really firm — when you lift up the paddle the mixture should stay firm and not drip from the whisk.

Ahh... perfect.

Spoon mounds of the whipped whites onto a lined baking sheet. They’ll form nice wave-like mounds: it’s ok if they are irregular in shape.

Bake at  105 C  for about 90 or 105 mins. When they’re done they should be crusty (but not dark or even browned, just a shade pale yellow and sport a pearly glow) and the inside a little soft. It should come off the sheet easily and when it goes in your mouth, it should melt.

The cookies can be eaten alone, or with some fruit or cream and nut crumble. Yummm

Monday, May 3, 2010

Scrambled eggs, 2.0


I have never been a fan of scrambled eggs. The wet-ish texture just of this popular breakfast dish has always made me steer clear of it. I am, however, the minority. scrambled eggs are a favourite breakfast dish all over the world. Baked, double boiled, microwaved and even baked, there are a multitude of ways to jazz up your scrambled eggs. If you're interested to vary your method, you might want to check out this site that's dedicated to scrambled eggs. Yeah, can you believe it?

As for me, I like my eggs well done. Fried or as an omelette (or its variants -- fritatas and quiches are fine) are as far as I'll go. So it's rare that I order scrambled eggs. When I visited India a couple of years ago however, I decided to try the Indian version of  scrambled eggs, called egg bhurjee, at my hotel in Delhi.

I loved it. Firstly because it was kinda spicy. Secondly, it wasn't wet at all. No, I lie. The dish was a little wet but the eggs were completely set. The moisture was from the tomatoes added into the eggs, giving it also a sourness that added some zing into an otherwise predictable flavour.

The indian scramble had onions (lots of it), some spices (I detected cumin and chilli powder), curry leaves and chilli. Once I discoevered this jewel, I ordered it at the different hotels I stayed in all accross Rajasthan only to discover that even a dish like this varied in each location.


In India, the egg bhurjee is not confined to breakfast. You can have it as a side dish to eat with your rice or flat breads. Sometimes, paneer or Indian cheese can substitute the eggs (just as tofu can substitute eggs in a vegan scramble) and this too is delicious.

For my spicy scramble, I added some boiled potatoes (take it out before your fork can pierce right through it; cubed), green chillies, tomatoes, onions, red chilli flakes, cumin and a little bit of tumeric and seasoned with salt and pepper.

Wednesday, March 17, 2010

Stuffed pocket: always a good thing


Pita bread is a delicious pocket bread that's associated with Middle Eastern or Mediterranean cuisine. What's amazing about the pita bread, or simply pita, is the way a pocket of air opens up in the centre while the dough puffs up in the oven. Quite ingenious, no? The pocket makes pita perfect for a sandwich, though many use it to scoop sauces or dips.

This post isn't about pita but a pita sandwich (look out for the pita post soon). I had some leftover hummus I wanted to finish off and what better bread to go with hummus that pita? Putting the sandwich together was real easy but there was some prep involved sine I wanted to add sundried tomato pesto to the mix. What this entails is hours of slow baking cherry tomatoes in the oven (five to six hours!) and then blending them with some pine nuts, olive oil and cheese. Once you get this done, you're good to go.

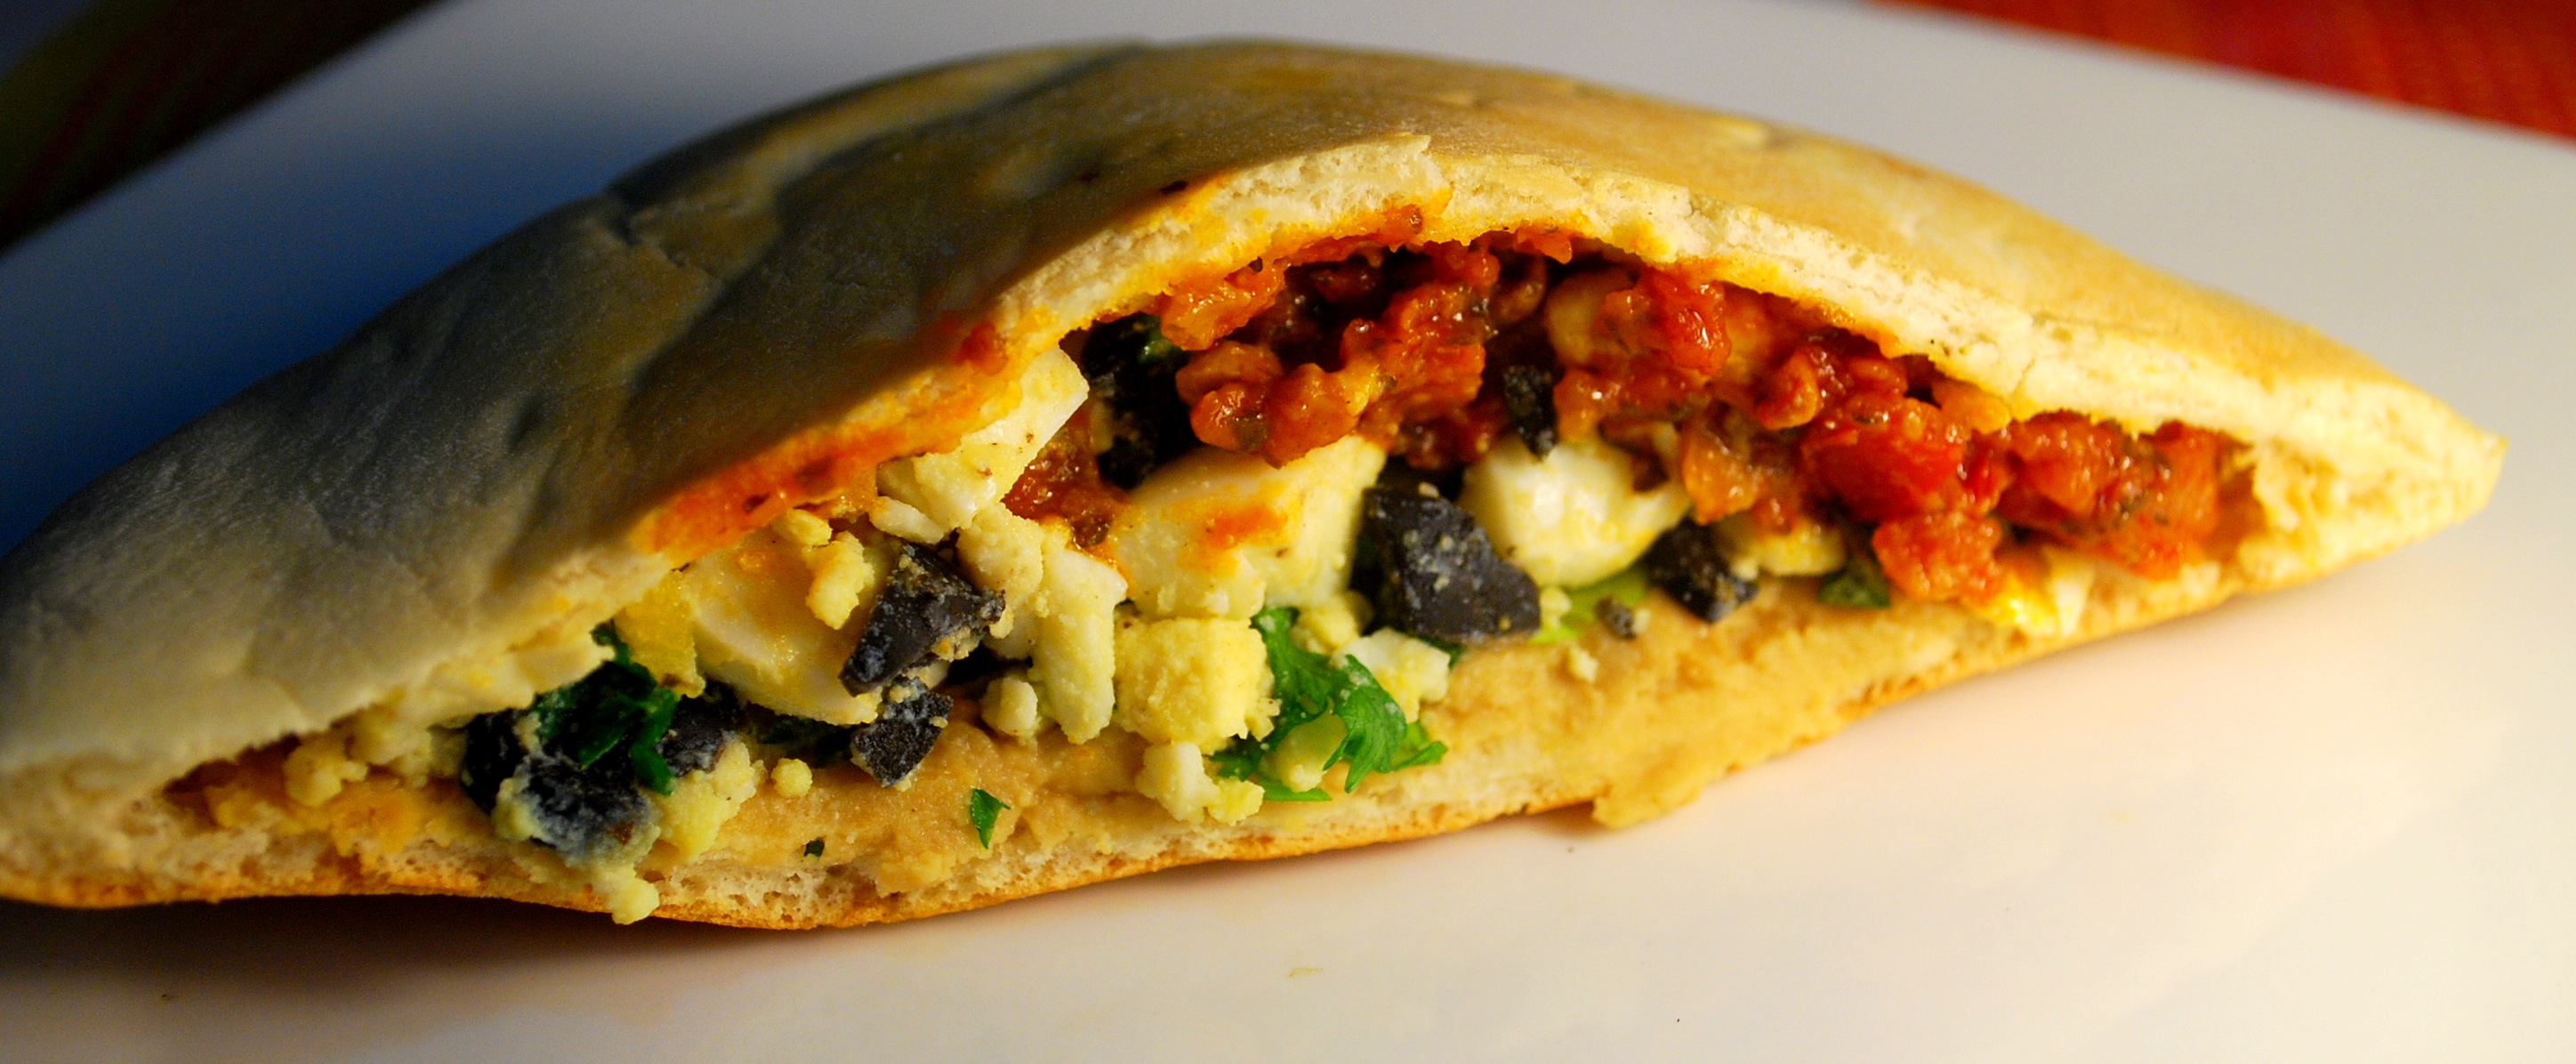
Toast the pita. Spread a generous layer of hummus on the bottom sleeve of the pocket. Hard boil two eggs and then chop it up small and mix in some pitted black olives (chopped small too) and Parsley (chopped as well). Slice some iceburg lettuce. Mix them all together and season with salt and pepper.

Fill a layer of the sundried tomato pesto on the hummus (or you can spead it on the top sleeve of the pocket) and the spoon the egg+olive+parsley filling in.

Sit yourself in front of the TV and enjoy!

Tuesday, February 16, 2010

Confucius say …


Fortune cookies can be real trouble ... if you take them fortunes seriously. Remember when Homer's fortune cookie told him he would find happiness with a new love in the Last Temptation of Homer (S9)?

Do you ever wonder who writes these fortunes and what goes through their minds when they do? Remember the time Homer got so fed up with the fortunes in his cookies he decided to do something about it: he became a fortune cookie writer in Chinatown? "You will invent a humorous toilet lid" may not have been a profound fortune ... but it's hilarious.


Seriously though, coming up with fortunes for them cookies are difficult. I've eaten a few fortune cookies in my time and the most common fortunes were courtesy of Chinese thinker Confucius. Haven't you cracked open a cookie to read something like: Confucius say (the bad grammar is intentional), "A journey of a thousand miles begins with a single step" or "Man who run in front of car get tired". The second one isn't really Confucius. Or is it?

I made a bunch of fortune cookies for a gambling session on the second day of the Lunar New Year and it took me a while to come up with 40 fortunes. In the end, I repeated a few because I was getting sleepy thinking up new ones ... after a while, I came up with some doozies like, "If you believe this fortune, you're mad" .

Now if I though coming up with the fortunes were hard, I soon found that making the cookies were doubly hard. Well, actually its an easy recipe and making the batter takes less than 10 mins. But because you have to shape the cookies while they're hot -- as in STRAIGHT out of the oven, not a minute later (seriously), you have to bake them, at the most, two at a time. Now, let's do the math: I baked 40. At the snail's pace of 2 cookies at a go multiplied by each batch taking 7-10 mins; it took me about 2 hours and a half. And it's not like you can go watch a movie while it bakes; no have to keep working. Spreading batter onto tray, shove it in the oven, wait 7 mins, take it out and immediately put in another batch; rush to fold the two that came out (your finger will be sore touching the hot cookies); greasing the tin and repeating the whole process again. Also you have to keep an eye on the cookies that are baking cos though the baking time is estimated at 5-7 mins, sometimes, if you spread the batter to thin, it will brown quicker.
The cookies tasted yummy as did the batter (I must confess to being a batter whore) but will I make these again? Not likely. Too much hard work.


Fortune Cookies
3 egg whites
3/4 cups sugar
3 tbsp melted butter
3/4 tsp. vanilla
1 cup all purpose flour
Dash of salt

Preheat oven to 180C. Mix egg white and sugar and whisk till fluffy but not till it forms peaks. Add rest of the ingredients; keeping the flour for last.

Drop a spoonful of batter on a greased baking sheet and spread it in a circle. Distribute the batter evenly. Put 2 per sheet. Bake for 5-7 mins or till 2/3 of batter (from the outer rim inwards) browns. Remove and immediately put in next batch to save time.

Work immediately on the cookies. Insert fortune and fold round cookie in half; sandwich in a cup and bring edges together (one edge goes in the enside of the cup and one on the ouside. Place folded cookied inside a muffin cup to keep the shape. Once cool (3 mins or so) store in an air tight bottle. Repeat. Repeat and repeat.

Be warned that if you dont fold the cookies immediately they start to harden and will crack when you fold them.I wasted a handful this way.

Monday, February 8, 2010

Love takes time. Love letters too.


With less than a week to Chinese New Year, I am truly getting into the spirit of the season. No, I don't technically celebrate Chinese New Year. But what I do every year is join some friends who so celebrate the New Year  and gamble the night away. (Girls, we're on for the 15th eh?). But more than just gambling, I love all our  celebrations because these are times when people forget about potty politics and silly scandals. It's all about family, food and fun and that's what life should be about.

Now Chinese New Year would not be Chinese New Year without kuih kapit or love letters. This year especially, since the first day of New Year falls on Valentines day. Now, I'm not a soppy person. I think I have actually only written an actual love letter once in my life - a silly adolescent crush and a mopey letter I wish I had never written. Anyway, I decided to take my good friend Melody's suggestion and be corny and make some love letters.

I found a recipe for Kuih Kapit in an old recipe book of my aunt's - The Malaysian Cookbook (Preston). I also decided to go online and counter check the recipe with some others. There were slight variations but they were all the same for the most part.

So, first things first. I bought my mould from my trusty neighbourhood sundry shop: Peng Soon.


Got all my ingredients: Rice Flour, plain flour, eggs, vanilaa essence, oil (for greasing the mould) and a tall glass of water (standing over the fire is exhausting).

Sift the flours together (70 g rice flour, 15g plain flour) and whisk in the sugar (75 g castor sugar). Slowly stir in the coconut milk (3/4 cup) and mix until you get a smooth batter. Break in the eggs (2 eggs) one at a time and mix it in. Add a drop of vanilla essence.

Grease the mould with some oil. Traditionally, the love letters are made over a charcoal fire. But I didn't have charcoal and I don't have a barbeque grill so I just heated it over my gas stove fire. It still works.

Pour the batter onto one side of the mould (about 1/2 cup), make sure it's not too thin a layer but not too thick either or it won't be too crispy.

Close the mould and press tight till extra batter flows out. Place mould on fire for a few minutes, until batter is light brown. You will have to test it out a few times to get the hang of it.

Remove from fire and with a thin knife, peel of  the cooked kuih kapit from the mold and fold in half and then again in half. Press down hard and store in an air tight container.

Repeat. You'll get about 35 pieces per batch of batter. Unless of course you spoil more than the 5 I did.


My first few love letters were either not cooked enough or burnt; I had to get the timing right. It just takes  a few minutes for the batter to cook and crisp but even an extra minute may burn the batter so be vigilant.

If I were to rate my love letters, I'd give them an A for taste and C for appearance. The edges of my kuih lapis were singed (kinda like the love letters of yore -- yellowed paper with singed edges or maybe a pirates treasure map ... nevermind) and some of them were a tad pale.  I need more practice but I will get there.

Thursday, January 28, 2010

I heart you, Tart


Some people refer to it as the Portugese Egg Tart while others swear on their cat's nine lives that it's actually called the Hong Kong Egg Tart.

I'm not really bothered by the details but I read a blog which described these egg tarts as "something Portuguese, reincarnated as a Chinese dessert".  I like that.

Having said that, there are numerous  variations of the egg tart.

There are many egg tarts recipes floating around but rarely can you find two that are identical. They share the same base recipe but add a spice or something that makes them deviants.

For example, some egg tarts are made with shortcrust pastry and some with puff pastry.

Some recipes suggest you sprinkle cinnamon or nutmeg onto the custard while others make do with vanilla essence.

At the end of the day, a recipe is just a rough guide. You decide how you want your food to be. You reap what you sow and you hafta eat what you cook ...


[caption id="attachment_987" align="aligncenter" width="300" caption="Soft, sweet dough, shaped into balls. "][/caption]

Here's a step by step of how I made my egg tart. You can, of course, alter it any way you wish.

STEP 1: Make syrup.

Add 2/3 cup sugar into 1 cup boiling water and keep on low heat till sugar dissolves. Turn off heat and let the syrup cool.

STEP 2: Make pastry

Sift together 2 cups of flour and 1 cup icing sugar. Add 2/3 cup butter and mix till crumbly. Add 1/2 an egg (beaten)  into the crumbly mix and form a dough. Chill for about 30 mins. Form into balls and shape them into greased muffin pans.

[caption id="attachment_988" align="aligncenter" width="300" caption="The egg mixture is thin but hardens well in the often "][/caption]

STEP 3: Egg custard.

Break and beat 41/2 eggs mixed with a drop of vanilla essence. Strain the egg mixture. Add the syrup and mix well.

[caption id="attachment_989" align="aligncenter" width="225" caption="Sunny and nice. "][/caption]

STEP 4: Assembling the tarts

Pour the egg mixture into the pastry cups. Bake in a moderate oven (160C) for about 30 mins or till custard sets.

Yummy. I actually reduced the sugar a little as I didn't want my tarts to come out too sweet and I'm glad I did. They were good and not too eggy (well as not eggy as an egg tart can be!)

So, until I determine for sure if these are Portugese Egg Tarts or Hong Kong Egg Tarts, I'll call them my Midnight Egg Tarts.

Friday, January 8, 2010

No Egg Omelette


I saw a carton of Organ's "No Egg Egg Replacer" in the supermarket the other day and I had to get it. Not because I am thinking of quitting eggs (not yet, at least) but I was just curious about how an egg replacer would work and, more importantly, how authentic the taste would be.

The "No Egg Egg Replacer" comes in powder form: it is, after all, made of Potato starch, tapioca flour, vegetable gum (methylcellulose, calcium carbonate), citric acid!

1 tsp of Organ No Egg + 2 tbsp water = one egg. That's what the instructions on the box said. The box also had a simple recipe for (No Egg) egg custard.

Although it made more sense to use the Egg Replacer in cakes, pastries and such, I decided to see if the No Egg Egg Replacer could actually be made into a No Egg Omelette.

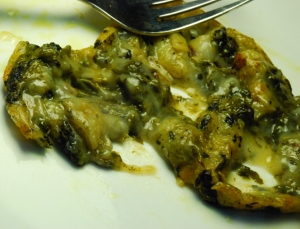
I usually go for a two-egg omelette, so i mixed 2 tsp of the No Egg Egg Replacer (you can tell I kinda like saying this) with 2tbsps water. I heated some onions in butter, added spinach and then the Egg Replacer.

OK, for one thing, the texture is nothing like egg. Maybe congealed egg whites but this mixture was a little too gummy. Err....


Ok, I don't think frying an omelette was going to work. Scratching my head, I picked up the box again, and notice the "warning note" at the back:


Cautions


Egg replacer is not suitable for making scrambled eggs or omelettes.


Doh! Seriously, a Homer moment! Oh well, you can't knock a gal for trying. Now that I have just wasted two No Eggs, I  will (hopefully) learn to take it easy and read instructions properly and not just jump headlong into some silly experiment. Ha! Sounds like a resolution for 2010.


Now, my problem. Should I eat the gummy omelette or should I just trash it. (in my head I hear my mother's words:  "... think of the starving children around the world...").


Awwww, Ma!

Cautions


Egg replacer is not suitable for making scrambled eggs or omelettes.

Related Posts with Thumbnails