Showing posts with label focaccia. Show all posts

Sunday, December 25, 2011

Thyme-Parmesan Focaccia


I am a reconvert ... to the old fashioned way of kneading bread by hand.

I must admit that since I bought my gorgeous red Kenwood Patissier a couple of years back, I've been a lazy bread maker, using my dough hook to knead my dough for me. I love my Patissier but honestly, I recently realised that it doesn't really do justice to the bread.

So here's the story.

Last week, I went over to a good friend's house to show her how I make my Focaccia, following a basic recipe by wunderkid Jamie Oliver. She didn't have a mixer so we kneaded by hand. Like I said, it's been a while since I'd done it and the moment I felt the dough beneath my fingers, transforming from a slightly sticky, stiff mass to a pliable and smooth ball, I knew that I'd be using my Patissier a lot less. Well, at least not for bread making.

There are many reasons I opted for the machine method in the first place but I've come to realise how flimsy these reasons really are. Maybe you have the same reservations but here's why I think they aren't really valid. Well, that is if you consider the end result: a gorgeous loaf of bread you've created literally by hand.


Messy? Perhaps because as you knead, fold and slap the dough on the floured surface, you're bound to get flour all over your hands, shirt and perhaps even your floor. Or maybe that's just me.

Dough sticking to your hand? Well, yeah but this isn't catastrophic and if you flour or oil your hands (I prefer oiling as it doesn't make the dough too dry and adds flavour to the bread. Just don't be over enthusiastic with the oil!), the problem is no longer a problem.

Time consuming? Well, it only takes about 10 minutes longer. The machine kneading time is usually between 5 to 7 minutes. With your hands, you'd probably take 10-12 minutes. Plus, you work your biceps (even if it's just on one arm). Plus, there is a much lesser chance of over-kneading your dough because the ache in your arm will prevent you from kneading longer that necessary. I didn't realise this but I think I've been over-kneading a little with my mixer. Though my bread always rises and turns out fine, the difference with the hand-kneaded breads (I've made a couple more since my session with my mate) is that the latter rises quicker and the texture and quality of the bread is a lot nicer: it's even, more fluffy and has a nice chew to it.


How do you know when the dough is ready? Pinch a bit of the dough off, gently stretch it with your fingers until the dough is pliable enough that it stretches to a thin, opaque layer without tearing. This is call the window-pane test. It's pretty cool — check it out here.

Lastly, kneading the dough by hand can be extremely therapeutic. No matter what method of kneading you choose, you can wither work you aggression out on your dough (though you may be eating all that bad energy later on, be forewarned) or be calmed by the action of pushing, pressing and folding. Try it. The latter works better for me because I seriously don't want any negative energy flavouring my loaf.

For more on kneading dough, check this article by master baker Dan Lepard published in the Guardian.

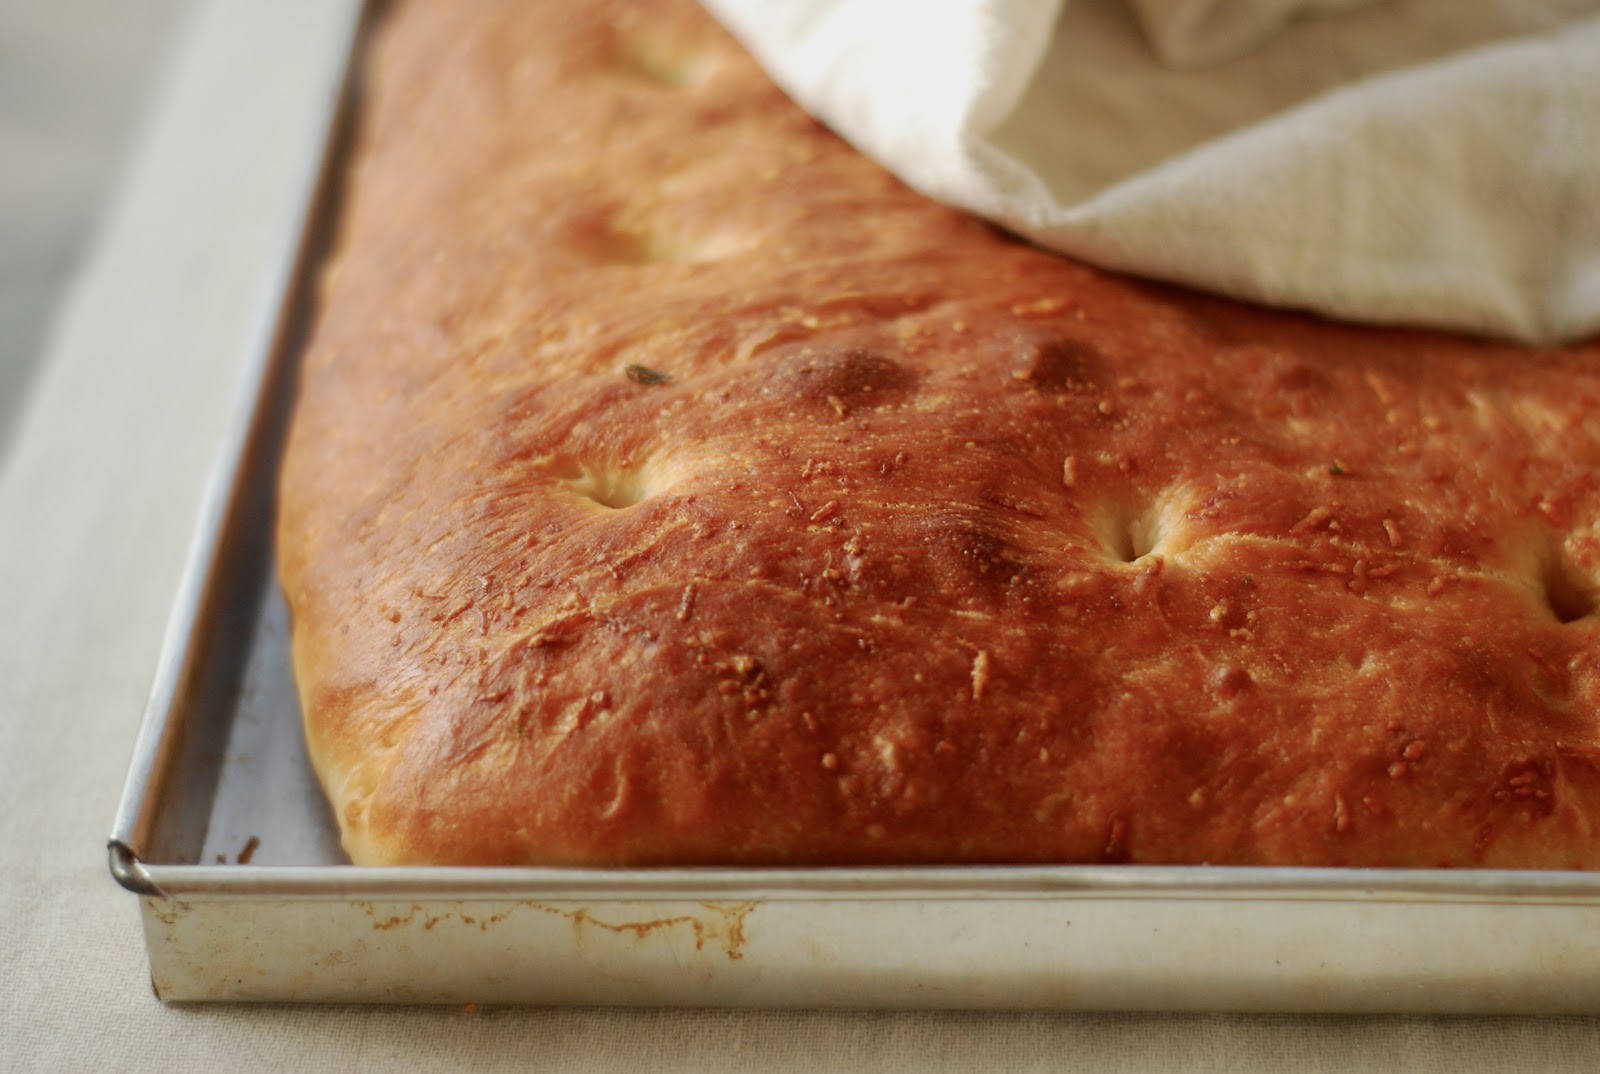
Thyme and Parmesan Focaccia
500g bread flour
pinch of salt
1 tbsp instant yeast
1 tbsp honey
325ml tepid water (a bit more if necessary)
olive oil
1 tbsp minced thyme
1/4 cup grated Parmesan

Whisk the salt and flour together.
In a bowl, dissolve the yeast in half the water and honey. Let it sit until the mixture starts foaming.
Create a well in the middle of the flour and pour in the foamy yeast mixture. Using your fingers and working from the middle (from the liquid) mix in the flour and liquid.
Add more water gradually as you mix the flour into a ball of dough. The dough should be a little sticky.

Oil (or flour) your hands and work surface lightly and then transfer the ball of dough onto the surface and start kneading. It should take about 10 mins.


Transfer the dough into a lightly oiled bowl. Cover and leave to rise until double its size (about an hour).

Once rise, lightly punch out the dough to release the gasses (press down with your fingers or knuckles). Gently knead in the chopped thyme and Parmesan: not too much, just so that the ingredients get into the dough a little.


Transfer to your baking tray and gently stretch it to fit the pan. If it's difficult to stretch, don't force it. Let it rest for 5 to 10 mins and resume.

Dimple the bread with your finger tips (press your finger through the dough till it reaches the pan and move it to form a dimple) and pour some olive oil on the surface (about 2-3 tbsp). Some of the oil should collect in the dimples. You can

Leave the bread to rise one last time, about 10-15 mins.


Preheat the oven to 200C.

Bake for 20 mins or until the tops and nice and golden brown. Remove and drizzle with more olive oil (1-2 tbsp).

Monday, March 7, 2011

Breakfast, lunch and dinner


A sandwich? A pizza? What is that, you ask? 

Answer: It's a stuffed focaccia and yes, it tastes as good as it looks!! No, it tastes better. It does taste a bit like pizza ... only better! A little like a sandwich ... only better. It tastes gooood!

 I'd like to blow my own trumpet but the recipe isn't mine. I got it off a gorgeous site called The Italian Dish.   Elaine, the author/creator of The Italian Dish stuffed her facaccia with sausage and onion and boy, did it look sexy. I had to make it. Had to. 


This, Elaine says, is perfect for breakfast, lunch and dinner. Hey that's like all Malaysian food. We eat nasi lemak, thosainoodles and roti canai (etc) for breakfast, lunch and dinner too.   

I decided to test the theory out. I served this focaccia to R for breakfast and dinenr (ok, I was lazy and not at all testing any theory out). He loved it and didn't mind the repeats! So, yeah, thanks Elaine. 


Breakfast for me is a nice big cup of iced tea, Malaysian style (thick tea with lotsa sweet milk). All my friends and everyone I work with (even people I don't really talk to) knows that I HAVE TO have a huge mug of tea before I can function. Those who are really close to me, like my good friend Sree (also my traveling partner)  know that they should stay clear if I haven't had my tea. 

And yet, I love breakfast. Well, I love breakfast food. Eggs are a favourite; as are puff pastries (I love croissants) and bread. So, I kept a slice of this gorgeous creature for my Sunday dinner. 

What this is, really, is genius. You make your focaccia dough, you divide it into two. Instead of spreading it out on a rectangular baking pan/sheet, you use a round, spring form pan. You spread one portion of the dough on the base of the pan, add whatever filling you wish in  the center and lay the other piece of dough on top, indenting it and drizzling olive oil and toppings (herbs or chilli, salt and pepper) as usual.


Elaine's recipe for focaccia differed a little from mine. Her's is courtesy of award-winning cook Carol Field and uses a sponge (a starter) to give the dough a better rise and a softer, spongier texture. The recipe was genius and I think this will be my go to recipe for focaccia for a while.
For my stuffing, I chose roasted red peppers, sauteed mushroom and cheese. It was good but I really should have packed more stuffing in! Next time I will. And next time, I'll make a chunkier, more robust filling because this bread deserves it. 

Try it! You have to try it.   


Stuffed Focaccia Bread With Sausage and Onions
adapted from The Italian Dish

The sponge
1/2 cup tepid water
3/4 teaspoon instant yeast
3/4 cup all purpose unbleached flour

The dough 
1 heaped teaspoon instant yeast
1 cup water 
3 tbsp olive oil
3.25 cups unbleached all purpose flour (+/-)
 2 tsp sea salt 

The Stuffing
Anything you wish!

Topping
2 tbsp extra-virgin olive oil
Coarse sea salt
black pepper and a sprinkling of chili flakes/dried herbs  

First, we make the sponge.
Sprinkle the yeast over the warm water in the bowl of your stand mixer; stir in the flour and cover it with cling film and  let rise until double the original size (it will be a little bubbly) for about 45 minutes.

Moving on to the dough. Add the yeast, water and the olive oil to the sponge in the bowl. Using the dough hook, start mixing on a low speed and gradually add 3/4 of the flour and all the salt. The dough should come together; if it's sticking to the sides of the flour add more of the flour until the dough doesn't stick to the sides anymore (almost completely stick free). Make sure you don't have a dry ball of dough though. You should use the amount of flour stipulated or just a couple of tablespoons more. Thats all.  The dough should be nice and smooth and elastic. 

Transfer the dough into a nicely oiled bowl, cover and leave it for about 75 mins. IT will rise to double its size. 

Meanwhile, you can prepare your stuffing. I'm leaving this one up to you.

Assembling the bread
Lightly oil the base of a 23cm spring form pan.
Punch down the dough that's risen and divide it into two. Flatten one gently and transfer into the spring form pan, to cover the base nicely. 
Add your filling and please, be generous.
Stretch the second portion of dough and place it atop the stuffing.
Dimple the dough with your fingers and drizzle some olive oil on the top. Sprinkle some salt, pepper, chilli flakes and herbs and let it sit for about 30 mins.
Preheat your over to 200C
Bake for 30-35 mins; your crust should be a rich gold. 
Remove, drizzle a bit more olive oil and cover with a damp cloth until you're ready to serve. 


Related Posts with Thumbnails