Showing posts with label cheesecake. Show all posts

Sunday, October 14, 2012

A Seriously Rich (NY) Cheesecake


Luxuriously smooth. Creamy. Dense. Sweet with a little tang. This is the New York Cheesecake that's really world famous. It's pure in that there are no fancy flavours or ingredients added (not that there is anything wrong with a chocolate Oreo cheesecake or a strawberry-stuffed cheesecake). No, the New York Cheesecake just has lots of cheese (cream cheese, not ricotta), lots of eggs, some cream and sugar. The cake sits on a thin crust and is baked until the cheese batter is set.

The New York Cheesecake was said to have been created by Arnold Reuben, who ran the Turf Restaurant in New York City. He apparently tasted a cheese pie at someone's home, loved it so much, went back and experimented a whole lot until he created a cheesecake made from cream cheese (cheesecakes pre-Reuben apparently used cottage cheese). Now according to an article in Saveur magazine, Reuben's recipe was fodder for his competitor, restaurateur  Leo Linderman who lured Reuben's pastry chef away to his eatery — Lindy's — and together they created what we know today as the iconic New York Cheesecake.

No matter. A big thanks goes out to the two gentlemen (and the anonymous pastry chef) for this masterpiece. I love this cake. So dense and creamy and not too sweet and a little tangy. Oh yum.


I followed the recipe for the Lindy's Cheesecake which appeared in Saveur. I followed the recipe but I changed the measurements a little here and there. I've made baked cream cheese cakes before but this one was unique in several ways.

1. The crust. No biscuits are used in this cake crust. It's more of a pastry crust using flour, butter, salt, lemon zest and sugar. The recipe requires 1 cup flour, 120g butter (cold and cubed), 1/4 cup sugar, 1 tsp lemon zest, 1 egg yolk, 1/4 tsp salt and 1 vanilla bean (cut, seeds scraped out). I ended up using a little more flour (maybe 2-3 tbsp more) which made it easier to handle. I also left out the vanilla bean and instead added just a little more zest. The quantity of dough you end up with may seem too little to fill the bottom of your 9 inch springform pan but don't worry: the crust is SUPPOSED to be THIN.

2. The heat. The cake is initially baked on very high heat. The recipe calls for the oven to be set at 500F first which translates to 260C. That's about the highest heat my oven can go up to. I was a little hesitant but I followed the recipe nonetheless. You only bake it on this high heat for about 15 mins or until the top begins to brown. After that, you drastically reduce the heat to 90C (200F) and bake for an hour.
My Experience: In 13 mins, which was when I checked on the cake, the top of my cake had not just "begun" to brown, it had completely browned. So the tip is to know your oven and work around its quirks. Mine heats up fast from the top so I should have kept a closer watch on the cake and turned the heat down at 11 or 12 mins. No matter the taste of the cake didn't suffer, it just looked tanned. Like me. Yeah, I know, that was lame.


3. The baking time. The recipe says the cake should be taken out of the oven after it has just set: about an hour and fifteen minutes total baking time (including the 15 mins on high heat). After an hour and fifteen minutes the middle of my cake was still wet. Not utterly watery but it hadn't set. So I ended up baking mine for 15-20 mins more. Ideally the cake should still be a little wobbly inside; it will set as it cools and later chills. But mine was a little too wet in the centre. After the extra 15 or so mins, it was just nice. Still stuck to the tester (it is a creamy cake after all) but wit was not runny-wet.

4. Long time to set. You'd think that once the cake has cooled out of the oven you can eat it, right? Nope this baby needs to be chilled. For AT LEAST 8 hours, preferably overnight. I didn't read the recipe through to the end and so I started making it at 3pm for a dinner party I was hosting at night. so, the cake came out after 5pm. It took an hour and a half to completely cool on the counter and so I could only chill it at about 7pm. Needless to say, we didn't eat the cake last night. Thank goodness I had some pound cake I'd baked the day before to serve for dessert. Oh well. Lesson to learn: ALWAYS read through the recipe.

5. The cake is good enough to be eaten on its own but I made a simple strawberry sauce to go with it. Just quarter some strawberries, heat them on low heat with some water and sugar until the fruits get soft and the sauce thickens. Mash the fruits or leave them in pieces, to your preference. (For about 1 cup cut strawberries, I used 2 tbsp sugar and about 1/3 cup water)


Lindy's Cheesecake
(Adapted from Saveur)

For the crust
1 cup flour (I used about 1 cup + 3 tbsp)
120g cold butter, cubed
1 tsp lemon zest (I added another tsp)
1 egg yolk
1/4 tsp salt
1 vanilla bean, seeds scraped for use (I omitted this)

Filling
1115g cream cheese, softened at room temp (I used 1000g cos that's all I had)
11/4 cups sugar
3 tbsp flour
3 tbsp orange and lemon zest, equal amounts (I only used lemon)
1/2 tsp vanilla extract
5 whole eggs + 2 egg yolks
1/4 cup heavy cream

Make the filling first. Whisk together the flour, zest and salt in a bowl. Add the sugar, vanilla (if using) and butter and using your fingers mix together (as you would when making a pie crust) to form a dough. Chill for at least 30 mins.

Preheat the oven to 260C. In your mixer, beat the cream cheese till smooth. Add the sugar, flour, zest and vanilla and continue beating on high speed till smooth. Reduce speed to medium and add the eggs one at a time, beating after each addition till incorporated. Remove from mixer and stir in the cream. Mix well to combine.

Grease a 9-inch springform pan.

Take the dough for the crust out of the fridge. Press the dough onto the base of your 9inch springform pan, allowing the crust to come up to the sides a little.

Place the pan on a baking sheet (the butter from the crust may seep out) and pour the batter into the pan.

Bake on high heat for about 12-15 mins till the top of the cake starts to brown. Reduce the heat to 90C and bake for 60-80 mins or till cake has set.

Remove from oven to cook on the counter. Once cool, chill for at least 8 hours or overnight.

Sunday, May 27, 2012

Japanese Cheesecake


There was a time when I devoured cheesecakes. I ate them so much, it began to show on my person. My waistline grew and my clothes needed to be altered. I am serious; ok maybe a little exaggeration. But I was obsessed. I think it was sometime in the late 1980s. A new cheese cake shop opened in town - I think it was actually called The Cheesecake Shop - and I was introduced to a whole array of flavours to my favourite cake. There was chocolate, chocolate marble, Oreo ... oh my. It was heavenly. I used to visit the shop on my way back from school (I was in the sixth form and took the public bus home. The Cheesecake Shop was a slight detour but, hey, I felt I earned a slice every now and then).

That was a long time ago and it's been a while since I craved cheesecake like that. In fact, it has been a while since I've eaten any cheesecake at all.

Truth be told, I may have gone off cheesecakes. If I could eat a whole slice by myself in a split second before (ok, who am I kidding ... I could eat two slices, easily), I now can't even take a bite before feeling like I've had too much.

So, it was mighty strange that I woke up this morning with an urge to make .... cheesecake. 


Go figure, right? So, yeah, I wanted to make a cheesecake but I didn't want to make a creamy cake that sat on a biscuit crumb. I wanted something lighter, something more cakey and not too rich. I was about to give up and make something completely different (like a quiche or a crepe -- yes, my thoughts are always so random) when I remembered a Japanese cheesecake I'd eaten a long while ago (like five years ago) that I really liked. Yes! Perfect!

The Japanese Cheese Cakes (I'm not quite sure if it really does originate in Japan; I have never eaten one there either of the times I'd been there) are light and soft and have a more subtle (though not at all insipid) taste of cheese. The cake isn't overly sweet and there is no crust, so put away our digestive biscuits!

The cake also comes unadorned. There are also no toppings (no strawberries on top, no Oreo cookies in he middle ...) and though I have tasted a matcha-flavoured one before, I prefer the authentic, unflavoured Japanese Cheesecake the best.

 
Some compare the texture of this cake to flan, a souffle or a chiffon cake but, truth be told it's also almost like eating a slice of brie (although no brie is used; only cream cheese). The texture is the result of the emulsification of corn starch and eggs in the recipe -- this is what I've read. I figure it also has to do with the whipped egg whites (six, mind you) that are gently folded into the batter.

I don't know the science of it ... yet ... but I like the result. This cake is light, cheesy, not too sweet and oh-so-comforting. I am pleased that this is one cheesecake I am still fond of.


Japanese Cheesecake
(from thelittleteochew)
Ingredients
140g Castor sugar
6 egg whites
6 egg yolks
1/4 tsp cream of tartar
250g cream cheese
50g butter
100ml milk
1/4 tsp salt
60g cake flour
20g corn flour

1. Melt the butter, cream cheese and milk by combining them in a bowl and placing the bowl atop a pot of boiling water. Do not allow the bowl to actually touch the water. Stir until the cheese and butter melts. Set aside and allow to cool.

2. Sieve the flours and add the salt and whisk together.

3. Preheat the oven to 160C. Line a 24cm spring form pan with parchment paper.

4. When the butter mixture has cooled, add the egg yolks and flours and stir to mix.

5. Beat the eggs whites and the cream of tartar using the whisk attachment of your mixer until the eggs get frothy. Add the sugar and whisk on high speed till soft peaks form.


6. Fold in the whited to the batter, gently but well.

7. Pour batter into lined pan.

8. Fill two ramekins with hot water and place them diagonally in the bottom tray of your oven (below the rack where your cake is going to sit). Put in the cake and bake for 70 mins.

9. When the cake is done, turn off the oven and let the cake cool in the oven with the door slightly ajar for 30 mins before removing the cake. This helps prevent the top from cracking.


Wednesday, May 4, 2011

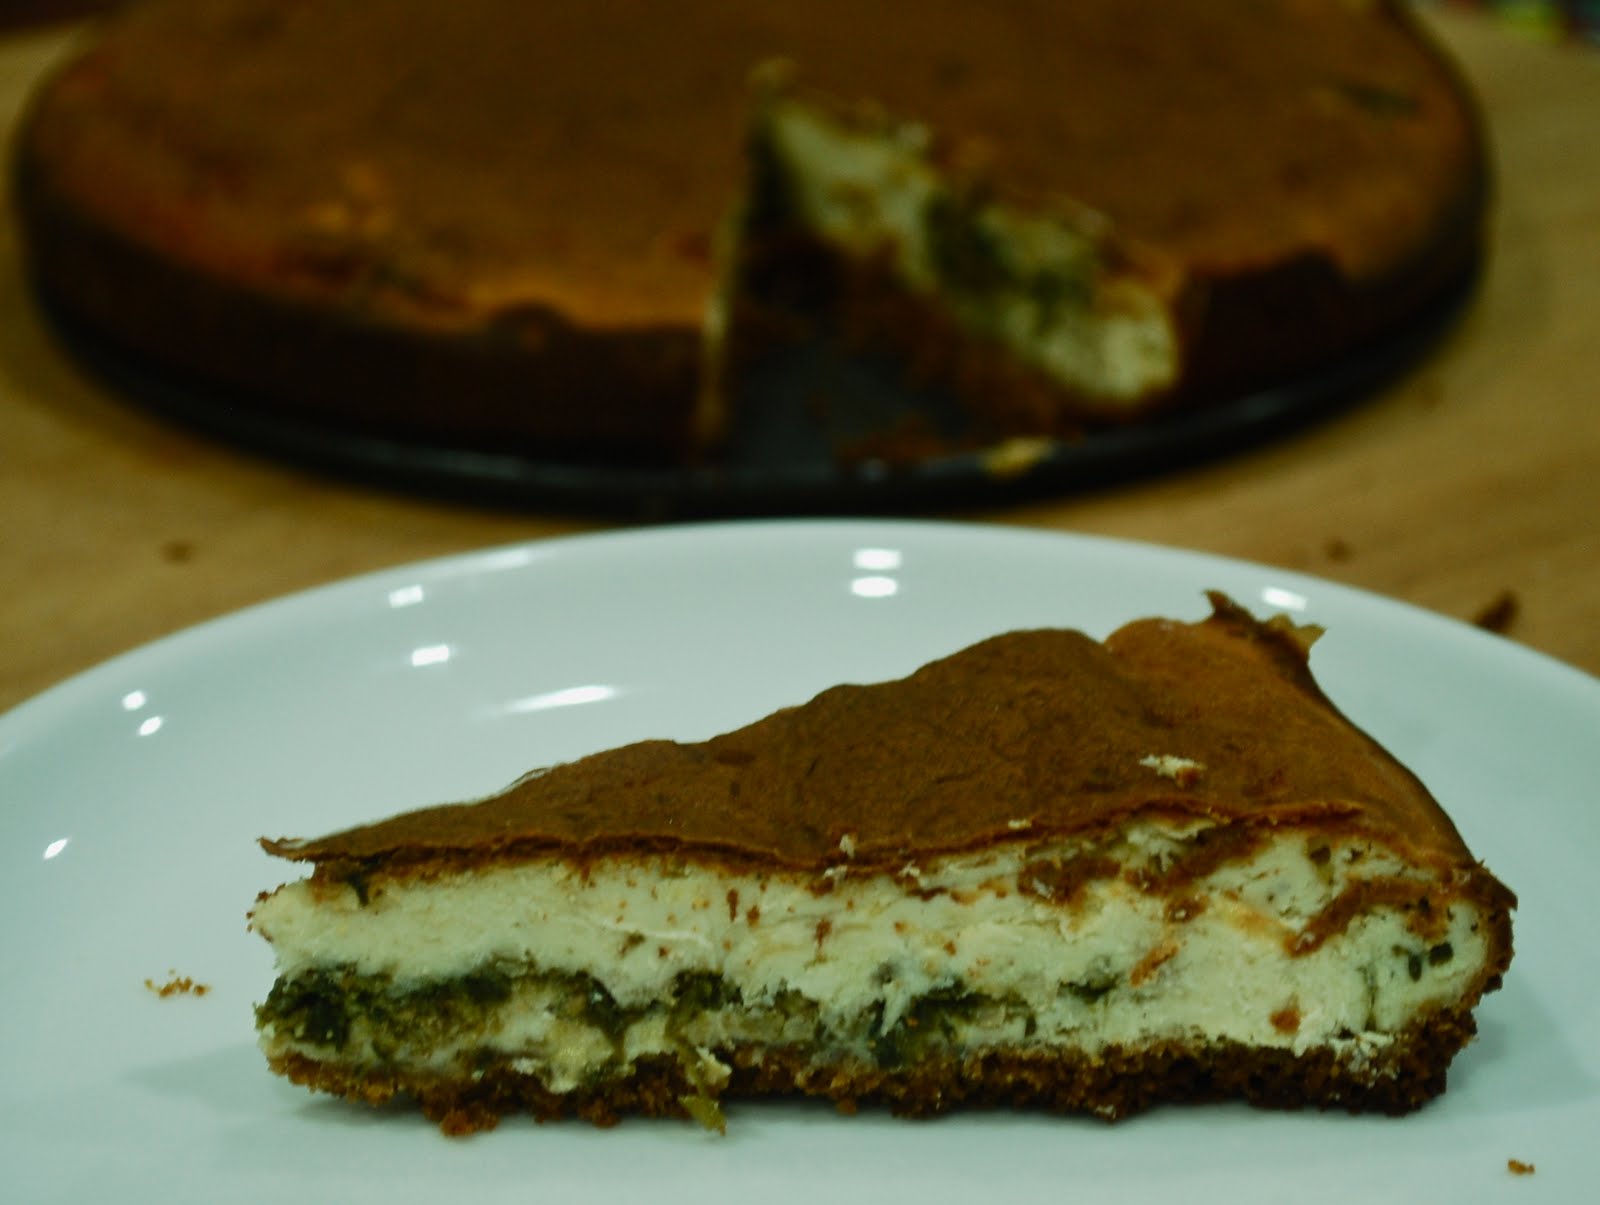
Pesto cheesecake


So here's the story.  I saw these edible flowers in the supermarket I had to get them. I was going to make a savoury cheesecake today and since you can't ice a savoury cheescake, I though it'd be cool to decorate them with flowers right? I thought they'd be so pretty. It's Spring after all ... well, not in Malaysia but ... aren't they pretty?


The cheesecakes that we know and love are mostly dessert cakes: sweet, creamy, rich and sometimes, a little tart. If there is one dessert I find impossible to resist, its the cheesecake. I remember when I was a teenager, there was a franchise called The Cheesecake Shop in Kuala Lumpur which served an array of delicious cheesecakes. Those cakes are the reason why I fell in love with cheesecakes, my favourite at the time was the strawberry cheesecake and the marble cheesecake. And the blueberry cheesecake. And, the ungarnished, non-fussy New York cheesecake. Oh I love them all.

But have you tried cheesecake as an entree? A savoury cheesecake with a side of roasted vegetables? Oh, and a garnish of flowers (he he).


Savoury cheesecakes aren't very popular ... yet. Recipes are evolving as we speak. In fact, if wedding cake specialist Jan Kish is to be believed, savoury cheesecakes are becoming an option for wedding cakes -- for those with specific allergies or dietary inhibitions. Check out her savoury wedding cheesecake creation.


This definitely isn't a dish for non-cheese fans. Oh no. But, if you're a cheese fiend like me and an after-dinner cheese platter makes you break out in a smile, well then you'll just love savoury cake. The flavour of the cheese is full-on.  I used purely cream cheese (with just a bit of Parmesan) but you can use  a blend of cheeses: cream+ricotta, ricotta+goats cheese, Stilton, mascarpone ... options abound. 


I stumbled upon this recipe for a Pesto Parmesan Cheesecake on fatgirltrappedinaskinnybody.blogspot.com and played around with Julia Costa Mesa's recipe just a little. I used her measurements to make two cheesecakes just to experiment with flavour. The first, I made a pesto filling/garnish just like hers. The second, I tried making a sun-dried tomato pesto filling instead. Both were sublime. I've got many more variations in my mind. Apples would, I am certain, go deliciously well with this dense cheese cake. As would zucchini. 

But that's for another time. Today, we'll try the pesto cake. 


Pesto Parmesan Cheesecake

For the crust
1 cup breadcrumbs 
80 gm butter, melted
1 tbsp roasted garlic

For the filling
600g cream cheese at room temp
1 cup Parmesan, shredded
3 eggs, room temp
2 tbsp flour
1/4 cup sour cream
2 garlic cloves, minced
1/2 cup pesto ( I made my own basil pesto)
1/4 cup toasted walnuts, chopped fine.

Garnish (optional)
1/2 cup pesto 
A handful of shaved Parmesan 


Preheat oven to 180C.

Mix the breadcrumbs, butter and garlic in a bowl and press into a 23-cm (9-inch) pan. Bake for about 10 mins. Remove and allow to cool.

Prepare your pesto. 
  • 1/2 cup pine nuts (you can use any walnuts or even pumpkin seeds, toasted)
  • 3-4 handfuls of basil
  • 1/4 cup grated Parmesan
  • olive oil
  • 2 cloves garlic, minced 
  • I use my mortar and pestle to make my pesto, especially since the amount is very little. Bash up the garlic with a little salt. Add the basil (bit by bit to fit the mortar) and pound till it becomes a nice paste. Add the toasted nuts, oil and cheese and massage with the pestle till you yield a gooey paste. 

In the bowl of your electric mixer, cream the cream cheese, Parmesan, eggs, flour, sour cream and garlic till smooth. Gently stir in the walnuts.

Pour half the cheese mixture onto the pre-baked crust. Slather on the pesto and pour the remaining cheese mixture over the pesto.

Turn up the heat of your oven to 200C. Bake for 10 mins and then lower the heat to 180C and bake for another 40-50 mins or till the cake doesn't jiggle, esp in the centre.

You can spread some pesto over as a garnish. Or use flowers like me. Or you could eat this cake with a side of roasted vegetables. I skipped the pesto garnish as it was a tad too strong for me. My basil pesto was a little too potent -- homemade pesto often is a lot stronger than the ones you get in jars. 

Enjoy.


Tuesday, December 28, 2010

Rhubarb-a-doo-wab


Nigella, I apologise. I've been unfair. 

Everytime R and I sit down to watch a Nigella Lawson cooking show, I end up rolling my eyes half-way through. You know which part, right? When she's licking her fingers or a spoon midway through making a dessert or a curry ... or as she tucks into her food in her satin robe at the end of a show. Those were my cues to groan in protest. You see, I always thought she was milking her good looks a little too much.     .

I take it back. I take it all back. After trying out her Rhubarb Cheesecake tonight, I think the licking of fingers is warranted. Heck, by the time I was done with of a piece of her cake,  I was licking my fingers, my plate, my fork in ecstasy.

So Nigella, I am sorry. And thank you for the cake.


I've never cooked with rhubarb before. It isn't easy to find here, and if you do find it in the supermarket, its usually very, very expensive. I've been dying to use it in a cake or pie for the longest time, having read about it in recipe books or seen cooks use it on TV. So, last weekend when I spotted some in the supermarket, I grabbed a stalk. Yes, just one measly stalk (think celery but a lovely crimson) because it was expensive and I wasn't sure if it was worth all the hype.


Meet Rhubarb, the cousin of celery.

Rhubarb is sometimes called the "pie plant" because, yup you guessed it, its most commonly used in pies and tarts. Originally, the stalk of the plant was used for medicinal purposes: as a laxative. THe leaves aren't used as they're believed to be toxic. 

Eaten on its own, rhubarb is sour.  But when its cooked and sweetened, it makes a delicious compote that is perfect jams or fillings for pied and tarts. The Rhubarb is also used to give the famous red colour of the all-too-popular Red Velvet Cake. 

So anyway, I looked through my books and I looked online and found recipes for rhubarb crumble, rhubarb  jam, rhubarb pies and rhubarb tarts ... they all looked delicious but nothing popped. Until I saw Nigella's recipe for Rhubarb Cheesecake. I had a fresh tube of cream cheese in my chiller and a small tub of sour cream too (he tops the cake with sour cream) so this was a recipe waiting to be made. Although I'd never been a fan of  Nigella, I've heard friends of mine and fans of hers oooohing and aaahing about her food so I was pretty confident she wouldn't let me down. 

After all her desserts always, always look so good on TV.


I had to halve the recipe as I only had 250 gms of cream cheese (the recipe calls for double that) and slightly more than 1 cup worth of chopped rhubarb (the recipe calls for 3). Why couldn't I go out and get some? Well, I always start my baking projects well into the night; this project began around 9pm. 

No worries. I decided to make mine into a cheese slice instead of a cake. 

The result was a yummy cheese cake. The four layers (crust, rhubarb, cheese and sour cream) worked  harmoiously together. The tartn rhubarb, the sweet and  creamy cheese centre and the tangy sour cream topping was just amazing. Not too sweet, not too sharp.


Nigella's Rhubarb Cheesecake.

For the crust

1 cup all purpose flour
1/4 cup white sugar
1/2 cup butter, chilled

Filling
3 cups chopped rhubarb (fresh or frozen)
1/2 cup white sugar
1 tbsp all-purpose flour

The cheese cake
550g cream cheese
1/2 cup white sugar
2 eggs

The topping
1 cup sour cream
2 tablespoons white sugar
1 teaspoon vanilla extract

Preheat oven to 190 degrees C.

In a bowl, combine all the ingredients for the crust. Mix with your finger tips until crumbly. Pat into the bottom of a 23cm (9 in) springform pan.

In another bowl,  toss together the chopped rhubarb, 1/2 cup sugar and 2 tbsp flour. Pour onto the crust and bake in the preheated oven for 15 minutes. Remove and set aside.

Reduce oven temperature to 175C.
.
In the bowl of your stand mixer, add the cream cheese and 1/2 cup sugar. Beat with the paddle attachment until creamy. Add in the eggs, one at a time, and beat till well incorporated.
Pour over hot rhubarb in the pan.
Bake in the preheated oven for 30 minutes or until filling is set.

Make the sour cream topping while waiting. In a small bowl, combine 1 cup sour cream, 2 tablespoons sugar and 1 teaspoon vanilla. Mix well.

Spread on top of the cake while its hot.
Related Posts with Thumbnails